*This post was originally written August 18, 2018
_______________________________
I predict that this stage of the build ends up taking the most time. It’s a lot of little things that add up and things I didn’t anticipate. It’s settling into a groove of hands on work, changing my mind, more research, and learning new skills (like how to use all these power tools).
This post chronicles Strider’s journey from untouched to clean slate – when I will begin the more concrete stages of the build, like solar, fan installation, insulation, etc.
Taking Care of Appearances
First, I addressed my van’s exterior. As with any vehicle, this is mainly regular maintenance to increase the longevity of the body. To get to clean slate status, and not knowing the full history of the van, I wanted to cover all my bases. One of the first things I did after bringing the van home was to have a Krown rust protection application. They coat the underbody as well as inside the doors to prevent rust advancement and lubricate. My mechanic told me that this had never been done with my van. It’s a beneficial step in a climate that uses road salt in the winters.
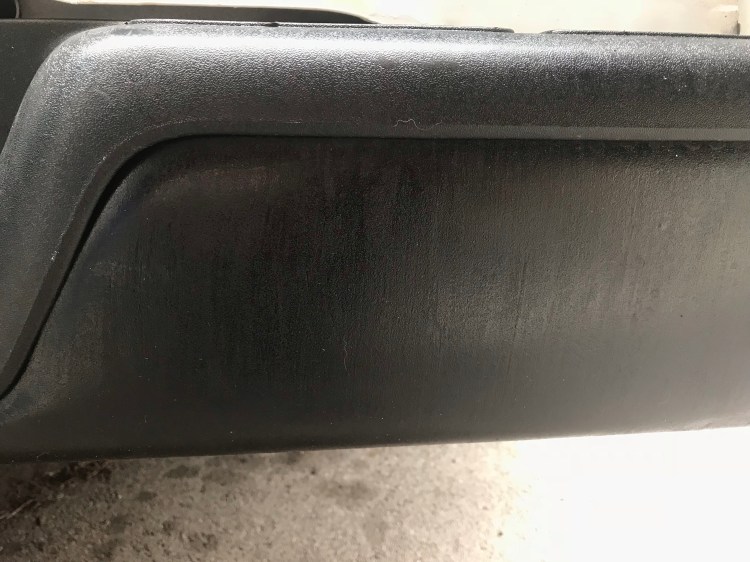
I had noticed some minor paint chipping (around doors, hood, lower paint job) and a few small spots with surface rust forming (mainly on the roof). To restore these areas and stall future deterioration I went ahead and found the paint code for my van from the sticker on my passenger door then headed to my local GM dealer – though they had a database with the correct paint, too. It was a 2 in 1 paint and top coat with pen, brush, and sponge applicators. All I had to do was remove any rust (fine grit sandpaper or scraper), clean (rubbing alcohol in case of grease), paint a couple of coats, let dry, sand until it blended with the old paint, then add the topcoat. It’s good to wash before and after this process.
Once I’d fixed up my van’s body I had the van washed and waxed. While I was told cargo vans rarely get this done, my van won’t be just another work van, and I may want to sell the van someday, so I want to take care of it. In the future I will do the wash and wax myself, clay bar detailing and all, but this time around I did also finish with a paint sealant myself to extend the length of time of protection – allowing me to wax and seal once a year instead of multiple times a year.
Sidenote: Cargo vans won’t fit in typical automatic or touchless car washes. You can take them to a truck wash or do it manually.
Strider’s Strip Tease: Pulling Out Factory and Aftermarket Parts
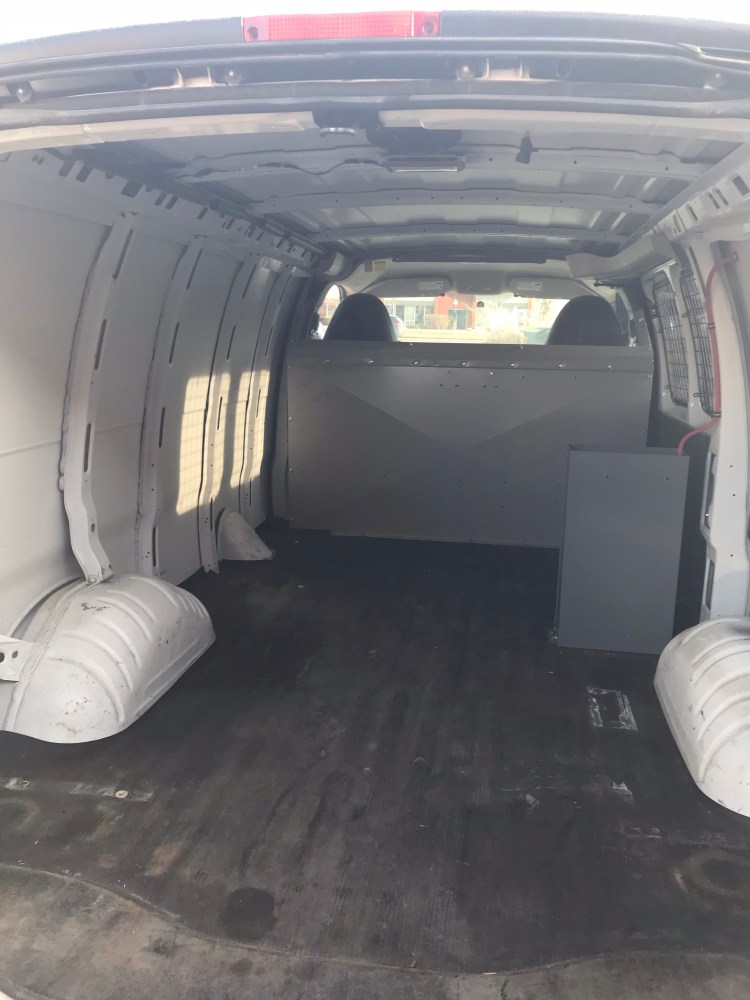
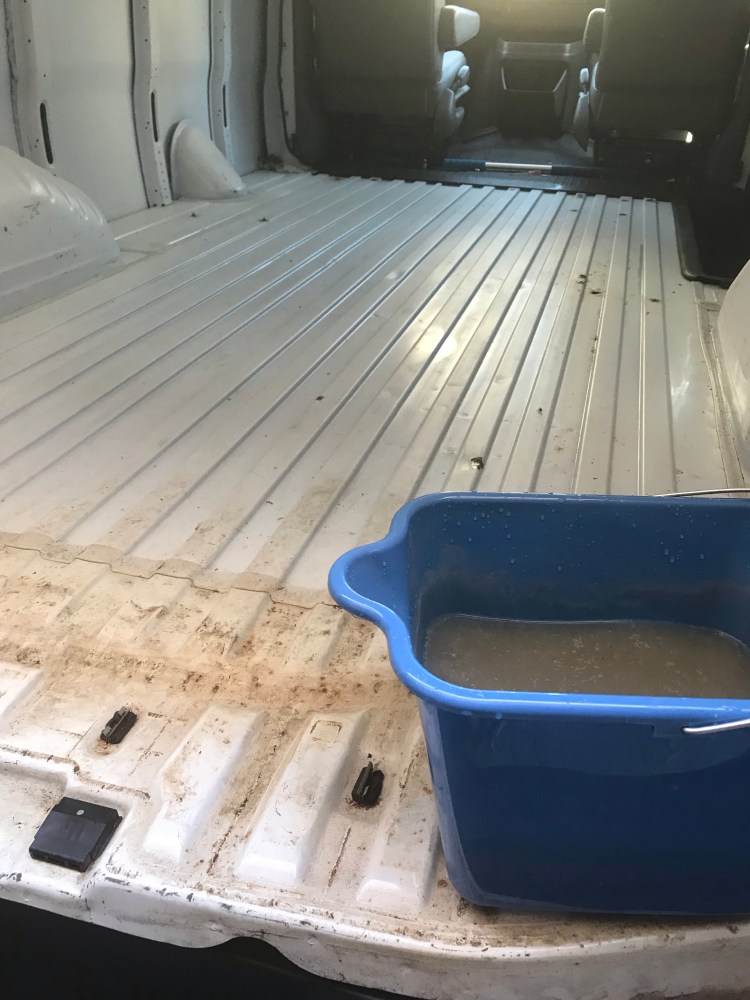
My van had several components that I would not be needing, including the roof rack, divider, grey metal box, rubber mat, and cargo bay light. While I planned to remove each part on my own, there were some instances in which I was not equipped to do so.
I planned on selling the roof rack and my auto shop offered to take it off for me, so they took it apart and I stored it. In retrospect, barring any bolts that might have corroded together, it would have been a simple enough task to do myself, but at the time I was unsure and didn’t want to risk scratching or denting my roof by accident.

I was going to sell for two reasons. First, because I contacted the manufacturer (Adrian Steel) of this particular rack, and based on photos I was told that this model’s MSRP was about $1,200 before tax and installation fee! So I could probably sell it for a decent price. Second, I was going to bolt my solar panels to the roof, so I wouldn’t need the roof rack and it only added weight and wind resistance to my van, decreasing my mpg. But over the course of a few months I only had two people interested in the rack, one who never got back to me, and the other with an offer I wasn’t ready to take. So I still had the rack… when I decided that rather than put more holes in my roof, I might prefer to attach the solar panels to the roof rack and put it back on my roof. I had gotten installation instructions from the manufacturer and found that it was really pretty simple reassemble!
Next up was the divider, separating the front seats from the cargo bay. When I went to take it out it proved to be a huge headache. I got most of the bolts and screws out that were holding it together and to the van’s floor (I treated myself to a wrench set and it kind of felt like Christmas), but several were rusted and stuck, and the two sides of the divider were riveted in behind the van’s interior panelling. I tried a couple of methods to remove the blind rivets (hammer a steel chisel under the edge of the rivets or drill into the rivets) – but with no avail. I needed to bring the van to a Chevy certified body shop – people who new the make of the van, how to remove and re-attach the panelling, and who would have better luck with the rivets.
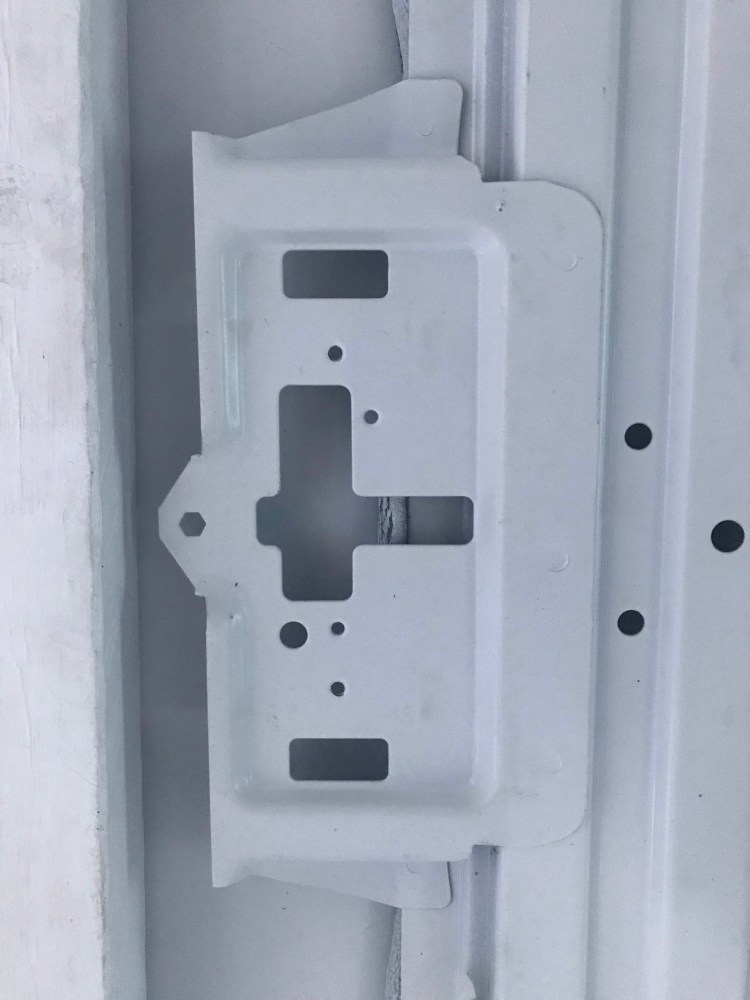
I also asked the body shop to remove the grey metal cabinet by the side door, which was fastened to the floor and had an orange rubber tube connected to the side wall. While I had dismantled the wall tube and gotten a couple of the screws out from the floor, the cabinet had a larger metal tube going down through the floor and a couple of bolts with wing nuts on the exterior of the floor that had rusted badly.
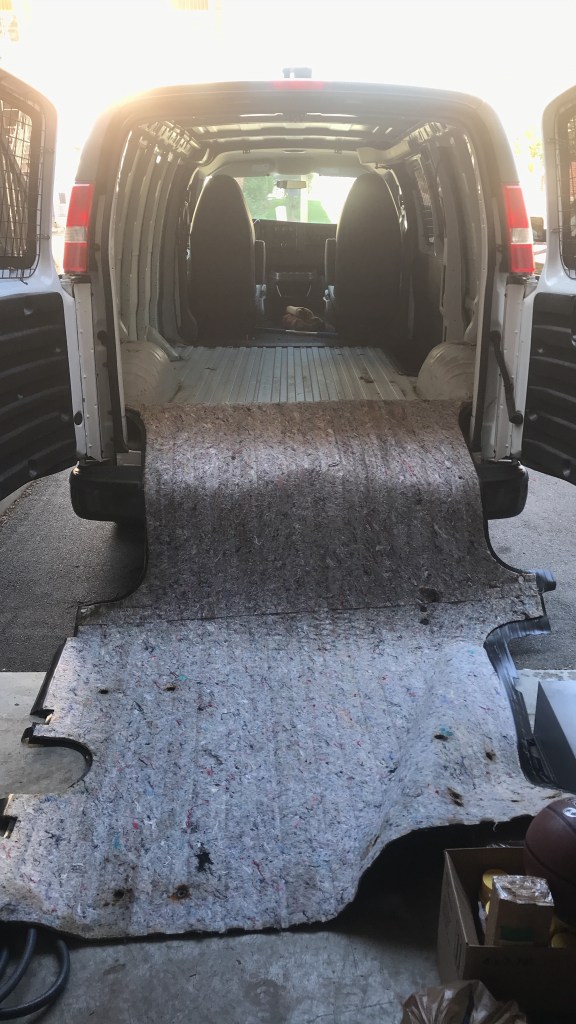
Next was the rubber mat. THIS was easy! I simply had to pull it up and out of the van. Some edges were wedged under rubber trim on the steps at the side and back of the van, and it was somewhat heavy, but simple enough. There was some sort of fabric under the mat that had a weird smell to it… but otherwise an enjoyably efficient process. I will likely end up bringing the mat to the junkyard, but for now I am considering using it as a floor template – not all the edges were accurate, going under or extending over the edges of where my floor will be, so when the time comes I will probably put it back in the van and score or trace the edges to a more accurate template. I’ve also seen some vanlifers keep the rubber mat as part of their flooring. Into The Mystery used it in his Chevy Express build to aid in insulating the floor. The fabric evidently comes off if you soak it under a hose.
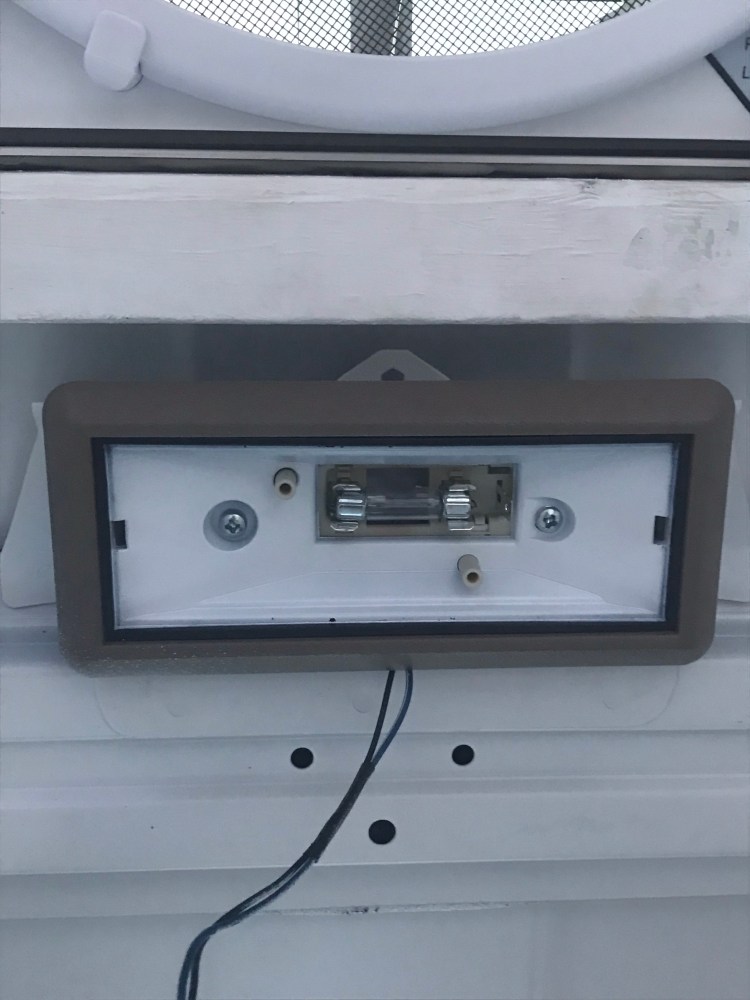
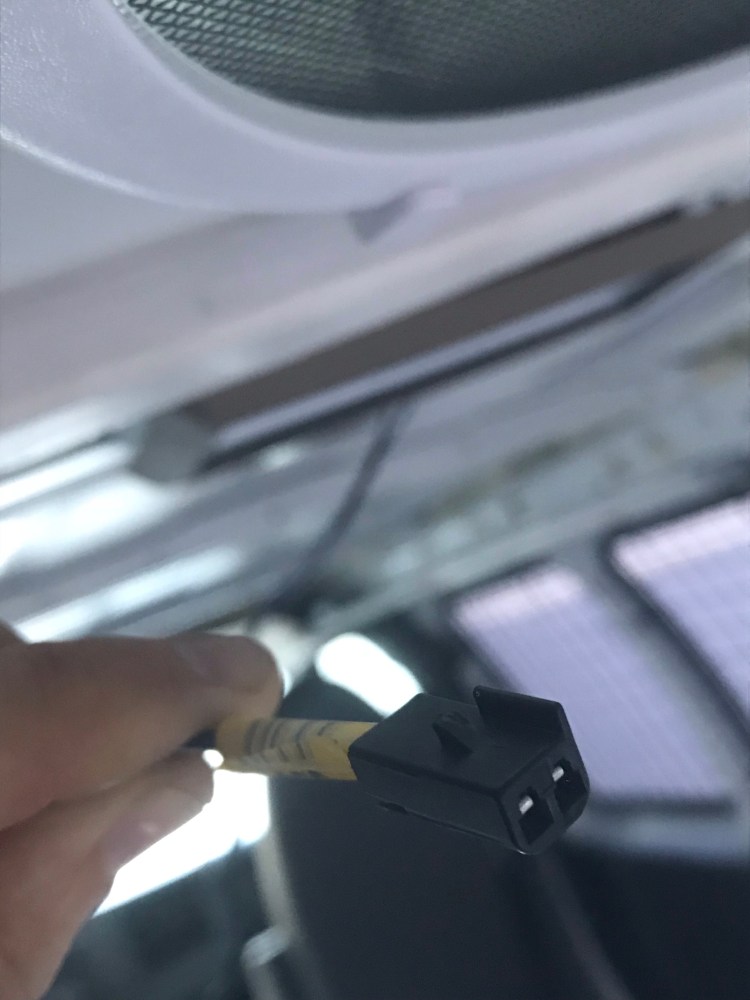
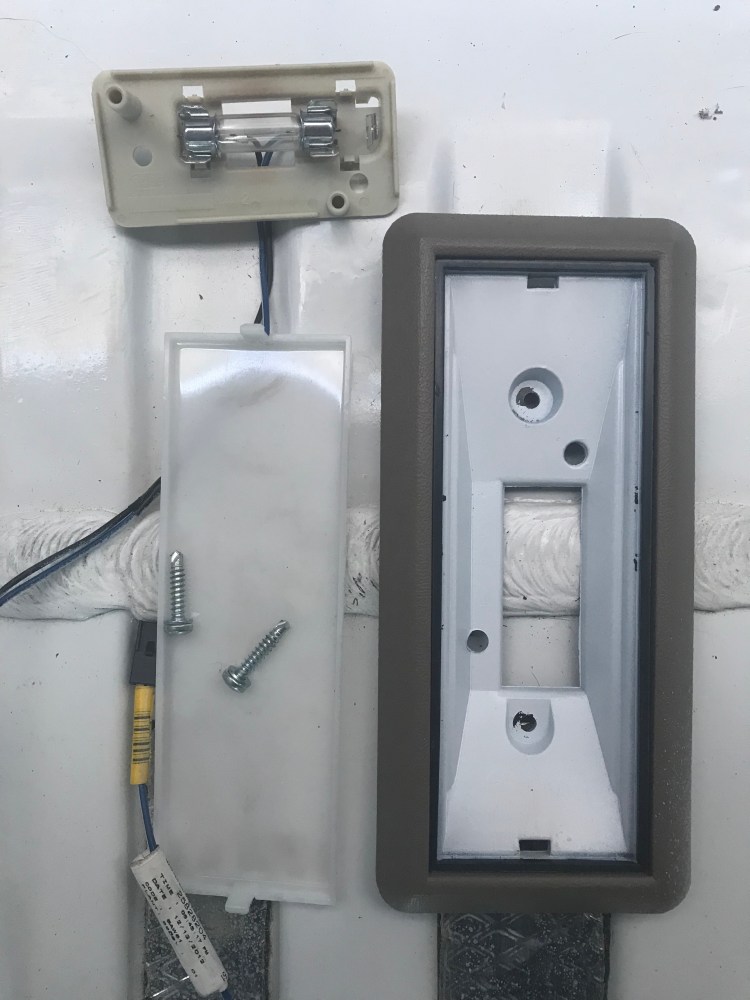
Lastly, there is a light on the cargo bay ceiling that I removed. Chevy had a piece of metal welded to a van rib and then a plastic holder for the light attached to that. There is wiring that lines the cargo bay on the driver side extending from the front of the van to the rear lights which will stay in place and another wire extends from here to the middle of the ceiling where the light is. It took a bit of fiddling, but I finally figured it out. So in the event that anyone else had an issue with this, here’s what to do. For the wiring there is a connection midway between the light and the main wiring along the side ceiling rib (branching off what’s headed to the brake lights). I pulled out the two grey tabs and then bent the plastic on one side to separate the two parts/ wiring to the light. There were two small wires held to plastic clips in the ceiling rib with electrical tape. I couldn’t pull the clips out so I took the tape off instead and might cut the clips out later. For the light, I first took the white covering off by pushing in on the edges at each end. This revealed two screws underneath. I removed these and the other parts followed. I was left with the metal holder that is welded to the ceiling rib.

I decided against pulling out the front seats and front mat. I was able to pull up the back of the front mat and it seemed okay underneath, with just a bit of surface rust around four screw holes – which I was able to reform without pulling up the whole mat. The fasteners holding the seats down are a bit rusty and there is wiring under the seats as well – I figured it might be tough to remove and I felt out of my depth with the wiring. But I may still decide to do this at a later date.
Sidenote: Into The Mystery 13 did a conversion on a long base 1997 Chevy Express last year and inside the lower centre dash panel was a huge mound of leaves! Check out the video here to see him cleaning out the van and possibly finding a surprise among those leaves… (I have no affiliation with his channel, I just find the videos enjoyable to watch and informational)!
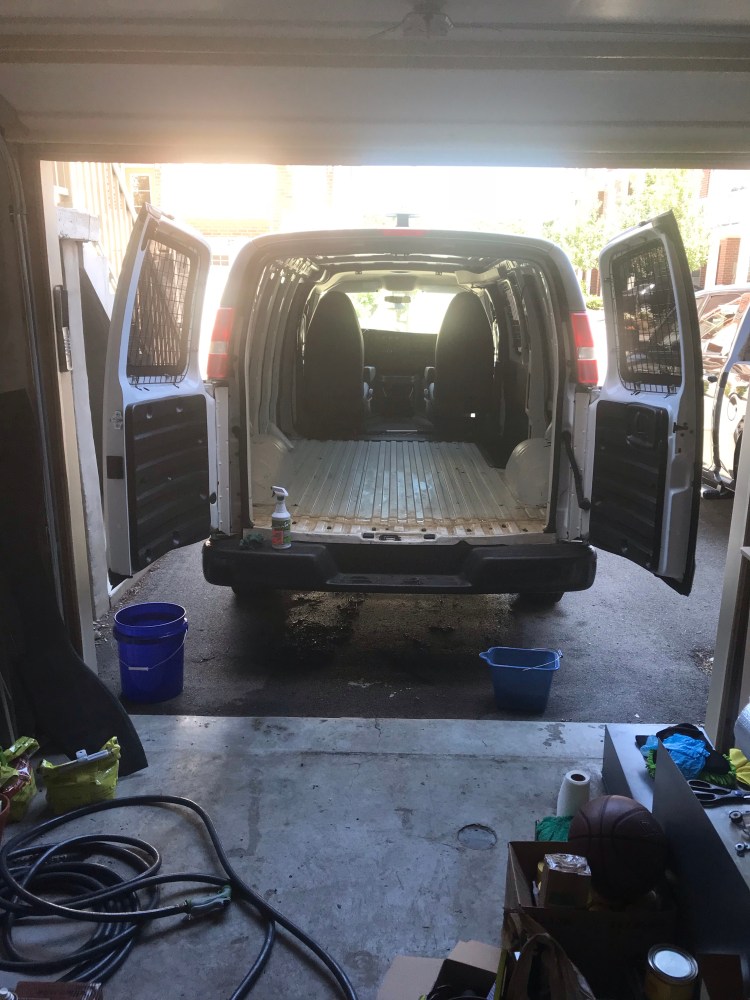
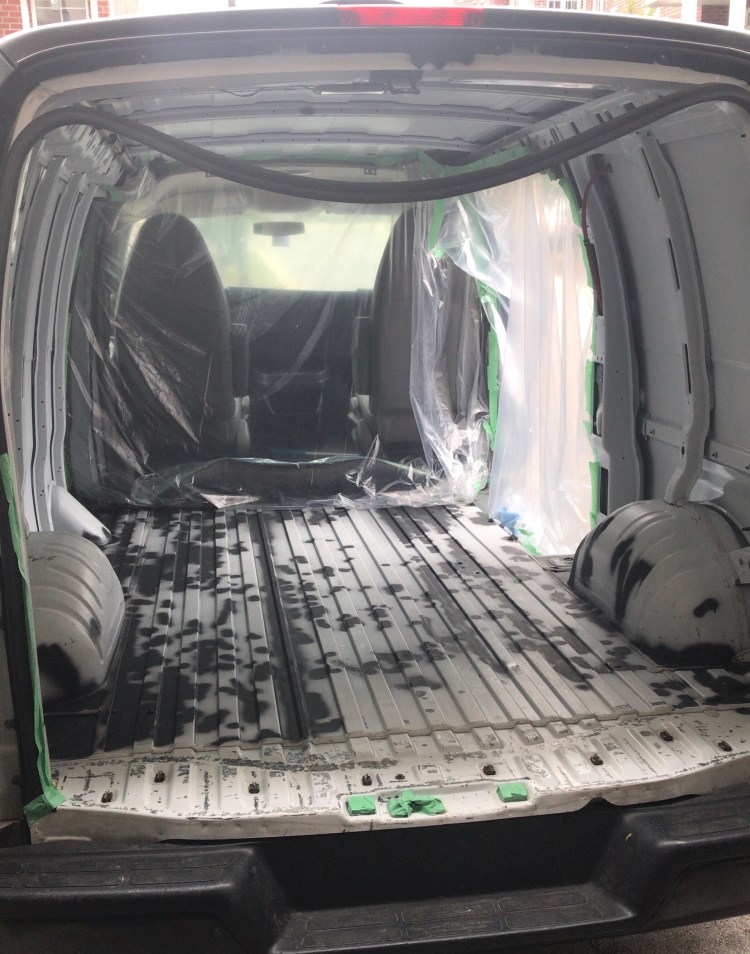
Cleaning
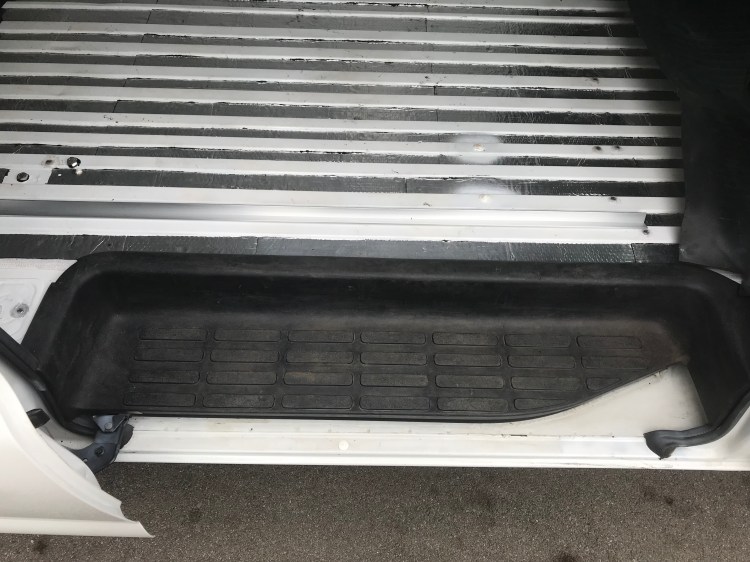
Once everything was out, it was time to deep clean this mean machine. To do so I also took off the rubber mats on the side step and at the back (just pull up – they are fastened into metal clips – but be careful not to step on the clips – it can hurt!).


First, I used a scrub brush to loosen any packed down dirt – there was a lot of what looked like soil under the rear mat. Then I used a hand-vac, followed by wiping down every surface of the van’s interior with a gentle soap/ something to cut through any grease. In retrospect, I probably could have done the mass cleaning after I ground off rust, but this way I had a better view of any subtle anomalies and bubbles concealed by the paint indicating rust.
Rust Removal
The thing about dealing with rust is – there is always more! Even when I thought I had meticulously singled out every spot (and I am a perfectionist), I still stumbled across more that had been hiding. As The Vanual puts it – rust is no joke.
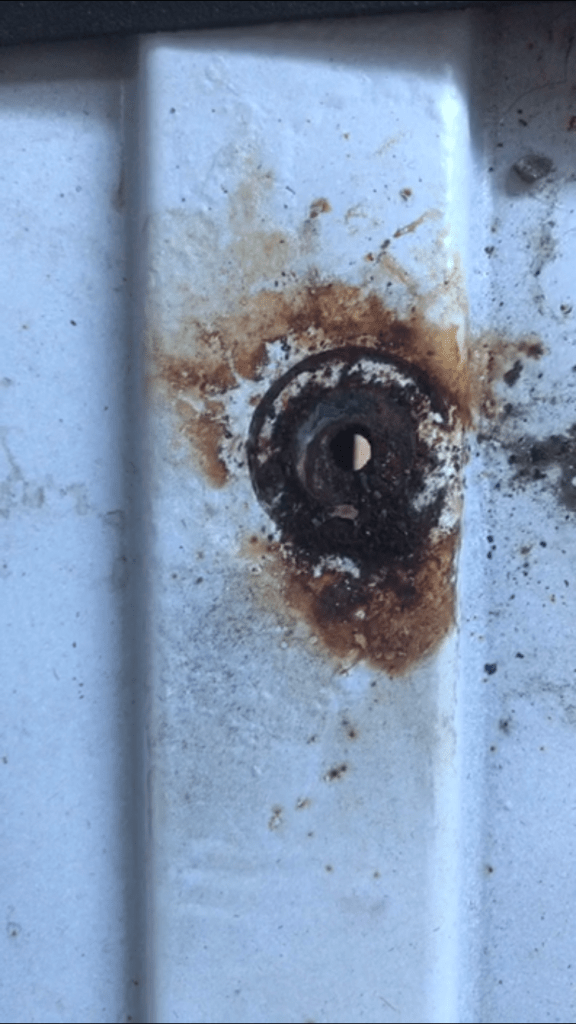

I had already addressed the van’s exterior and underbody, now it was the cargo bay’s turn. I was actually pretty pleased with the state of my van. If you google rust reforming or how to deal with holes in your van’s floor, you find people with huge holes in their van floors that had been eaten away by rust. For me it was just surface rust. You can see in the close up picture of the rusted screw hole above some of the bubbling under the paint.
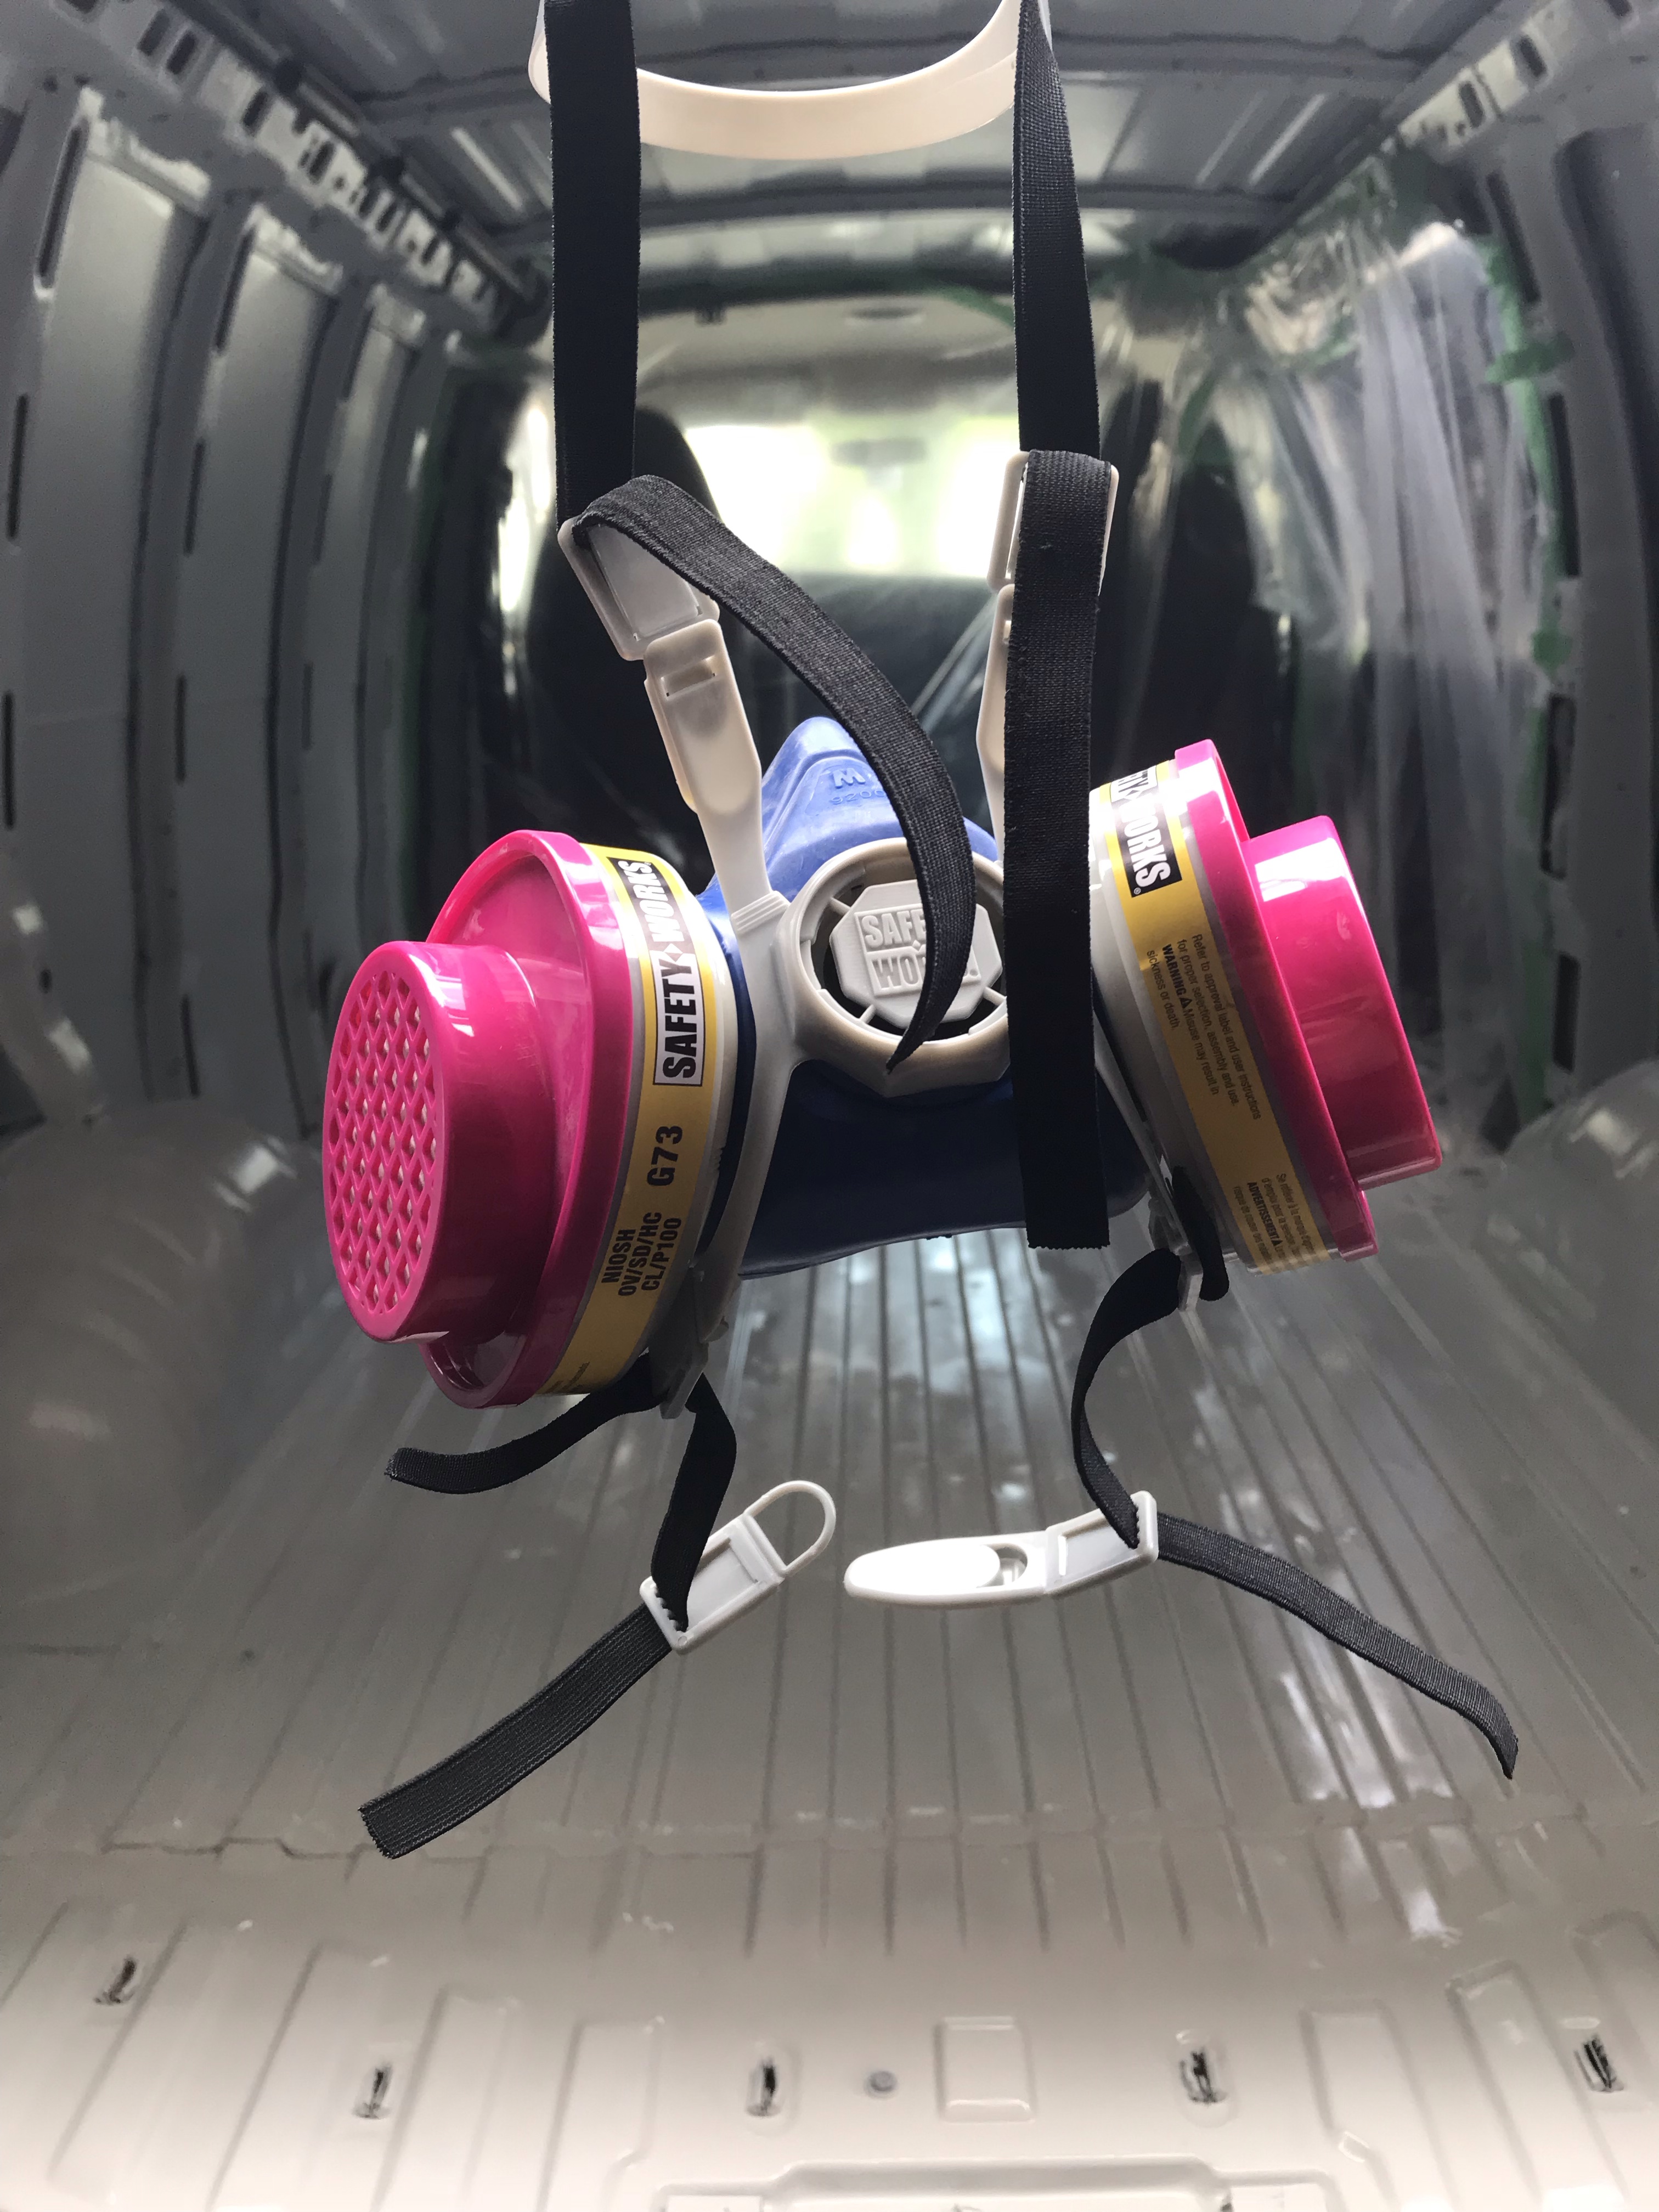
If there is any flaking paint you can use a putty knife to scrape it away. I liked the handheld wire brush I had, with metal scraper on top (in the future I would get a mini wire brush as well for hard to reach nooks). Then I ground off as much rust as I could get to with an angle grinder and metal grinding disc (you can also use a twist or crimped wire wheel brush). Very important is to wear protection – ear plugs (or ear muffs), protective eyewear (or these), an organic vapour respirator, gloves, and clothes that provide some protection. Once the grinding was done I went back and got any spots that the angle grinder couldn’t reach with my handheld wire brush.
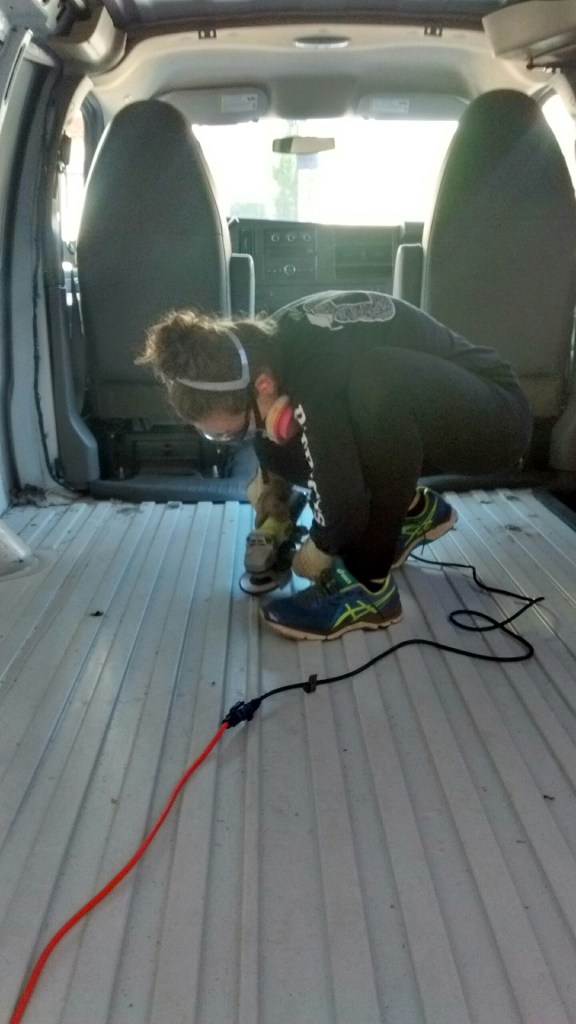


With bits of paint and metal dust spread throughout the van interior I vacuumed and gave the floor and walls another good wipe down.
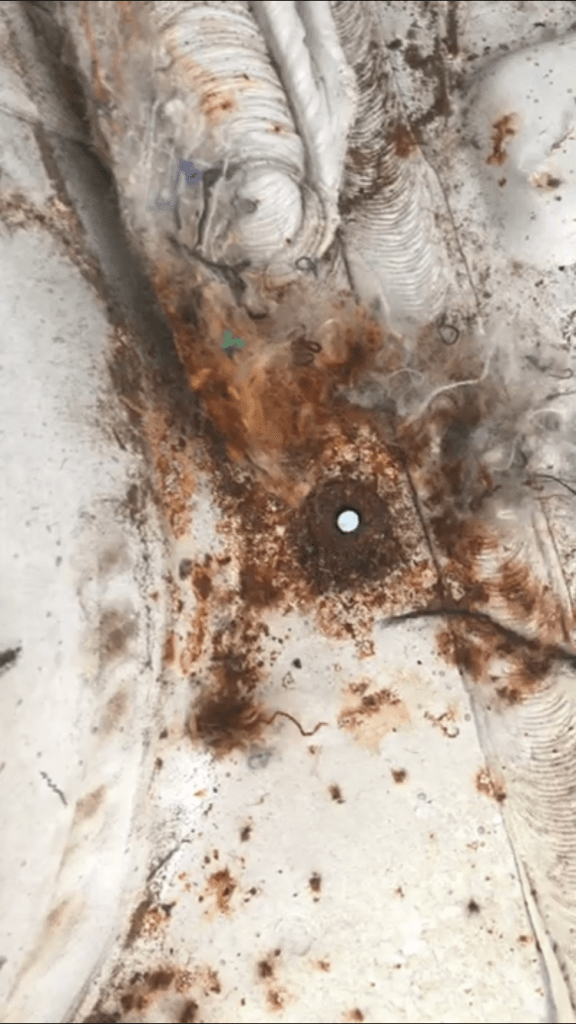
Later I noticed by chance a couple of spots that looked like rust on the back step of the van. I figured out how to remove the plastic cover – it was on there pretty good and I’m assuming not necessarily supposed to come off as I broke a couple of the rubber plug type things holding it down. But I’m glad I did because I found more serious rust, not just surface. So I whipped out my handy angle grinder and got cracking. With this more advanced rust, there was a lot of red dust that flew up as I ground and it got all over the interior of the van. In the future I would put up some plastic to keep to shield the rest of the van.
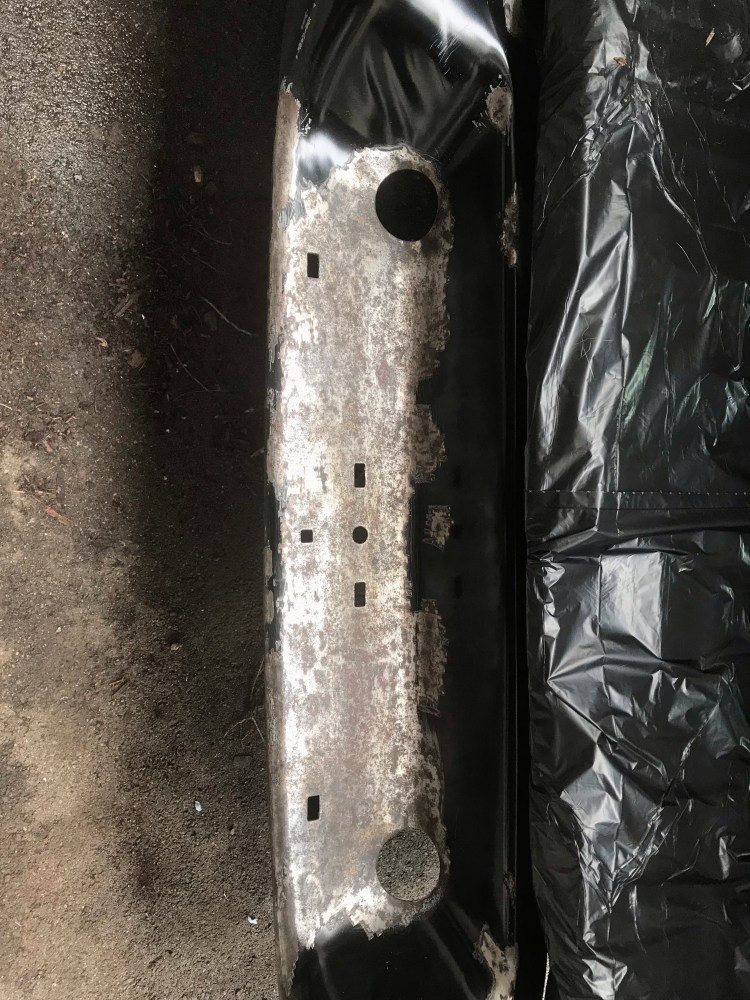
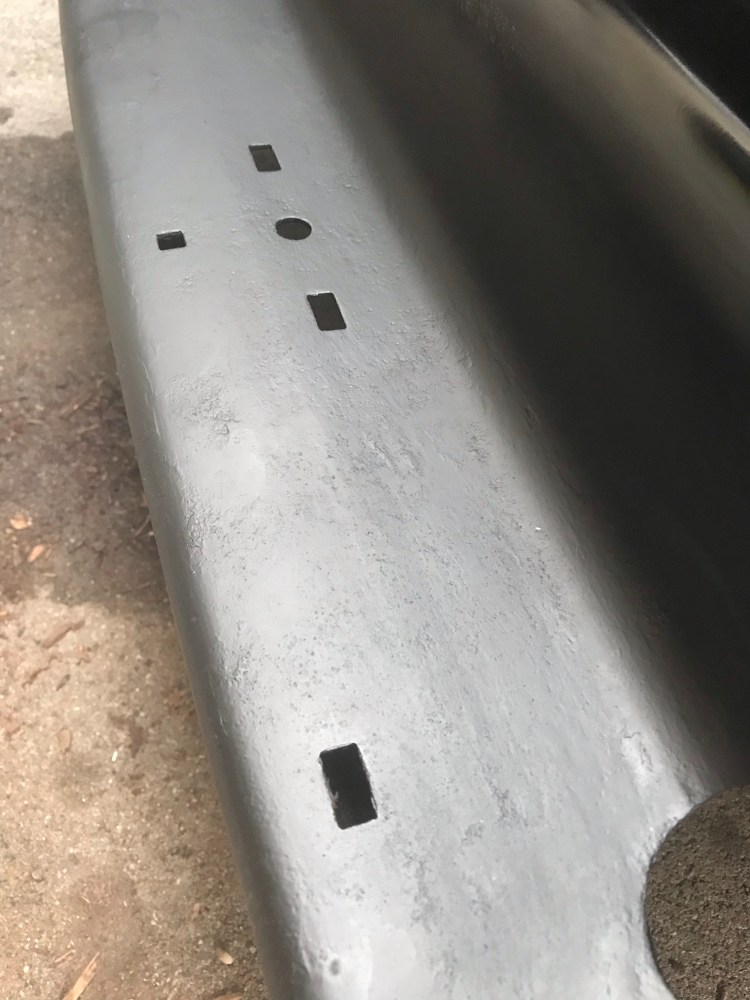
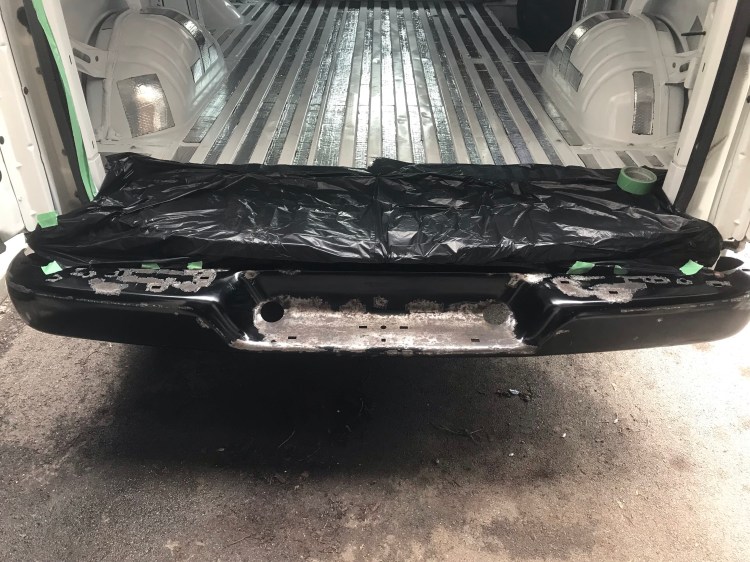
There were also a few rusting spots, though tiny, on the front bumper, but when I looked at how the cover was attached to the metal here from beneath I decided to leave it in place and just sand the visible rust. I finished (hopefully) the rust escapades by wiping down the front bumper and back step with rubbing alcohol.
Rust Inhibitor and Paint
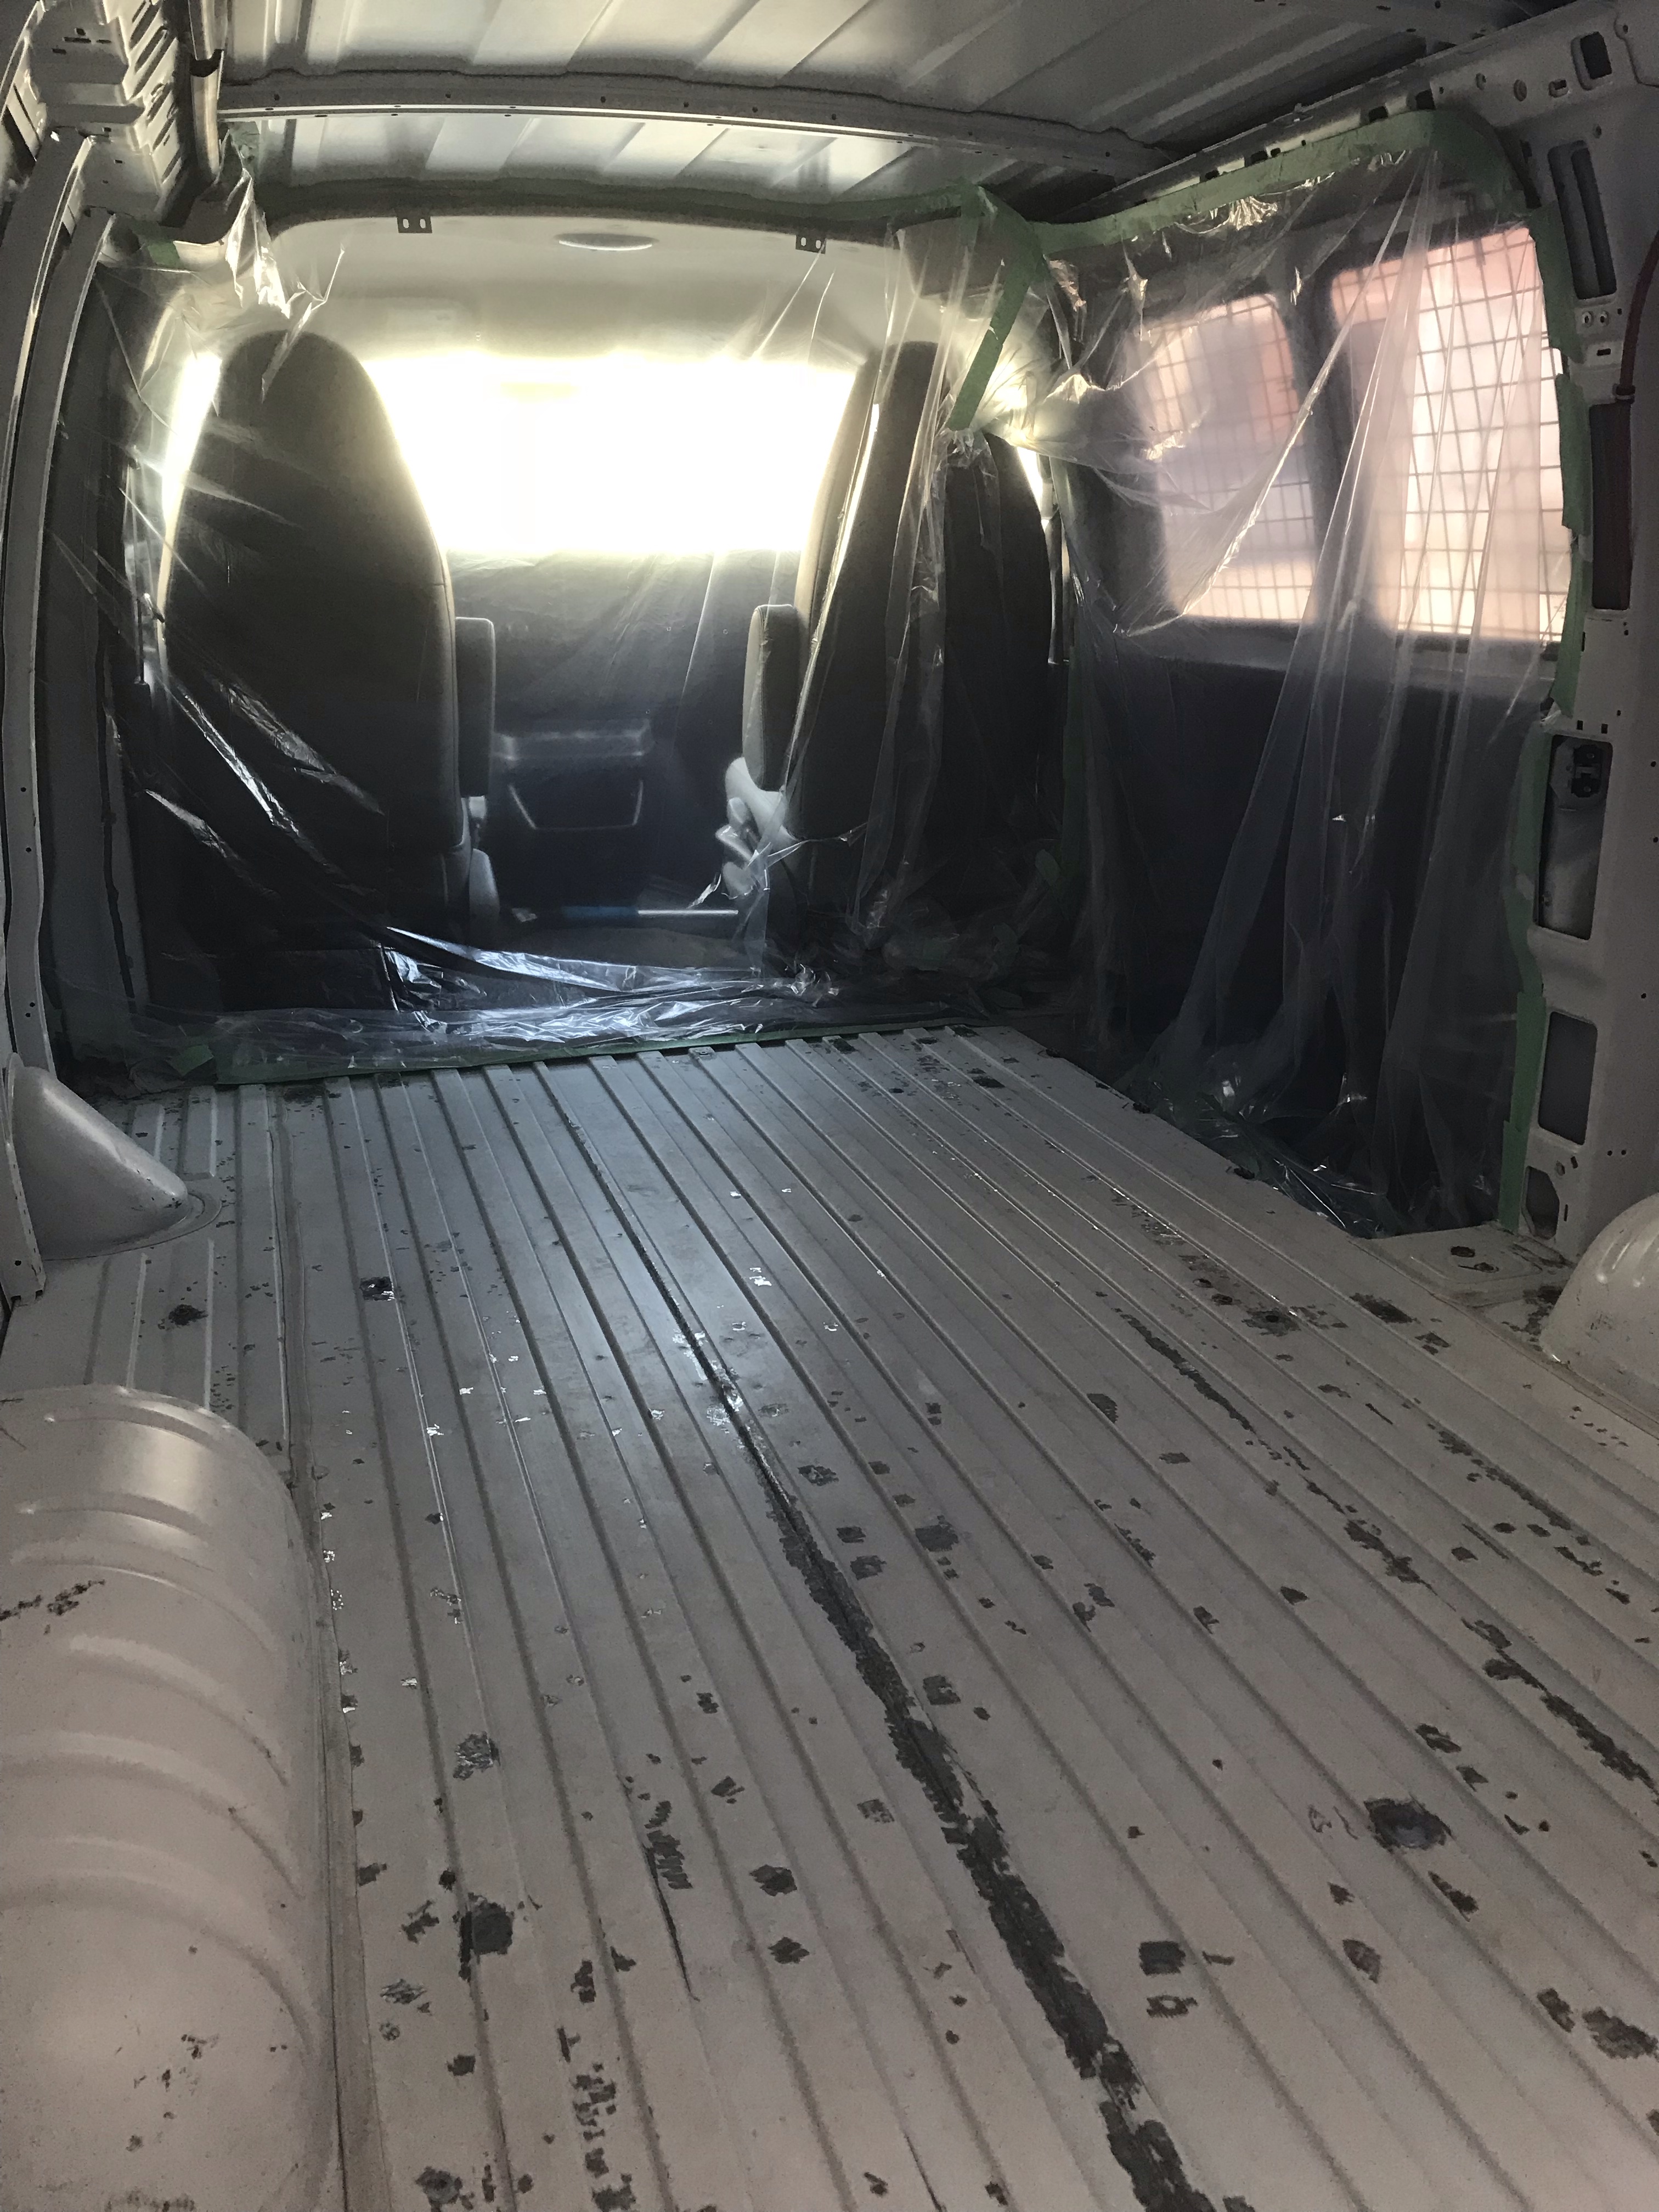
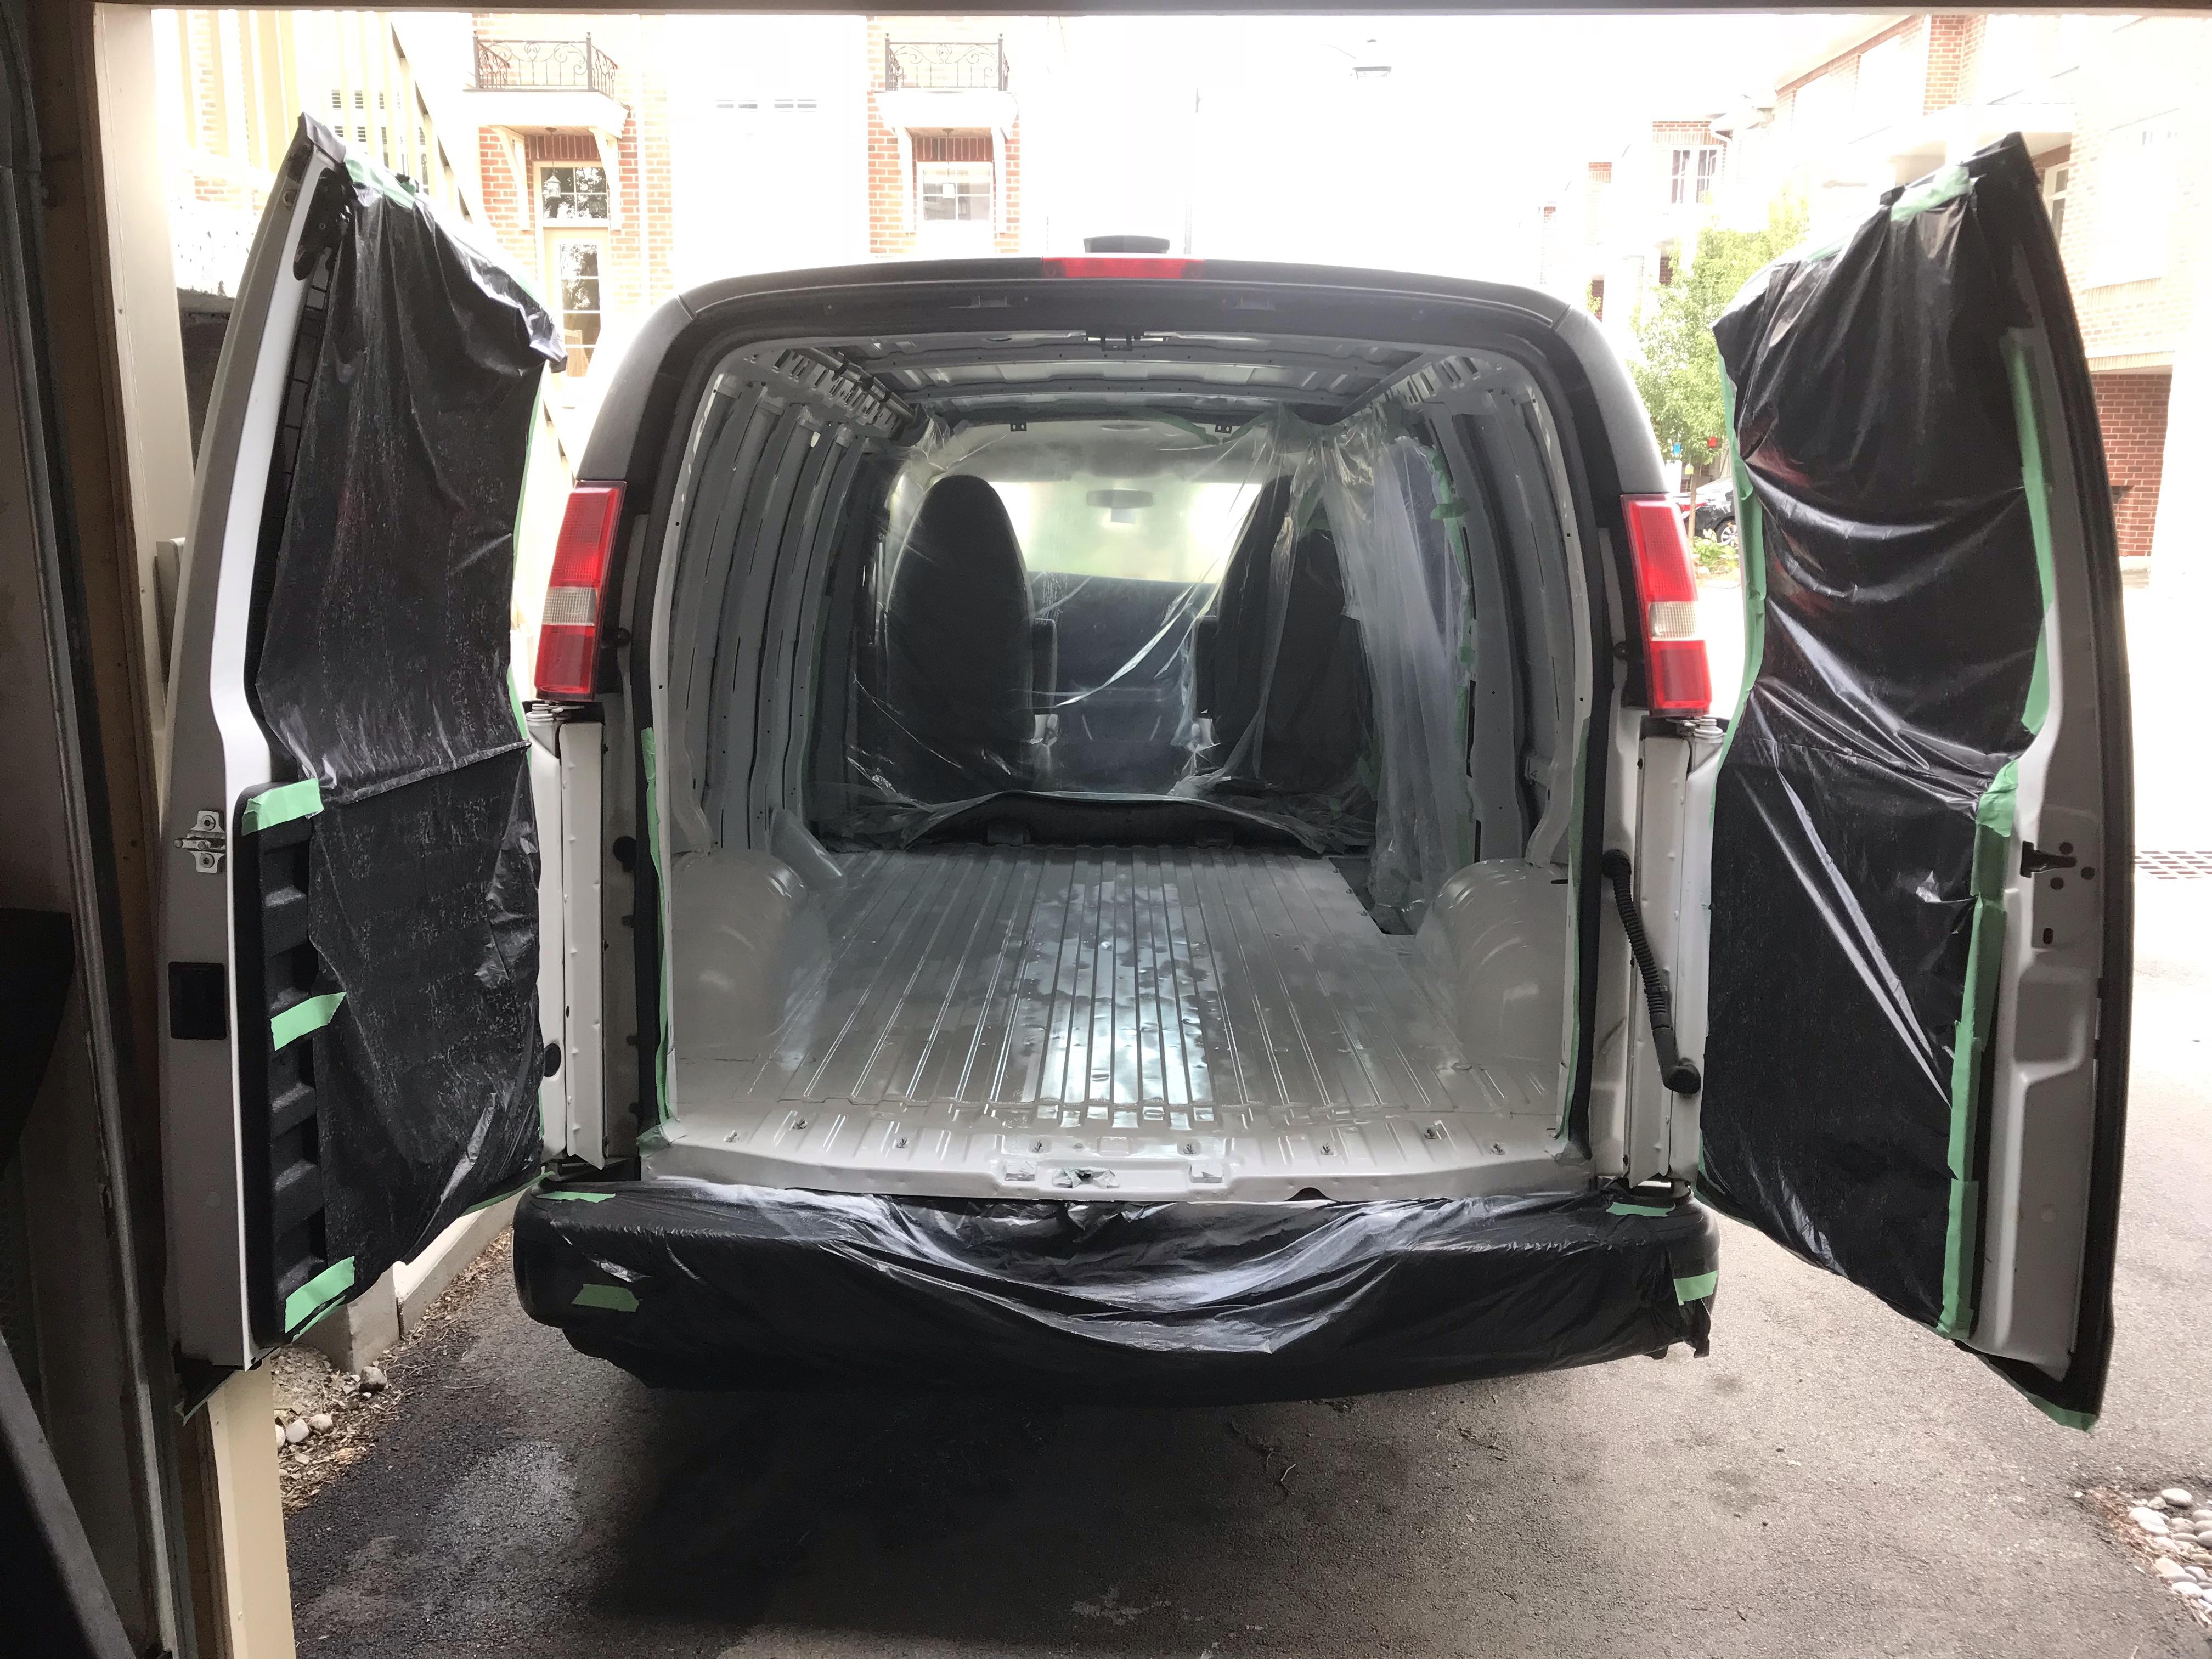
In preparation for painting I used painter’s tape, some plastic mattress covers I had handy, and garbage bags to cover any areas of the van on which I did not want to get paint.
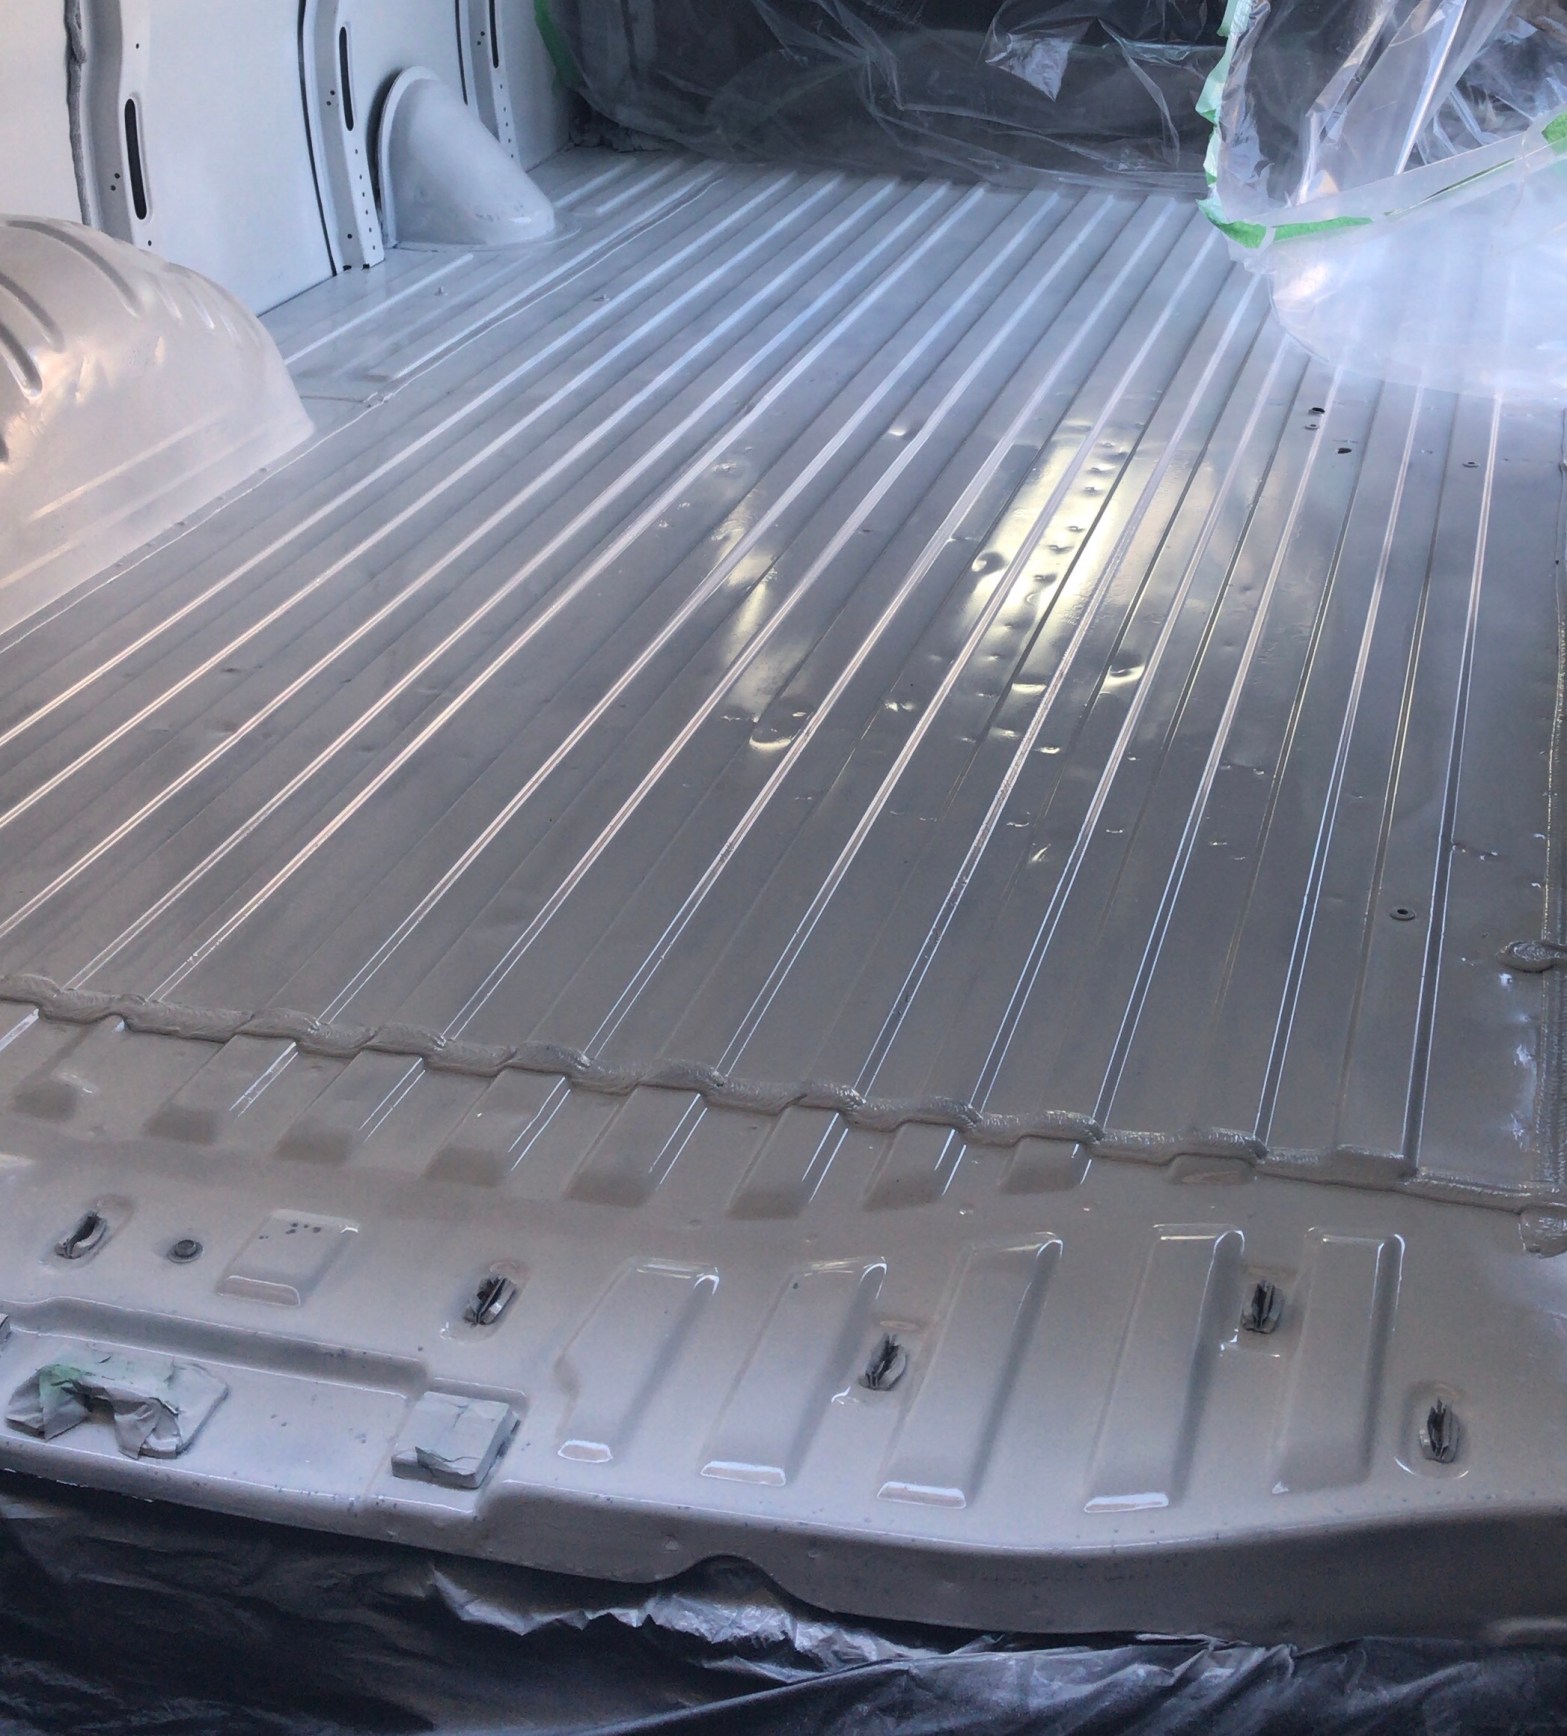
First up was using a rust inhibitor to cover any bare metal (or rust) in the cargo bay. I made sure to wear a respirator, eye protection, gloves, and clothes I didn’t mind staining during the painting process. Disposable booties/ old socks/ plastic bags are also good to have on your feet so you keep the painting surface clean. This step was pretty straight forward. I used several cans of rust reformer spray paint and waited 24 hours to allow drying before painting white on top.
I chose to use Rust Oleum’s white gloss spray paint. Application was easy and quick, but there were a couple of drawbacks. I didn’t find the spray application to be even and after one coat I could still see the black rust reformer underneath, so I needed a second coat (I probably used at least 6 cans to cover the floor and some spots on the ribs, walls, wheel wells, and ceiling). I also found out that this paint may be conducive to at least staining, at worst mold and mildew. I hadn’t fixed my rear door rubber seals yet and they leak so when it rains I put towels down in the back of the van. One night more water got in than usual, and although these were microfibre towels, they were wet long enough that the paint underneath turned pink in spots. Google said that this could be mildew. I washed the spots with rubbing alcohol and even Concrobium mold control, but the stain was in good. I do wonder if it was just dirt from the towels sinking in to the paint. To be safe, if I were to do the painting again I would use a paint that is explicitly marketed as mold-resistant, which the Rust Oleum paint is not, and potentially waterproof. Although the Rust Oleum paint does say it can be used as indoor and outdoor.


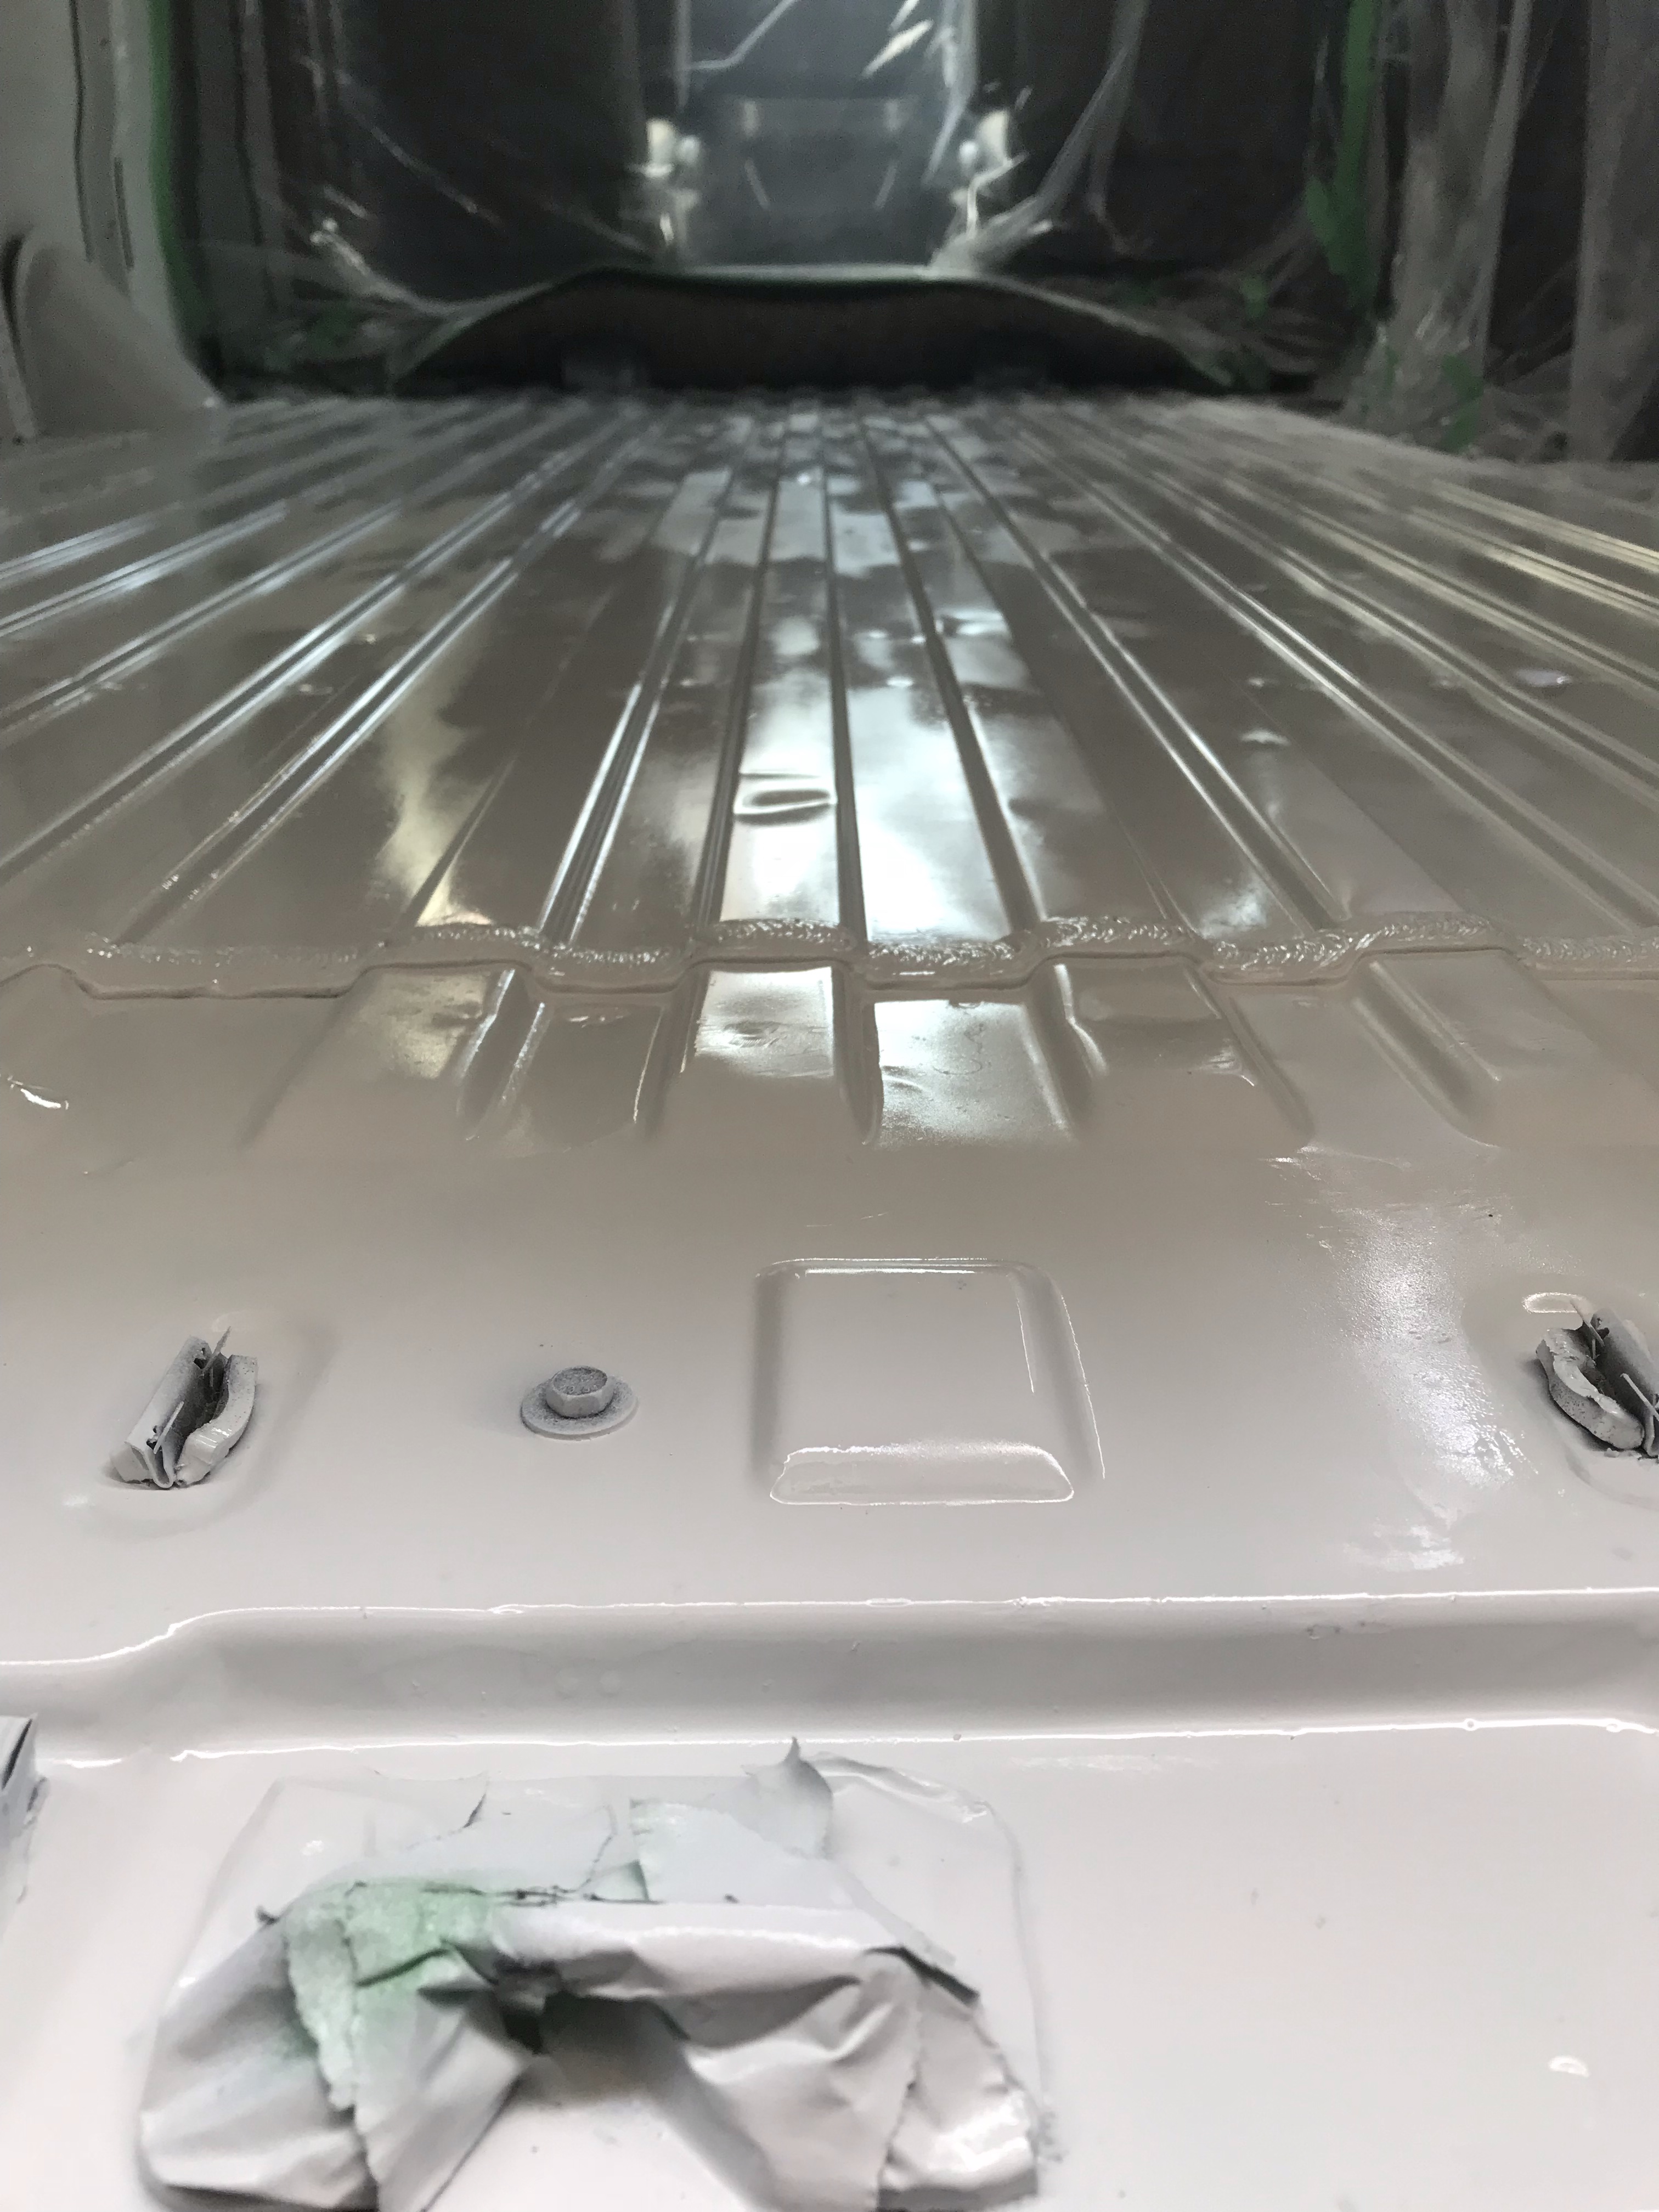
The wait time for the white top coat to dry was 48 hours so this was a process that tested my patience!
After the interior was all painted, I did the front and back bumpers. I first applied the rust reformer. Since I wanted to avoid any misting paint getting on the white body paint, I sprayed the inhibitor into a plastic container an applied it with a paint brush. When dry, I opted to use a weather and abrasion-resistant truck bed paint as the top coat.

Filling Holes in the Van Interior
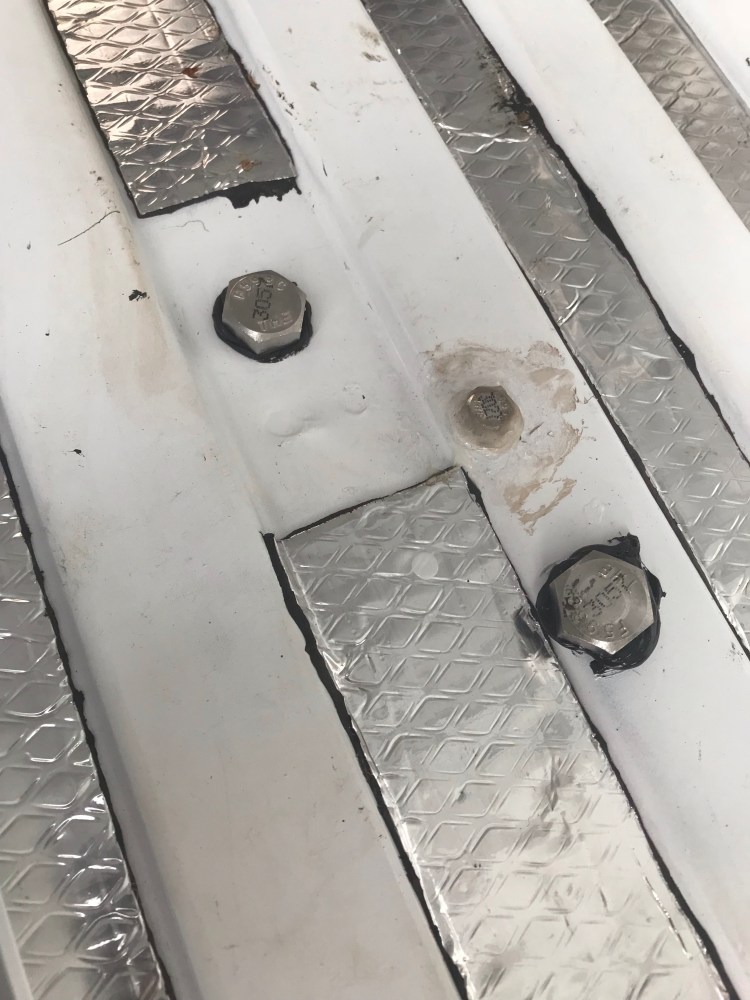
Most of the holes in my van floor were screw holes fitting 1/4 x 1/2″ hex bolts. I had some of these from taking apart the divider (zinc), but I wanted stainless steel (more expensive but corrosion resistant) since you could see the pavement below through most of these holes. Zinc plated fasteners are the cheapest, but they will rust when exposed to the elements. Galvanized fasteners are a step up in both price and corrosion resistance. Stainless steel is the best for corrosion resistance and most expensive. Weigh your options and priorities – I don’t want to have to worry about the bolts rusting under the insulation and flooring I’ll be putting down – I want longevity.
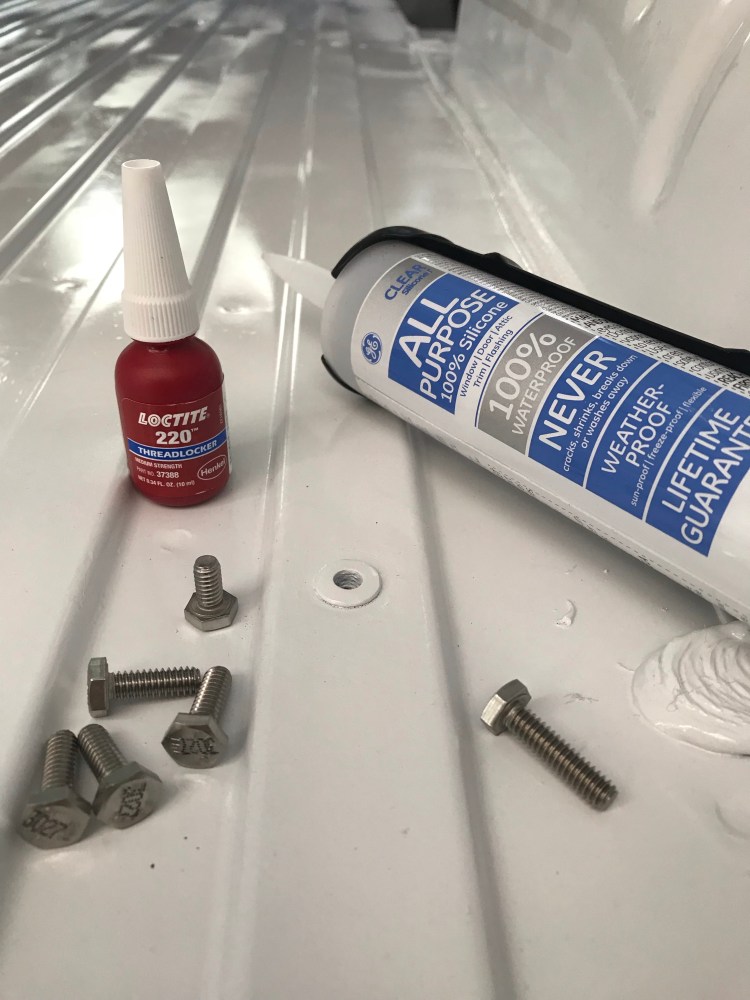
I used a socket and ratchet to tighten the bolts and once they were half way down I applied a medium threadlocker to help keep them in place during constant vibration of the van while driving, then tightened all the way down. I then cleaned around and on top of the bolt heads and sealed them. While I initially used a silicone caulk for it’s waterproof and flexible properties, I was unable to find any explicit information regarding how this would hold up with vibration. I’ve since decided that Dicor self-levelling lap sealant is the gold standard (well known in the RV world). Though I would also look into Sikaflex (polyurethane-based, flexible, shock-absorbent, high strength) or an automotive grade sealant. Gloves, eye protection, and respirator were worn during this process.
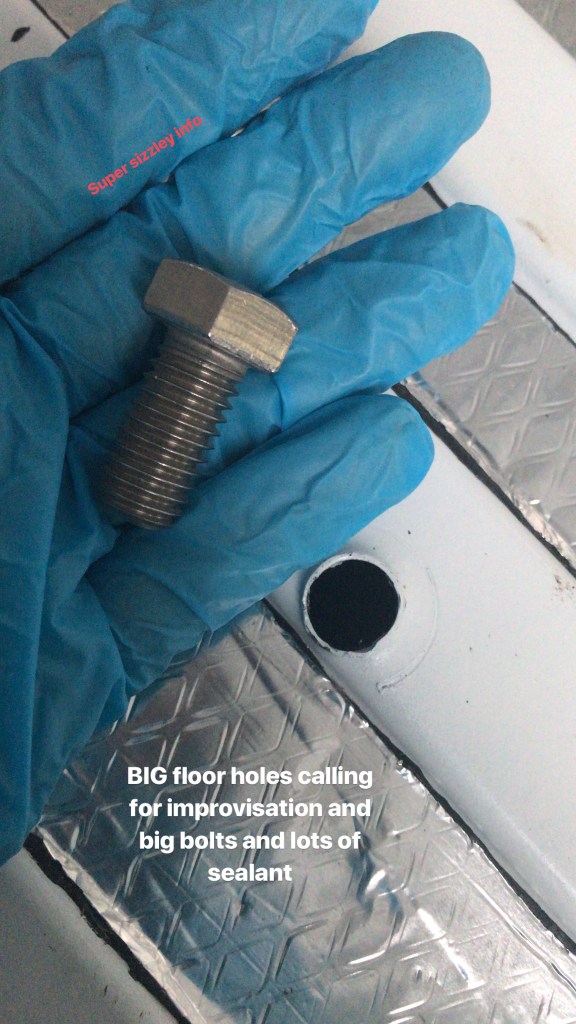
Unfortunately these were not the only holes to be sealed. The metal cabinet that had been removed from the van left two 1/2″ holes in the floor and a one inch hole in the side wall beside my sliding door. I weighed my options – from fibreglass resin, to bondo, to epoxy putty, to welding, to rubber sheetmetal plugs, to sealant only. I ended up sealing the 1/2″ floor holes with 1/2×1″ hex head bolts. I had some polyurethane adhesive (I would have bought 3M if it wasn’t so expensive) lying around and so I used this to coat the upper threads and bottom of the bolt head and applied to the holes. Only one of the holes was accessible from below the van and on this bolt I placed a nut underneath, also adhering with the polyurethane. After curing, these babies have held up nicely.
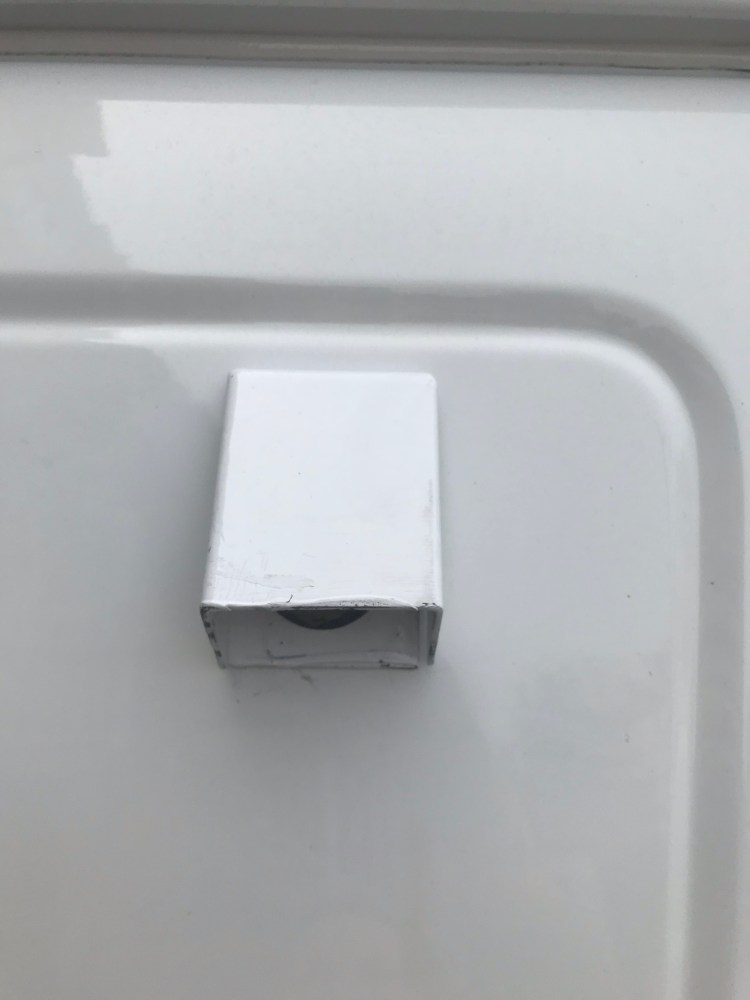

The hole in the sidewall had housed something that still remains a mystery to me (if anyone knows what it is I’d love to know!) I decided to go with it. I cut off the excess rubber tubing, took it apart, rust reformed and painted the outer shell, and filled the inside with polyurethane, also adding a little adhesive under the nuts.
Yay – my van has no more holes! Now to make it fully self-contained by addressing the leaky rear door seals…
Leak Test and Fixing Rubber Seals
Doing a leak test should be one of the first things done in preparation for a van build. This is a critical step in preventing mold from taking root in your tiny home on wheels.
I incorporated the test into a pre-existing plan to wash the van. I simply took a hose and held the running water over every window and door seal, then hopped in the van and made note of any locations where water was getting inside. Initially, I used high water pressure with a hose nozzle, directing it straight at the seals – this was probably overkill and not a realistic representation of what rain would do. But I also checked the van interior after heavy rainfall and there were a few spots along the back door’s seals, and a minor spot on the side door where water was getting in and I could see that the rubber seals were a bit worn.
Replacing seals and weatherstripping with the correct OEM parts can be pretty expensive. I decided to order rubber seals on Amazon and adopted a hack I found online where you use a length of 1/4″ rope, threaded along or into the seals to make a tighter fit. In theory, the latter is a good idea, but I found that it may or may not work. Depending on the door and state of the seals, the rope could make it harder to close your door, causing more of a leak or wind noise when highway driving. I liked adding rubber seals, the ones I ordered being smaller, allowing for subtle adjustments, but they also had limits for where they could be placed. While these seals had their own adhesive strip, I reinforced them with additional weatherstrip adhesive.
This is an ongoing process and I am still adjusting and testing each time I drive on the highway (wind and road noise through the side door) and when it rains (back door only now). My current theory is that where the two back doors meet there is a rubber attachment between the doors at the top corners that depresses the inner seals and allows water in, so I may need to add a sealant in there somehow as it is not a spot where rope or a rubber seal would fit.
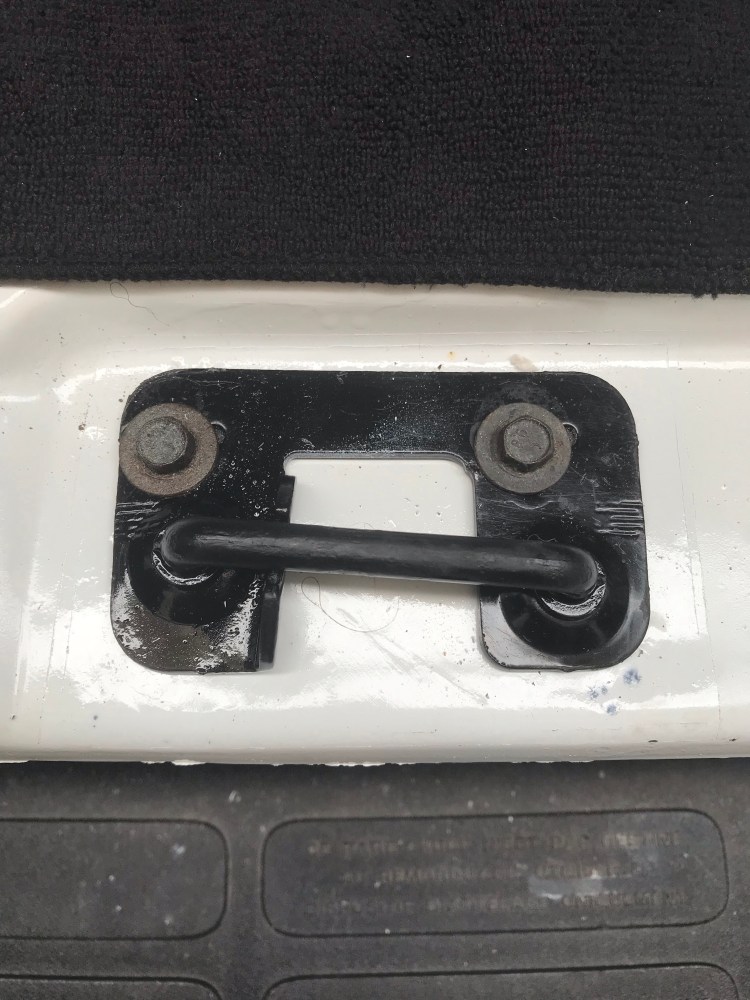
I was also able to adjust the rear door latches back a bit to help make a tighter seal.
So we will see!
Sound Deadening
I was going to skip this step. But I figured if I’m doing all this work, what’s one more thing? I might as well.
There are loads of options for sound deadener on the market – with two main categories. Some use butyl rubber adhesive (Noico, Dynamat, Fat Mat) and others use a rubberized asphalt adhesive (Peel and Seal, Cofair Aluminum Roof Tape). The former category is typical of sound deadener specifically designed for sound deadening purposes, often for use in conjunction with a sound system or vehicle. The latter is designed for roof repair – aka it is designed with outdoor use in mind. What many people are concerned with when it comes to the asphalt based products is the toxicity of asphalt. Manufacturers have stated that this only applies when asphalt is heated and releases fumes, but there are those who wonder if it will off-gas. And if applying directly to the metal vehicle body – how hot would the vehicle need to get to create fumes? I did a bunch of research and while the roofing tape was the cheaper option, I lucked into getting Noico at a discount and felt comforted that I played it safe.

Installation was pretty easy, though a bit sticky at times. Noico’s sound deadener came with straightforward instructions. Heating the sheets is recommended to improve adhesion, but I figure installing in 30 degree weather (celcius) was sufficient. I mostly wanted to cover my floors and then use the excess on the wheel wells, walls, ceiling (for when it rains!). Make sure your surfaces are clean. Measure each piece according to where you’re placing it, cut, use your fingers to carefully flatten to avoid air bubbles, then use a roller to flatten and adhere. I made the mistake of ignoring the instructions to wear gloves when I started this and ended up with paper-cut-like-slits on half my fingertips..
Blood – check. Sweat – check. Tears – TBD.
Onward and Upward
Writing this post and looking at all of the pictures so far, I am starting to realize the transformation that is taking place. It’s a good feeling to see your work pay off. I am also learning a lot about myself and my process, and part of knowing that I am a perfectionist is having patience with myself and balancing the urge for perfection with time management and being realistic about what is needed. Next up – fan installation!
I think I’m going to start ending (there’s an oxymoron) these posts on a musical note (redundant?)… So with that in mind, I’ll ask you this: is there a lien on your dreams?
Not dead yet,
Kat
Copyright © Chronic X-Roads 2020

One thought on “Van Build #2: Getting to Clean Slate Status”