*This post was originally written September 5, 2018
_______________________________
Initially I had a hard time placing when would be the best time to do the fan installation. But it ended up being one of the first big alterations I tackled. Which suits me just fine as I am of the mindset that you’ve got to get through it to get past it and you might as well get the worst over with.
By worst, I mean I was a little terrified to cut a big hole in my van’s roof. But… I did it! This post covers my choice of fan and the steps I took for installation.
MaxxAir vs Fan-Tastic Fan
If you’re going to invest in a good vent/ fan, two names you’ll often hear are MaxxAir MaxxFan and Fan-Tastic Vent (now sold under the Dometic brand). There are cheaper methods of getting air circulation through a van, but here’s a case where I would argue that you get what you pay for.
While having a fan will feel nice when you’re travelling through hot climates, it’s not the only reason to get a fan. Some can cool the air coming in. And most importantly, a fan will help to remove humid air and moisture, targeting condensation that can lead to mold or rust problems in your small living space. Especially if you will be cooking – a fan can suck out any smoke or fumes. Cracking a window or having two fans – one for intake and one for exhaust – will improve air circulation and when it’s hot having a fan to pull out the hot air that;s risen to the ceiling will really help.
When researching which fan to get, I was stuck between the MaxxFan and Fan-Tastic Vent. Reviews were fairly similar on Amazon. What ultimately swayed me was the impression that MaxxAir was of slightly better quality (subjective opinion) and you could get it with a built in rain cover. This way you can keep it open even when it’s raining (which you can’t with a Fan-Tastic fan). Other fans give you the option of buying a separate rain cover – which is often bulky, or you have to keep your vent closed in the rain, which means no ventilation in wet weather (and I want to spend a good amount of time in the Pacific Northwest!). The Maxxfan can also be kept open while driving, even on the highway. It has two support arms for the fan that make it sturdy.
Both Into The Mystery 13 and Gnomad Home provide great points as to why they prefer the MaxxFan.
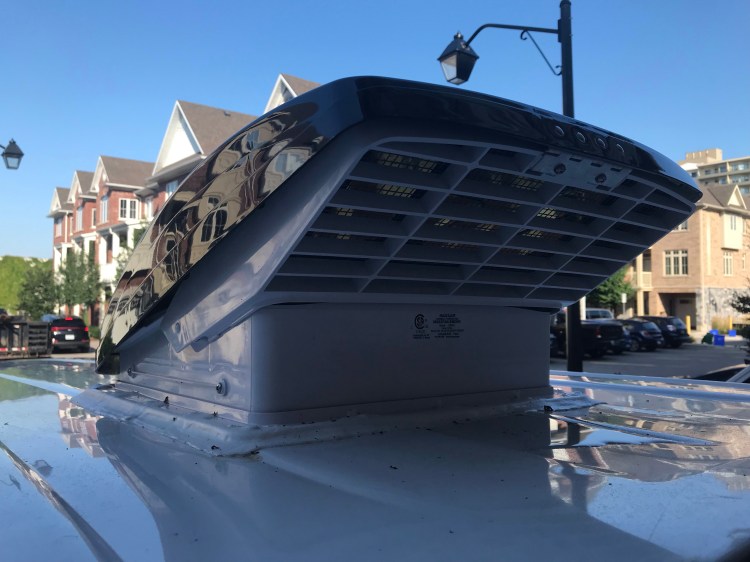
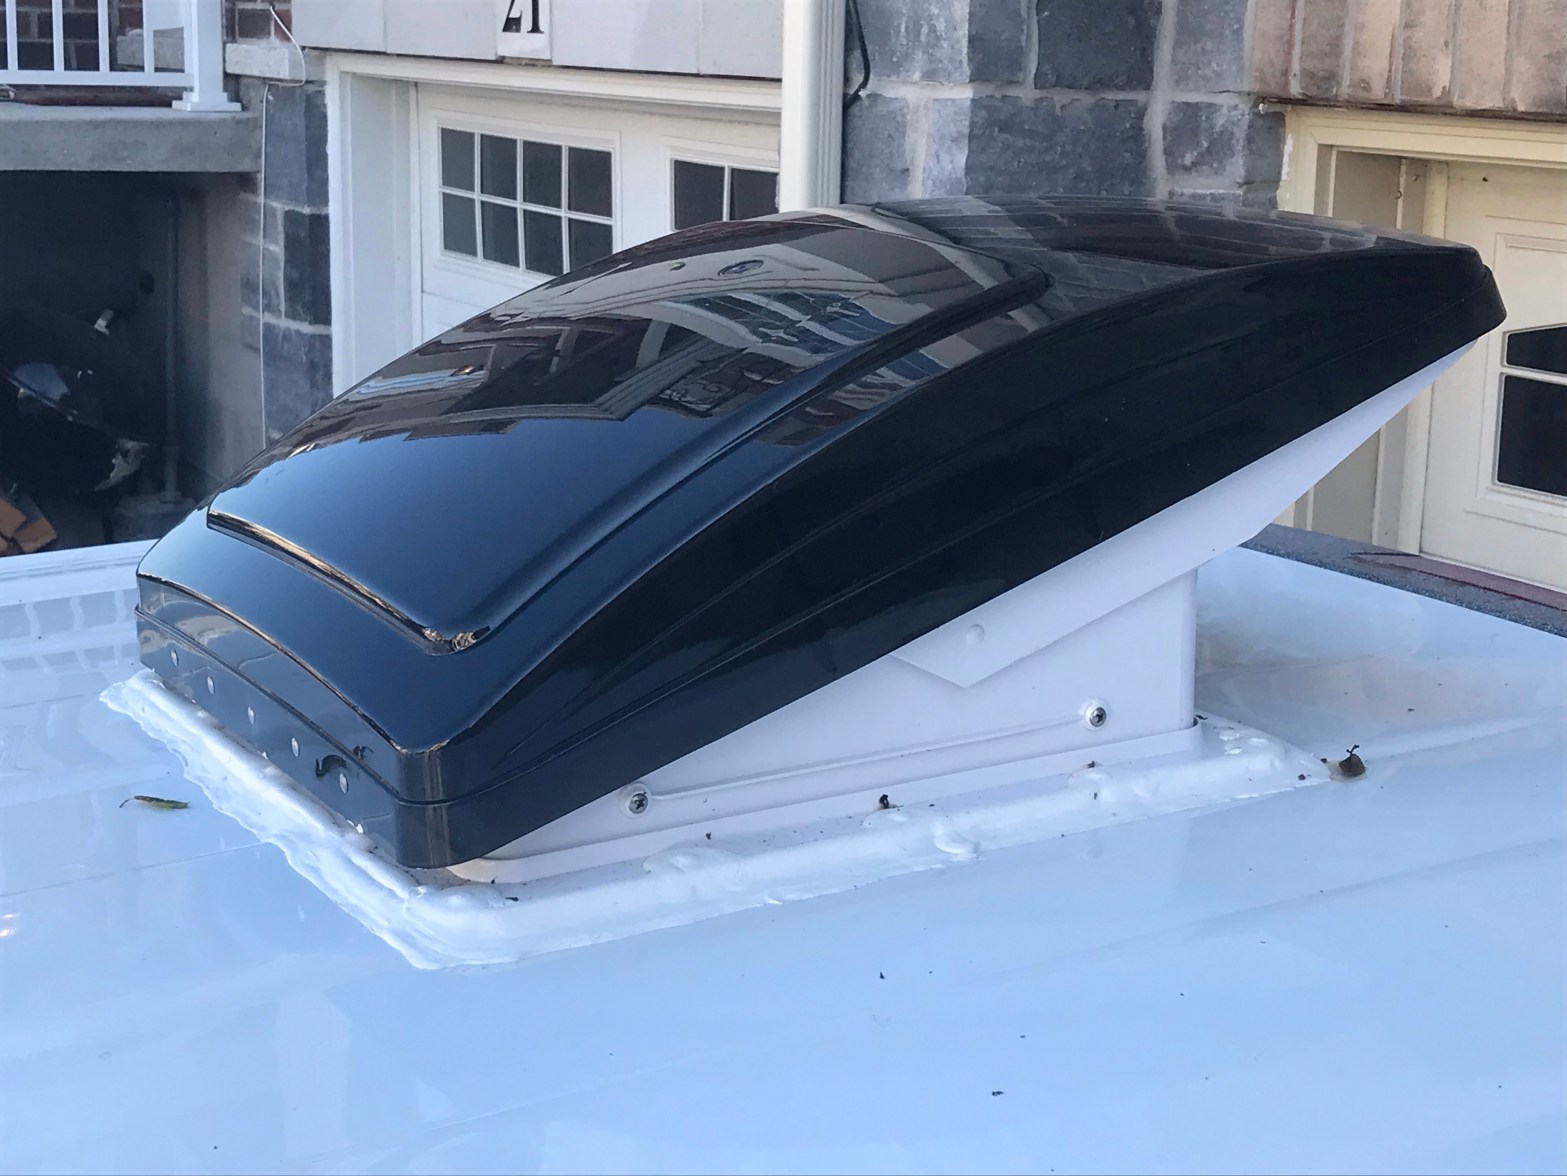
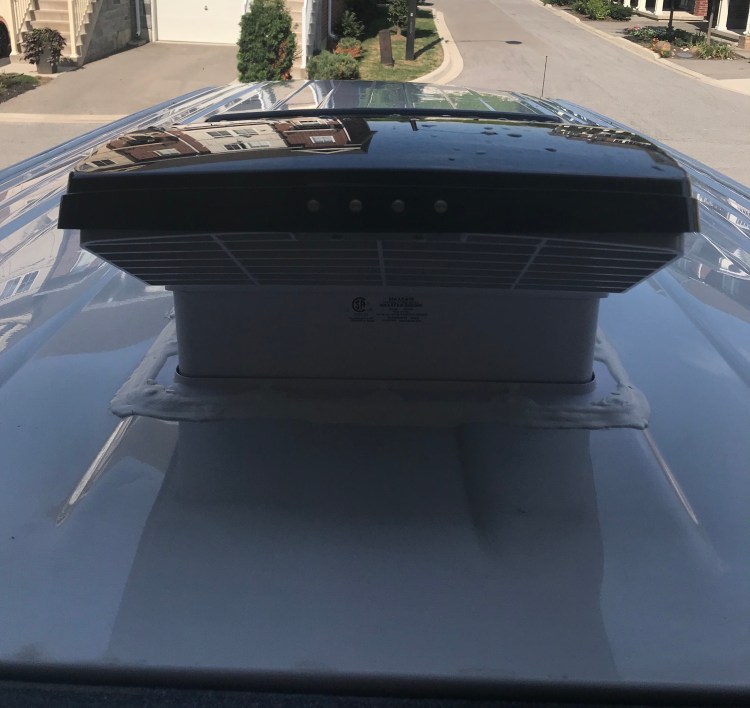
I chose the smoked lid for aesthetic reasons and thinking it might blend in more if I get a black roof rack. It lets in more light, but also more heat – which would be one reason to get the white lid.
Bumps In The Road
One thing I did not take into account when I bought the MaxxAir Fan was the size and weight. It’s really big! And it weighs about 16.5 lbs compared to a Fan-Tastic Fan which is smaller (with no rain cover), thus can be more stealthy, and weighs more like 5 lbs.
This only mattered to me because the roof on a Chevy Express van is actually pretty thin. So on the day when I was gearing myself up to cut a 14″ x 14″ hole in my van roof, I had what felt like an existential crisis because I started to question if it would be okay to install the fan at the back of the van roof, my ideal location. The issue here is that it is a larger space between the interior van ribs that support the roof – and the roof bends in when weight is placed here. Actually – the whole roof bends and moves around when I am walking around up there, but it is more evident between the back two ribs.
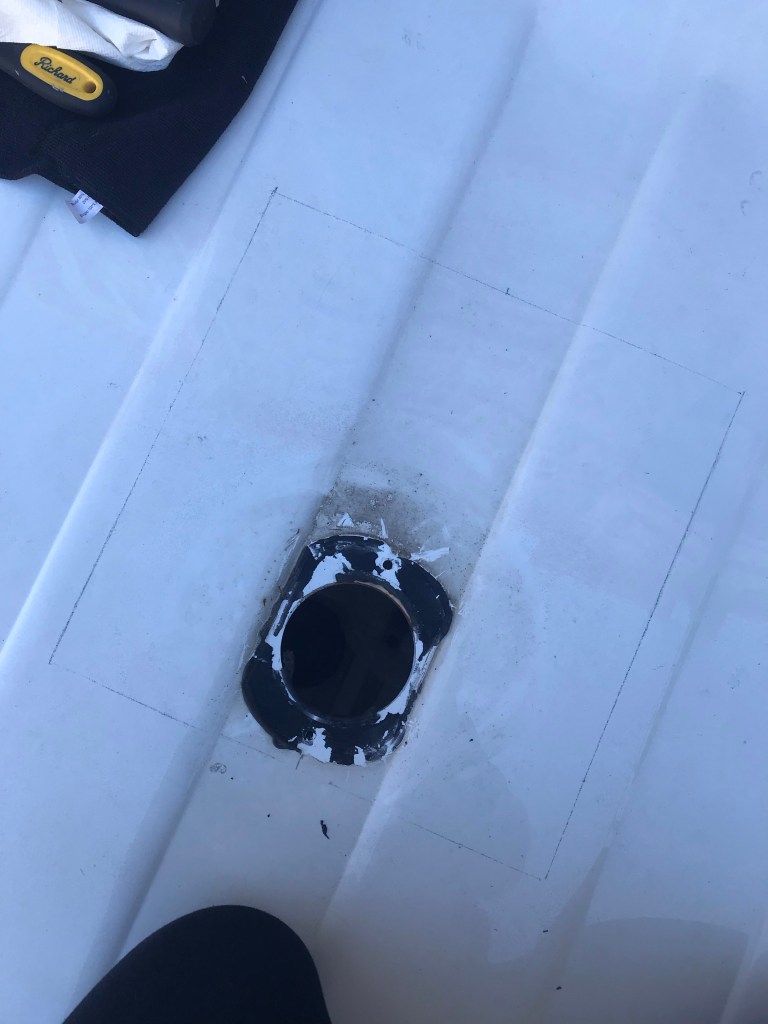
So, no problem, I thought, maybe I can install the fan between then next section of ribs, which are closer together and would just fit the fan, giving more support. Unfortunately the van came with a Flettner vent already installed between the last two ribs, meaning there was already a hole in the roof there. So it made more sense to put the fan where there was already a hole.
I probably could have still moved the fan up and gotten somebody to weld over the Flettner hole… but that would likely be expensive and ugly. Plus the solar panel configuration I had in mind might not work with the fan in the middle of the van. I rationalized the decision to keep the fan at the back by coming up with a plan to make braces (using metal angle bars) to place under the fan’s wooden support frame, which would screw into the adjacent ceiling ribs, to help support the fan from beneath. Boy, does this van build call for a lot of improvisation!
The Install: Wooden Frame
Before I even touched the van, I made a wooden frame that would go inside the van for the fan to screw into. According to MaxxAir the fan needs at least a 1 1/8″ roof thickness to be secured to. Using the fan’s flange I made measurements and cut four lengths of 2x2s. Then I simply screwed them together. I know people will tell you not to screw straight into the end grain of wood because you won’t get as strong a hold, but this isn’t exactly a structural piece and doing so was easier.

Following a load of research into mold prevention, I decided to spray the wood frame with Concrobium Mold Control as well as with mold resistant paint. This frame would be one of the first surfaces to get wet in the event of a leak so I figured I might as well play it safe.
Existing Vent
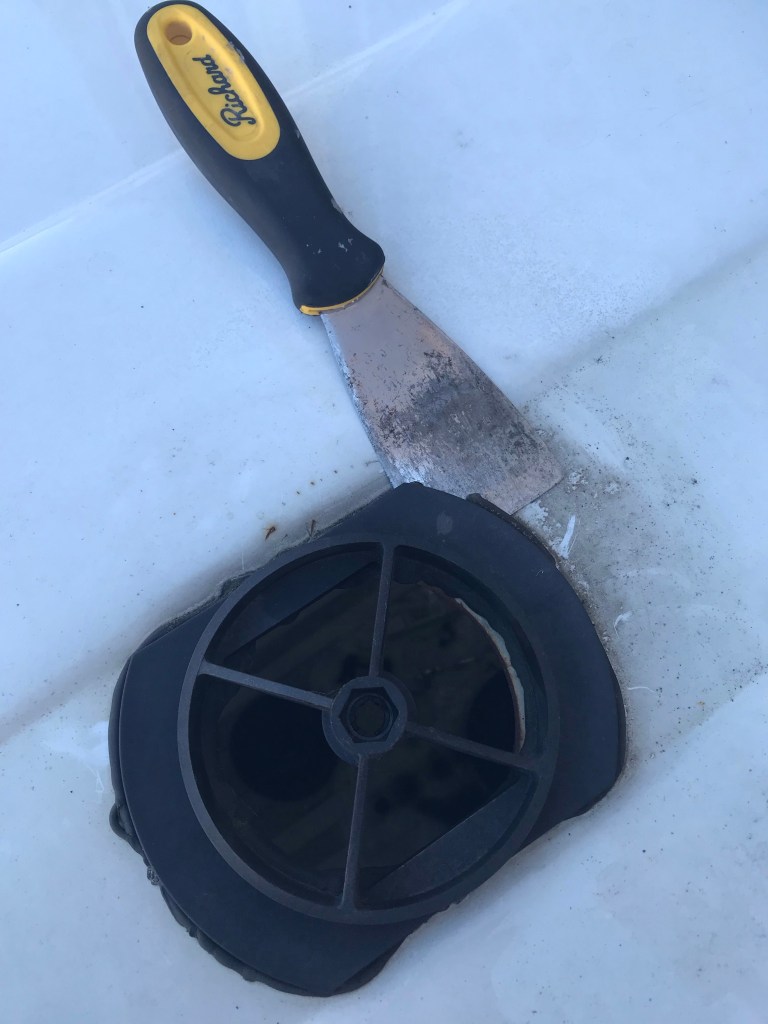
Next I removed the Flettner Vent already in the roof. A simple google search of the model on my van led to an installation video, which I executed in reverse to take it apart. This was pretty simple once I was familiarized with the parts – pop out a piece of plastic from the inside, unscrew a bolt, release the inside parts, then climb onto the roof to gently cut through the old sealant with a putty knife – done!
Measure The Hole
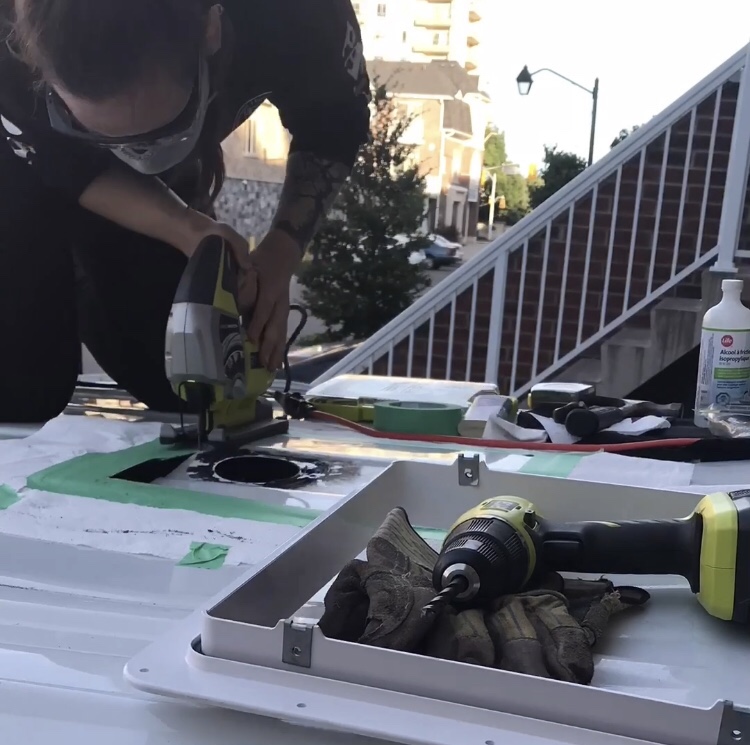
A 14″ x 14″ hole is typical of RVs and fans/ vents like the MaxxFan and Fan-Tastic Vent. While some fans come with a template for tracing your hole, MaxxFan suggests using the flange (base) to trace your hole. I did neither, instead making my 14″ x 14″ measurements relative to the roof ridges, side gutters, existing hole, and supporting interior ribs. I made sure there was enough room for the wood frame next to one rib on the interior and at least 8 inches of roof space behind the fan on the exterior (for the overhang). I used pencil so I could easily correct any mistakes. Then inspected my work carefully before prepping to make the cut.
It was nice to be able to take care of one rusting hole by cutting an even larger hole…
Once I was confident about my measurements I put down painter’s tape around the hole. This not only provided a better visual for the cut but also protected the van’s paint job from the jigsaw that would be sliding across it. I also taped down some paper towel around the area so that the metal scraps and dust expelled by the jigsaw would not damage the roof.
Unfortunately, there was a slight wind that blew the metal bits down the length of my roof anyways. When it was time to clean up I did my best to get all the metal pieces I could (an oily rag is recommended, but I was still afraid of scratching the roof and running the risk of slipping) – I picked up any larger pieces by hand and used a handheld vacuum for the dust. I kept an eye on the roof over the next several days and to my dismay found that some rusty spots had appeared. My theory is that after some time in the sun and after a rainy day, the remaining bits of metal had adhered to the roof and rusted. It took a surprising amount of effort to wash off these spots – which really were stuck!
Make The Cut
The moment had arrived – time to take the plunge and cut!
I put down some garbage bags in the van beneath where the hole would be to catch metal scraps. You can tape a garbage bag to the ceiling, which I did, but the jigsaw caught on it a couple of times, creating a hole through which scraps fell anyways. So bags on the floor should be fine.
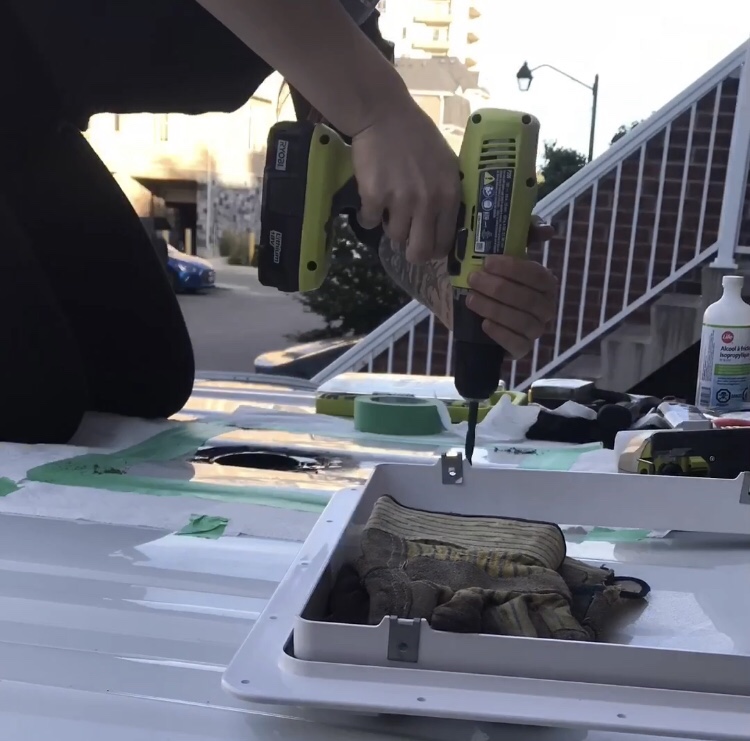
I began with drilling pilot holes in the square’s corners. I used a centre punch, applied lubricating oil to the drill bit to prevent overheating, and went to work.
I donned my protective eyewear, dust mask, and ear plugs (gloves are a good idea, too). Once the starting points for the jigsaw were drilled out I started cutting with the jigsaw, once again lubricating the metal blade.
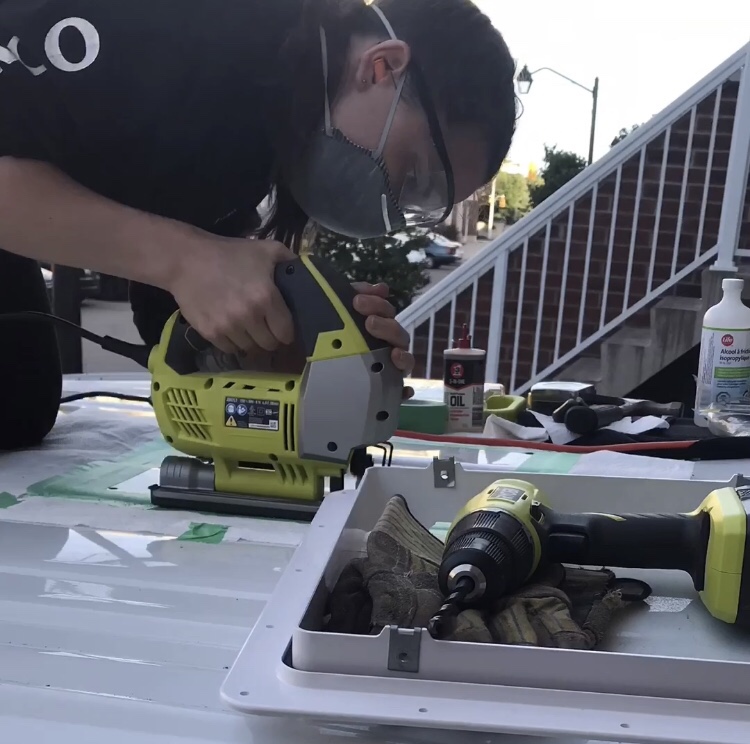
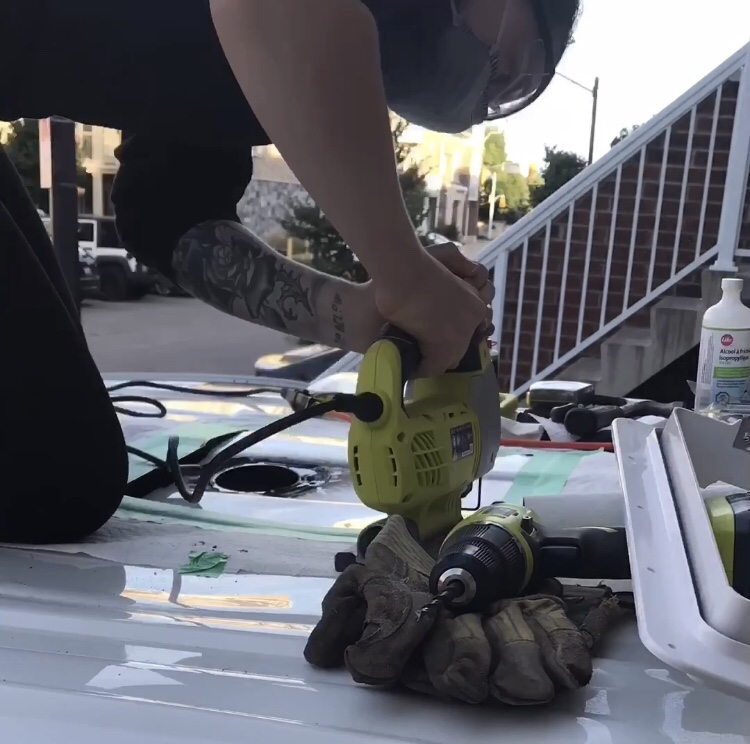
Another downside to the roof bending around was that once I got to the fourth and final side of the cut things got tough. The roof was moving around a substantial amount and cutting on a moving surface is pretty difficult. I ended up pushing the metal down while cutting, which was the best way to make the surface more stable.
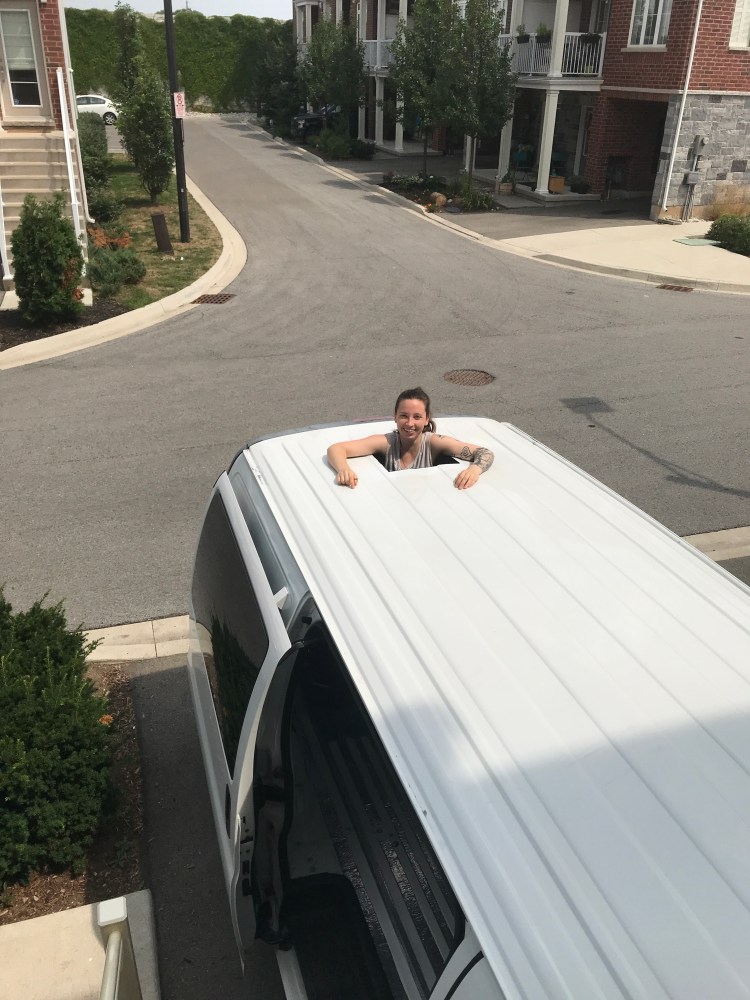
Congratulations – you now have a big hole in your roof. And the scariest part of the build is behind you!
Perfect the Cut
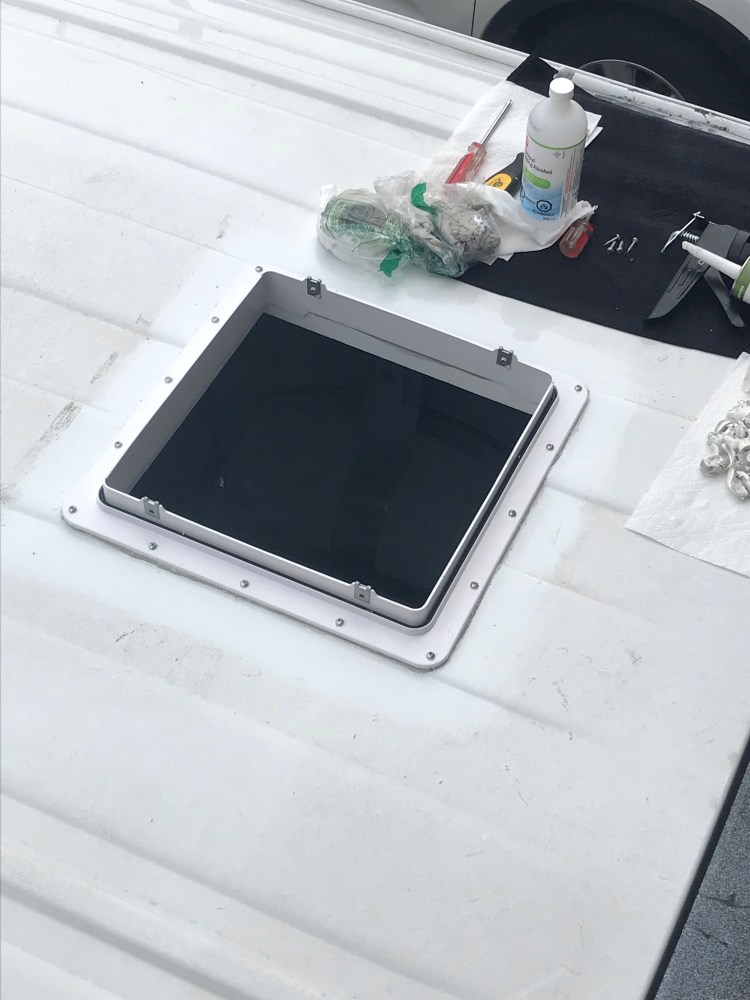
Following the cut I test fit the flange. It was a bit too tight on one side so I used the jigsaw to cut a bit more and go over any uneven edges. Once the flange fit I deburred and smoothed out the edges with some medium grit sandpaper. I proceeded to clean the edges with rubbing alcohol and then painted the exposed metal with a rust inhibitor (I’d be interested to try this, too). I allowed this to dry overnight before continuing the installation process, taping a small garbage bag over the hole to keep bugs and leaves out of the van.
Butyl Tape
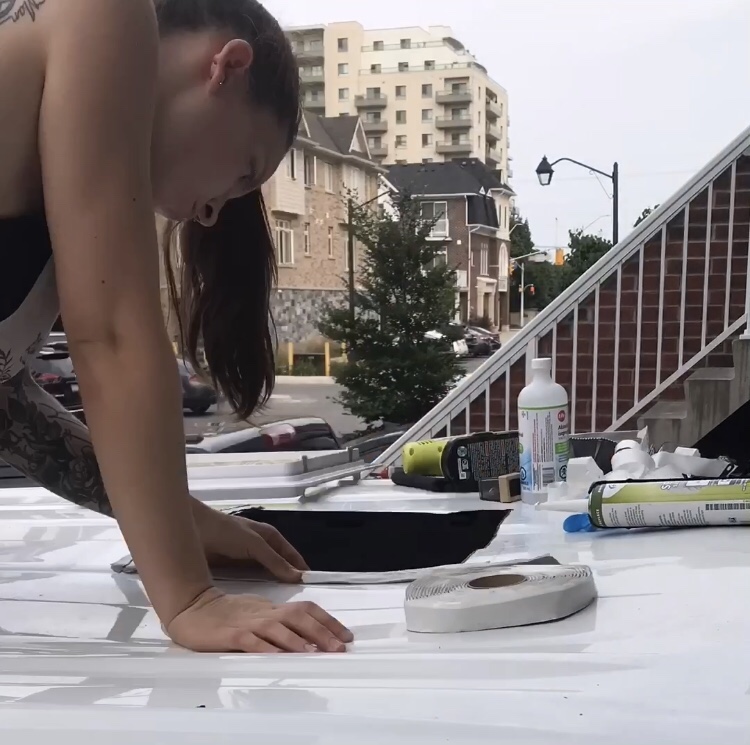
The next day I began by cleaning a two inch perimeter around the hole with rubbing alcohol. Once clean I started laying down butyl tape. This stuff is a great waterproof rubber adhesive that is thick so I could layer it in order to level the centre ridge that dips below the others. I used a few extra layers of butyl tape on the lower ridge and then covered all ridges with another layer to create a flat surface on which to put the flange.
After placing the flange into the hole (metal clips on the sides) and onto the butyl tape I carefully trimmed any excess butyl tape from around the flange’s edges (making sure not to scratch the roof).
Flange Pilot Holes
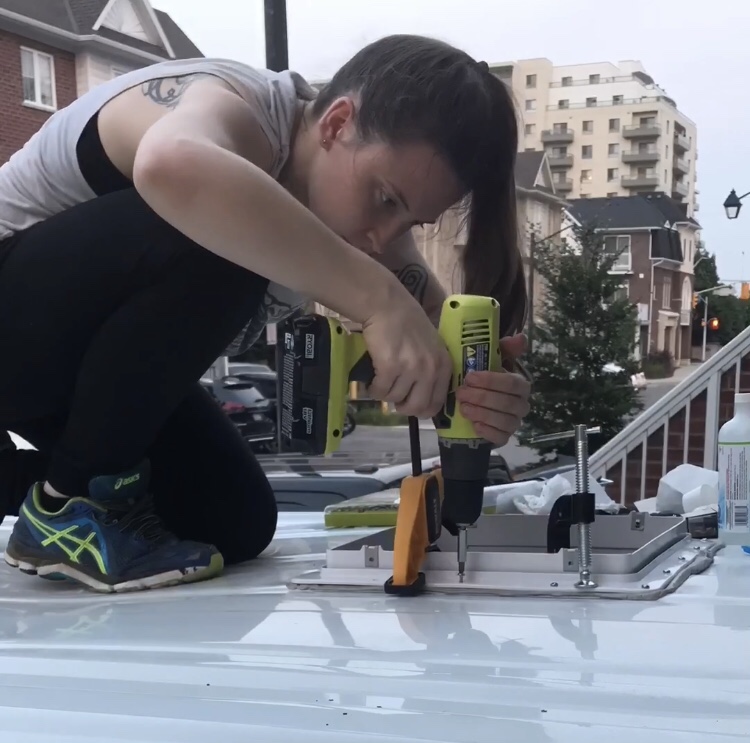
Next up was drilling 16 pilot holes through the flange holes and roof. I used a drill bit the same size as the threads of the screws provided with the fan – so technically I drilled clearance holes. If I had used a drill bit the size of the screw shank this would have made a pilot hole because the threads would still bite into the metal (don’t mind my newbie musings – I’ve learned so much on this build!) . But I did wonder if the threads really would have threaded into the metal since it was so damn thin… There are pros and cons to both pilot and clearance holes (here’s a good article).
Drive Screws And Seal
Once complete I clamped the wooden frame I’d made previously to the inside of the van roof and flange. Time to put in the screws! This was easy and fun. I made sure not to screw them in too tightly, which could stress the screws as well as make them lose their bite in the wood, push the flange down, possibly stressing the plastic, pushing out the butyl tape beneath, and bending in the roof’s metal edges where the ridge naturally created a small space between the metal and wood.
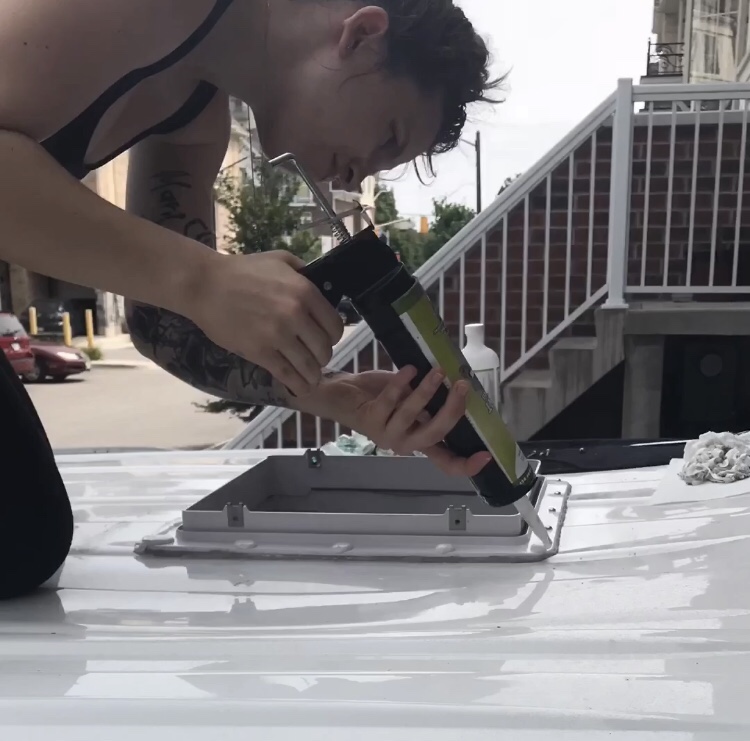
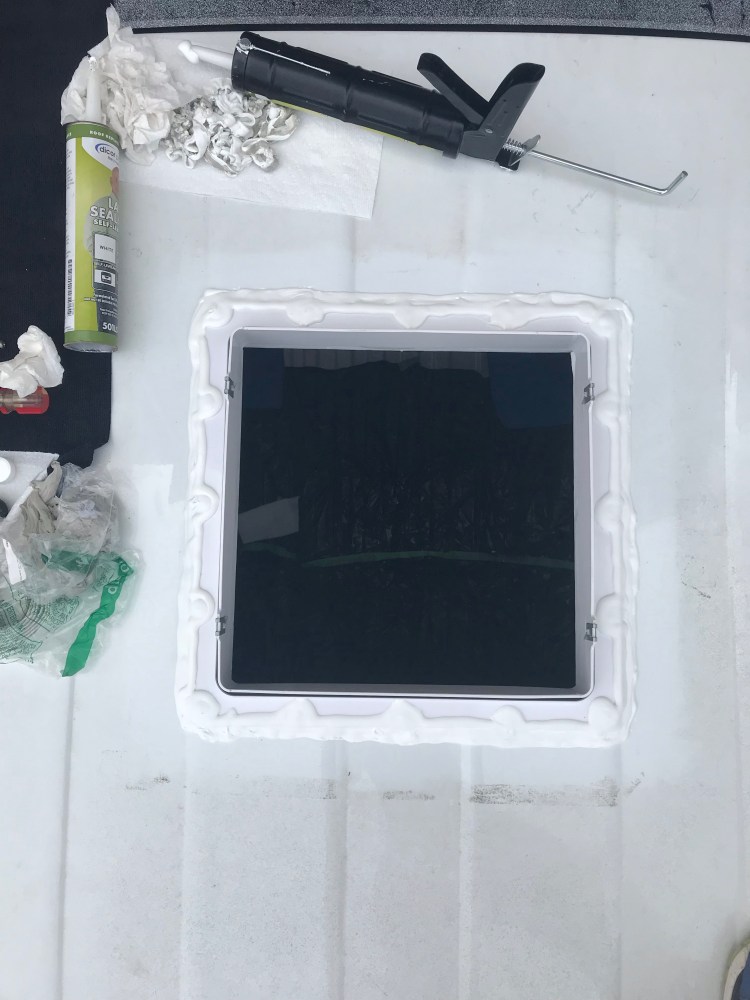
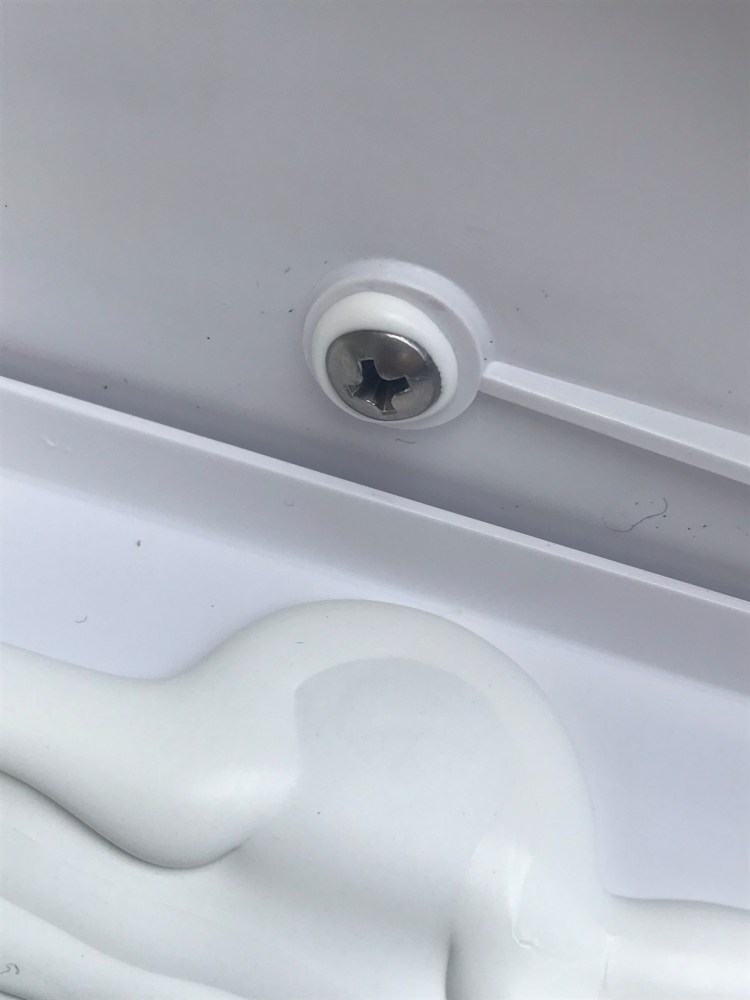
My favourite part of the install was applying the Dicor Self-Levelling Lap Sealant around the flange and screw heads. I don’t know why, it was just highly satisfying.
Attach Fan
Now I could place the actual fan into the hole and flange! Making sure the wires were tucked in and the vent was facing the back of the van, I lowered it. At first I had some difficulty when it came to screwing the fan into the flange. The four metal clips on the flange with holes that the screws were to secure into weren’t quite lined up with the holes in the fan. It was a matter of adjusting the metal clips on the flange, pulling them up a little (but not too much or it could compromise the seal at the base of the fan), that fixed the problem here.
The MaxxFan instructions don’t mention this and it might not have been necessary, but I took the liberty of putting dab of sealant on these screw threads to create a watertight seal here as well.

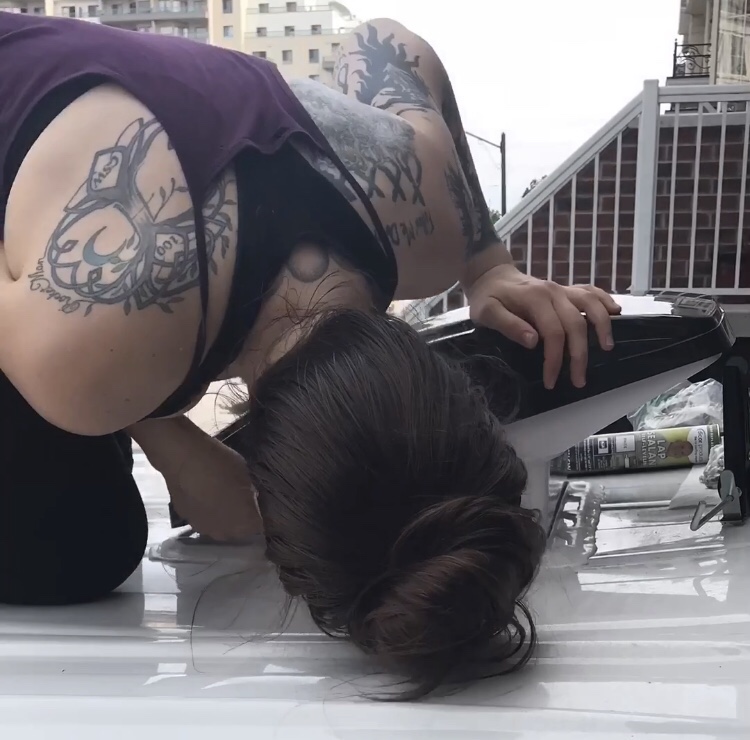
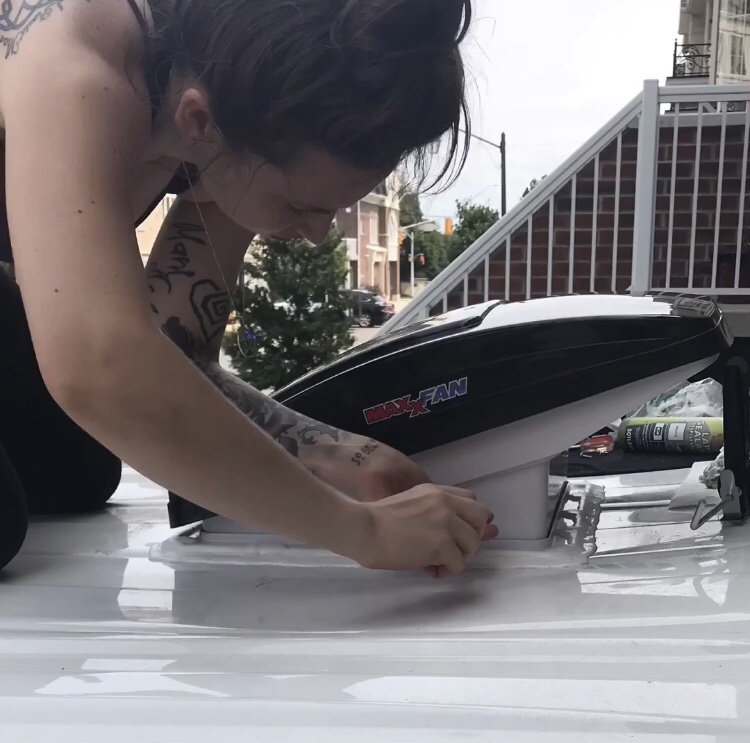
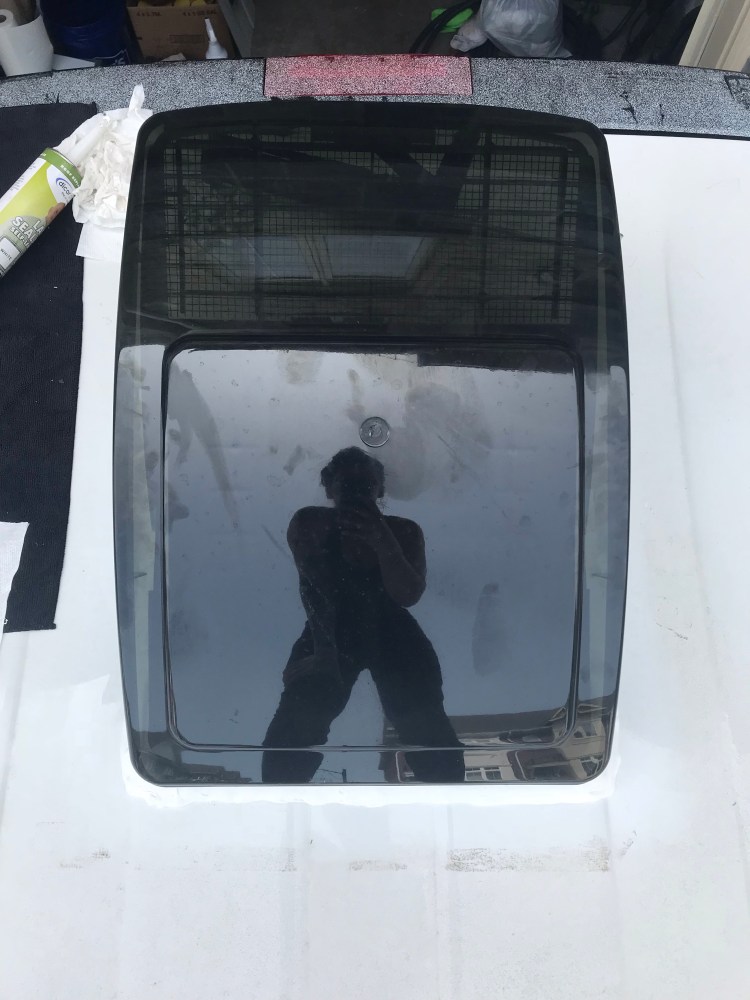
Ta Da! Fan installation complete!!
Well, almost…
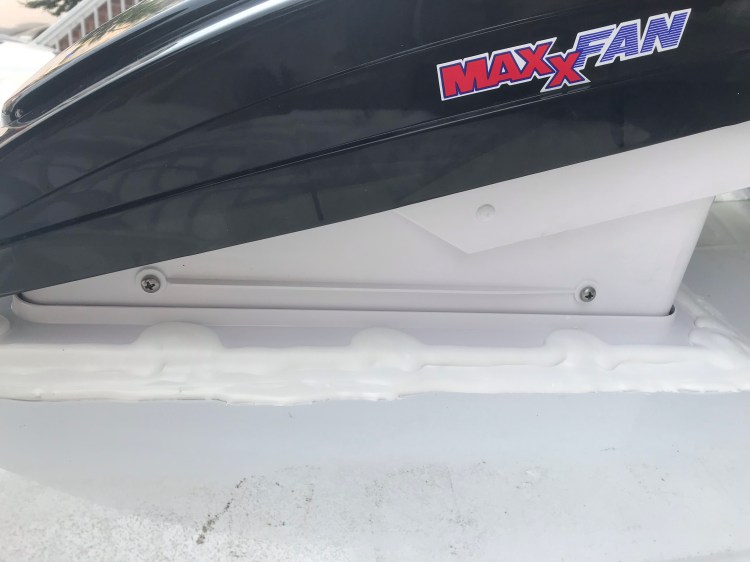
Remember how I said my roof bends? Well one side seemed to bend more than the other and it decided to bend inward after the installation. This meant that the fan looked lopsided on my roof and I wondered if rain would pool here since a lower ridge lined the sides of the fan.
Improvising: Fan Supports
This is where my idea about making supports for inside the van and under the wooden frame came in. I got an 8 foot / one inch aluminum (light weight) angle bar and cut it into the appropriate lengths to span the distance between the two ceiling ribs that bordered the fan. I had to make some creative cuts to get these supports to fit just right.
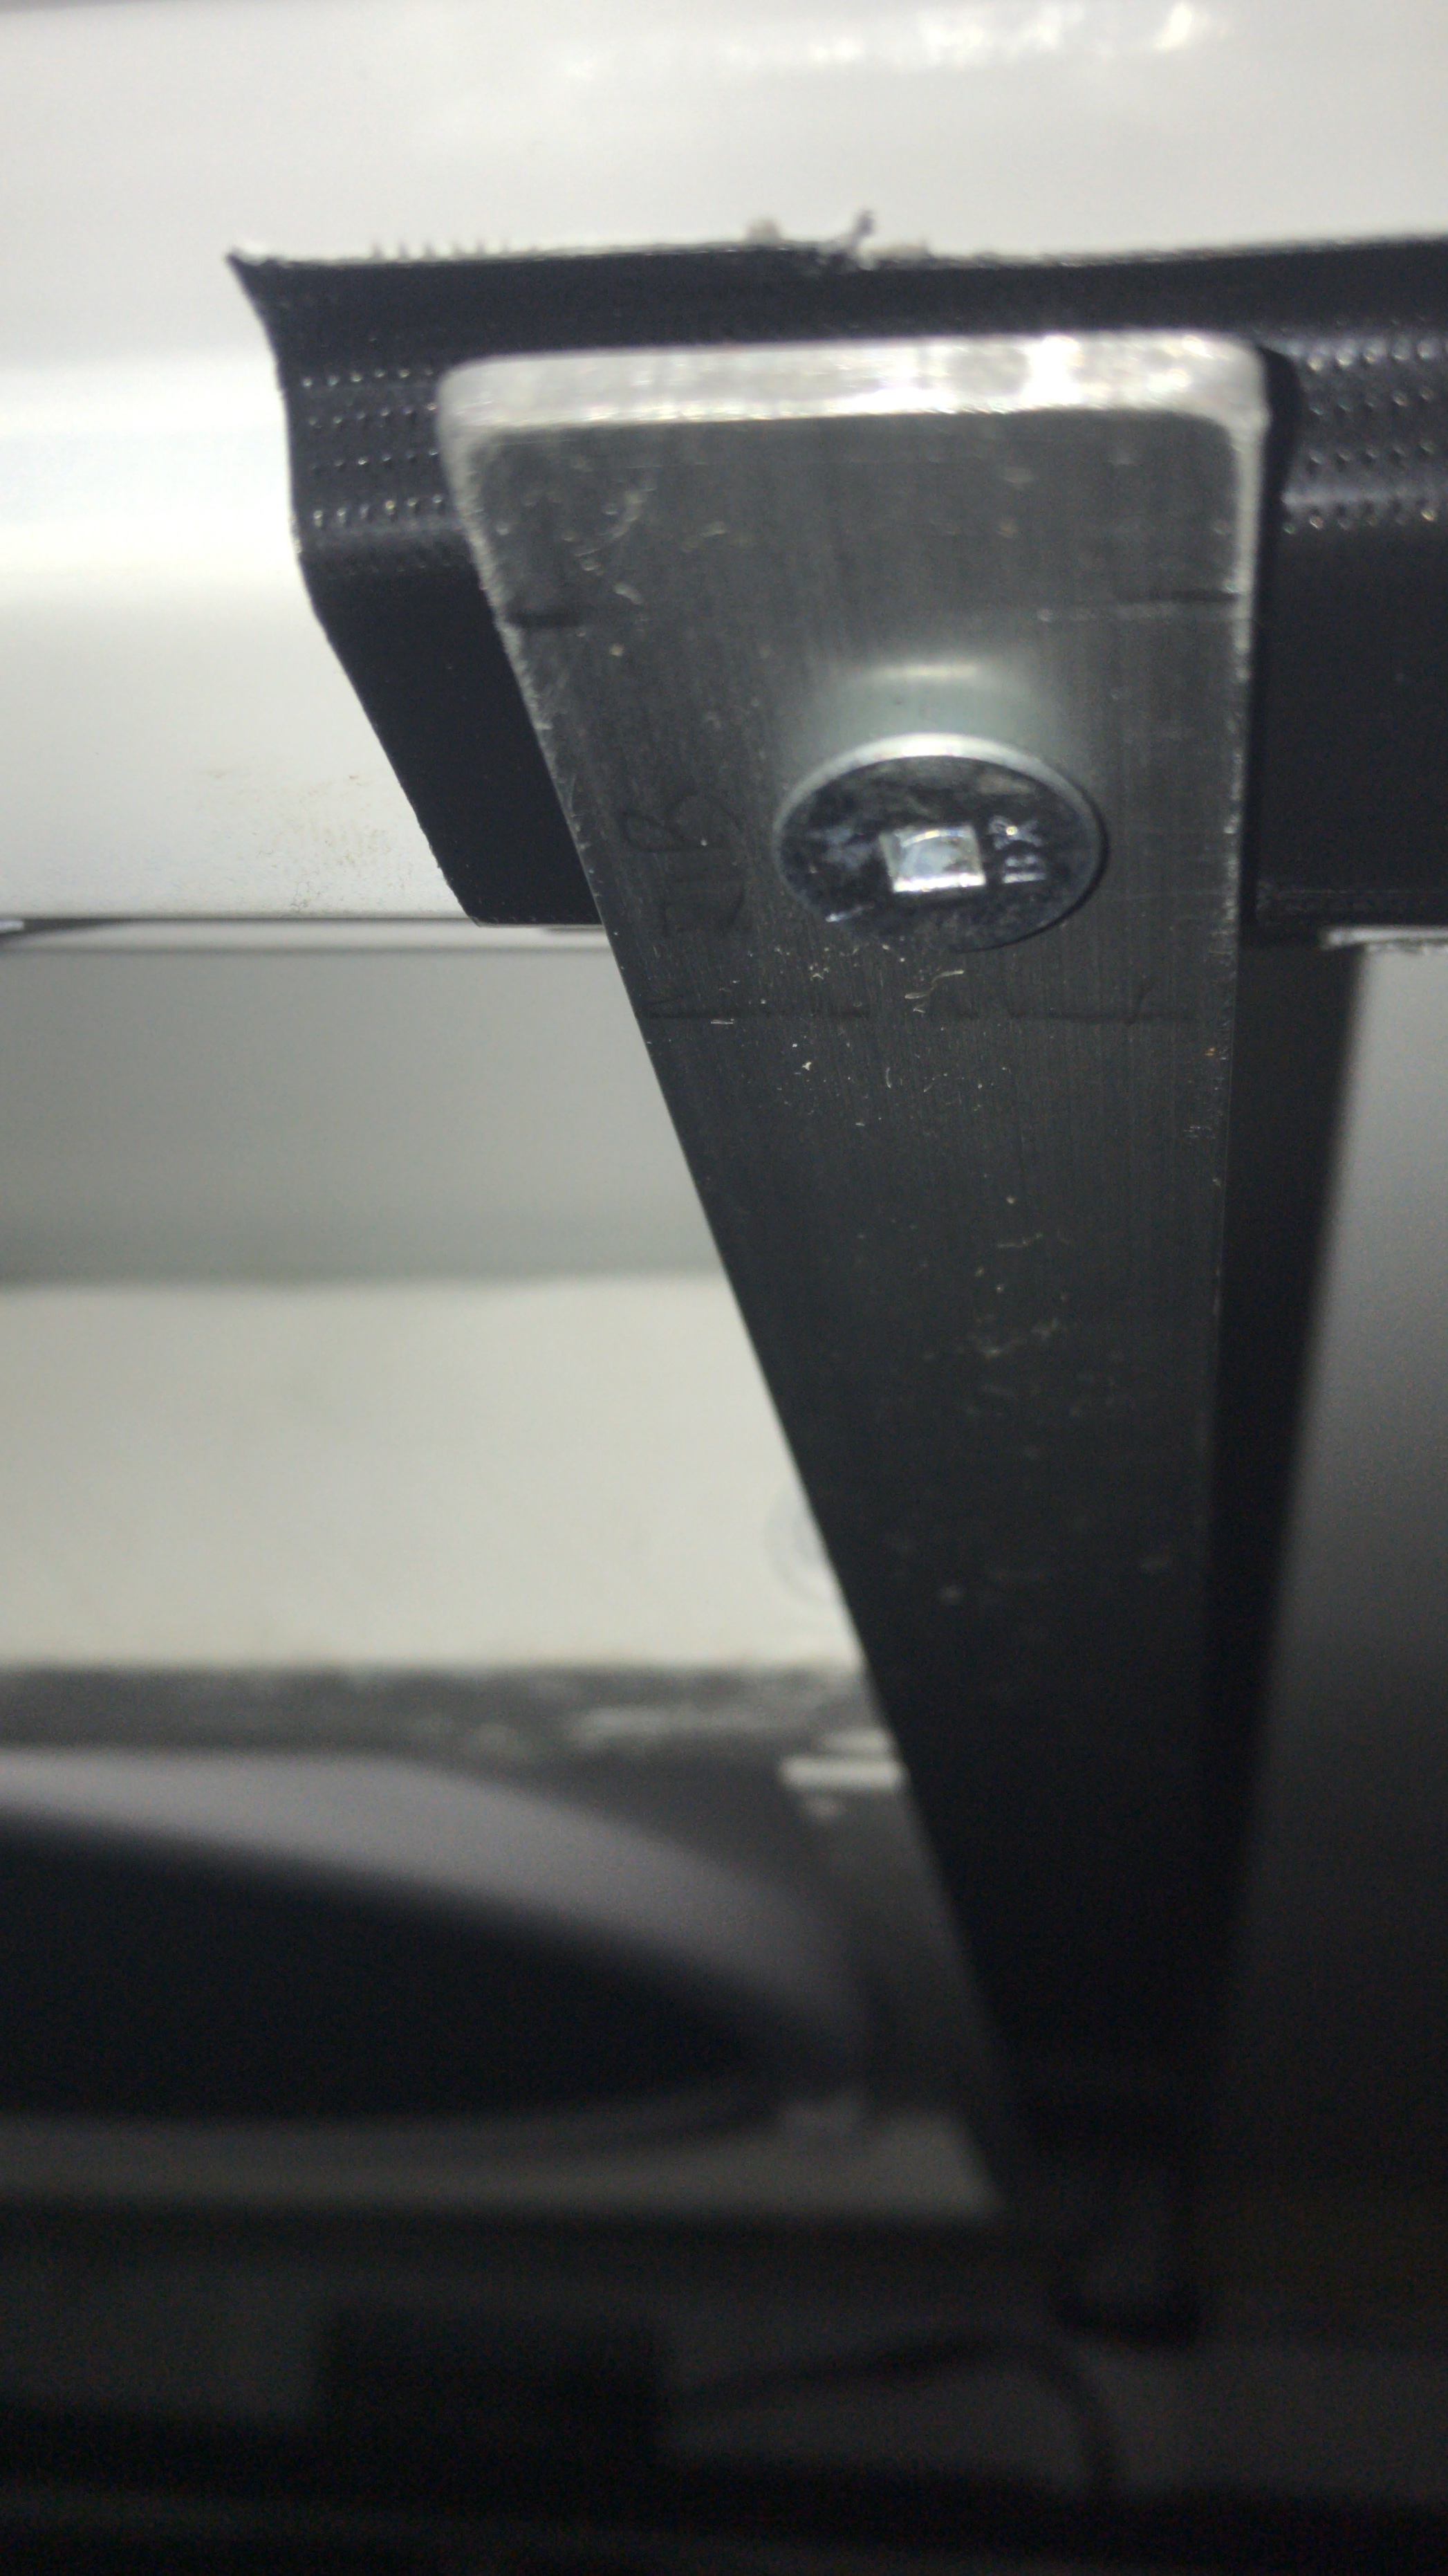
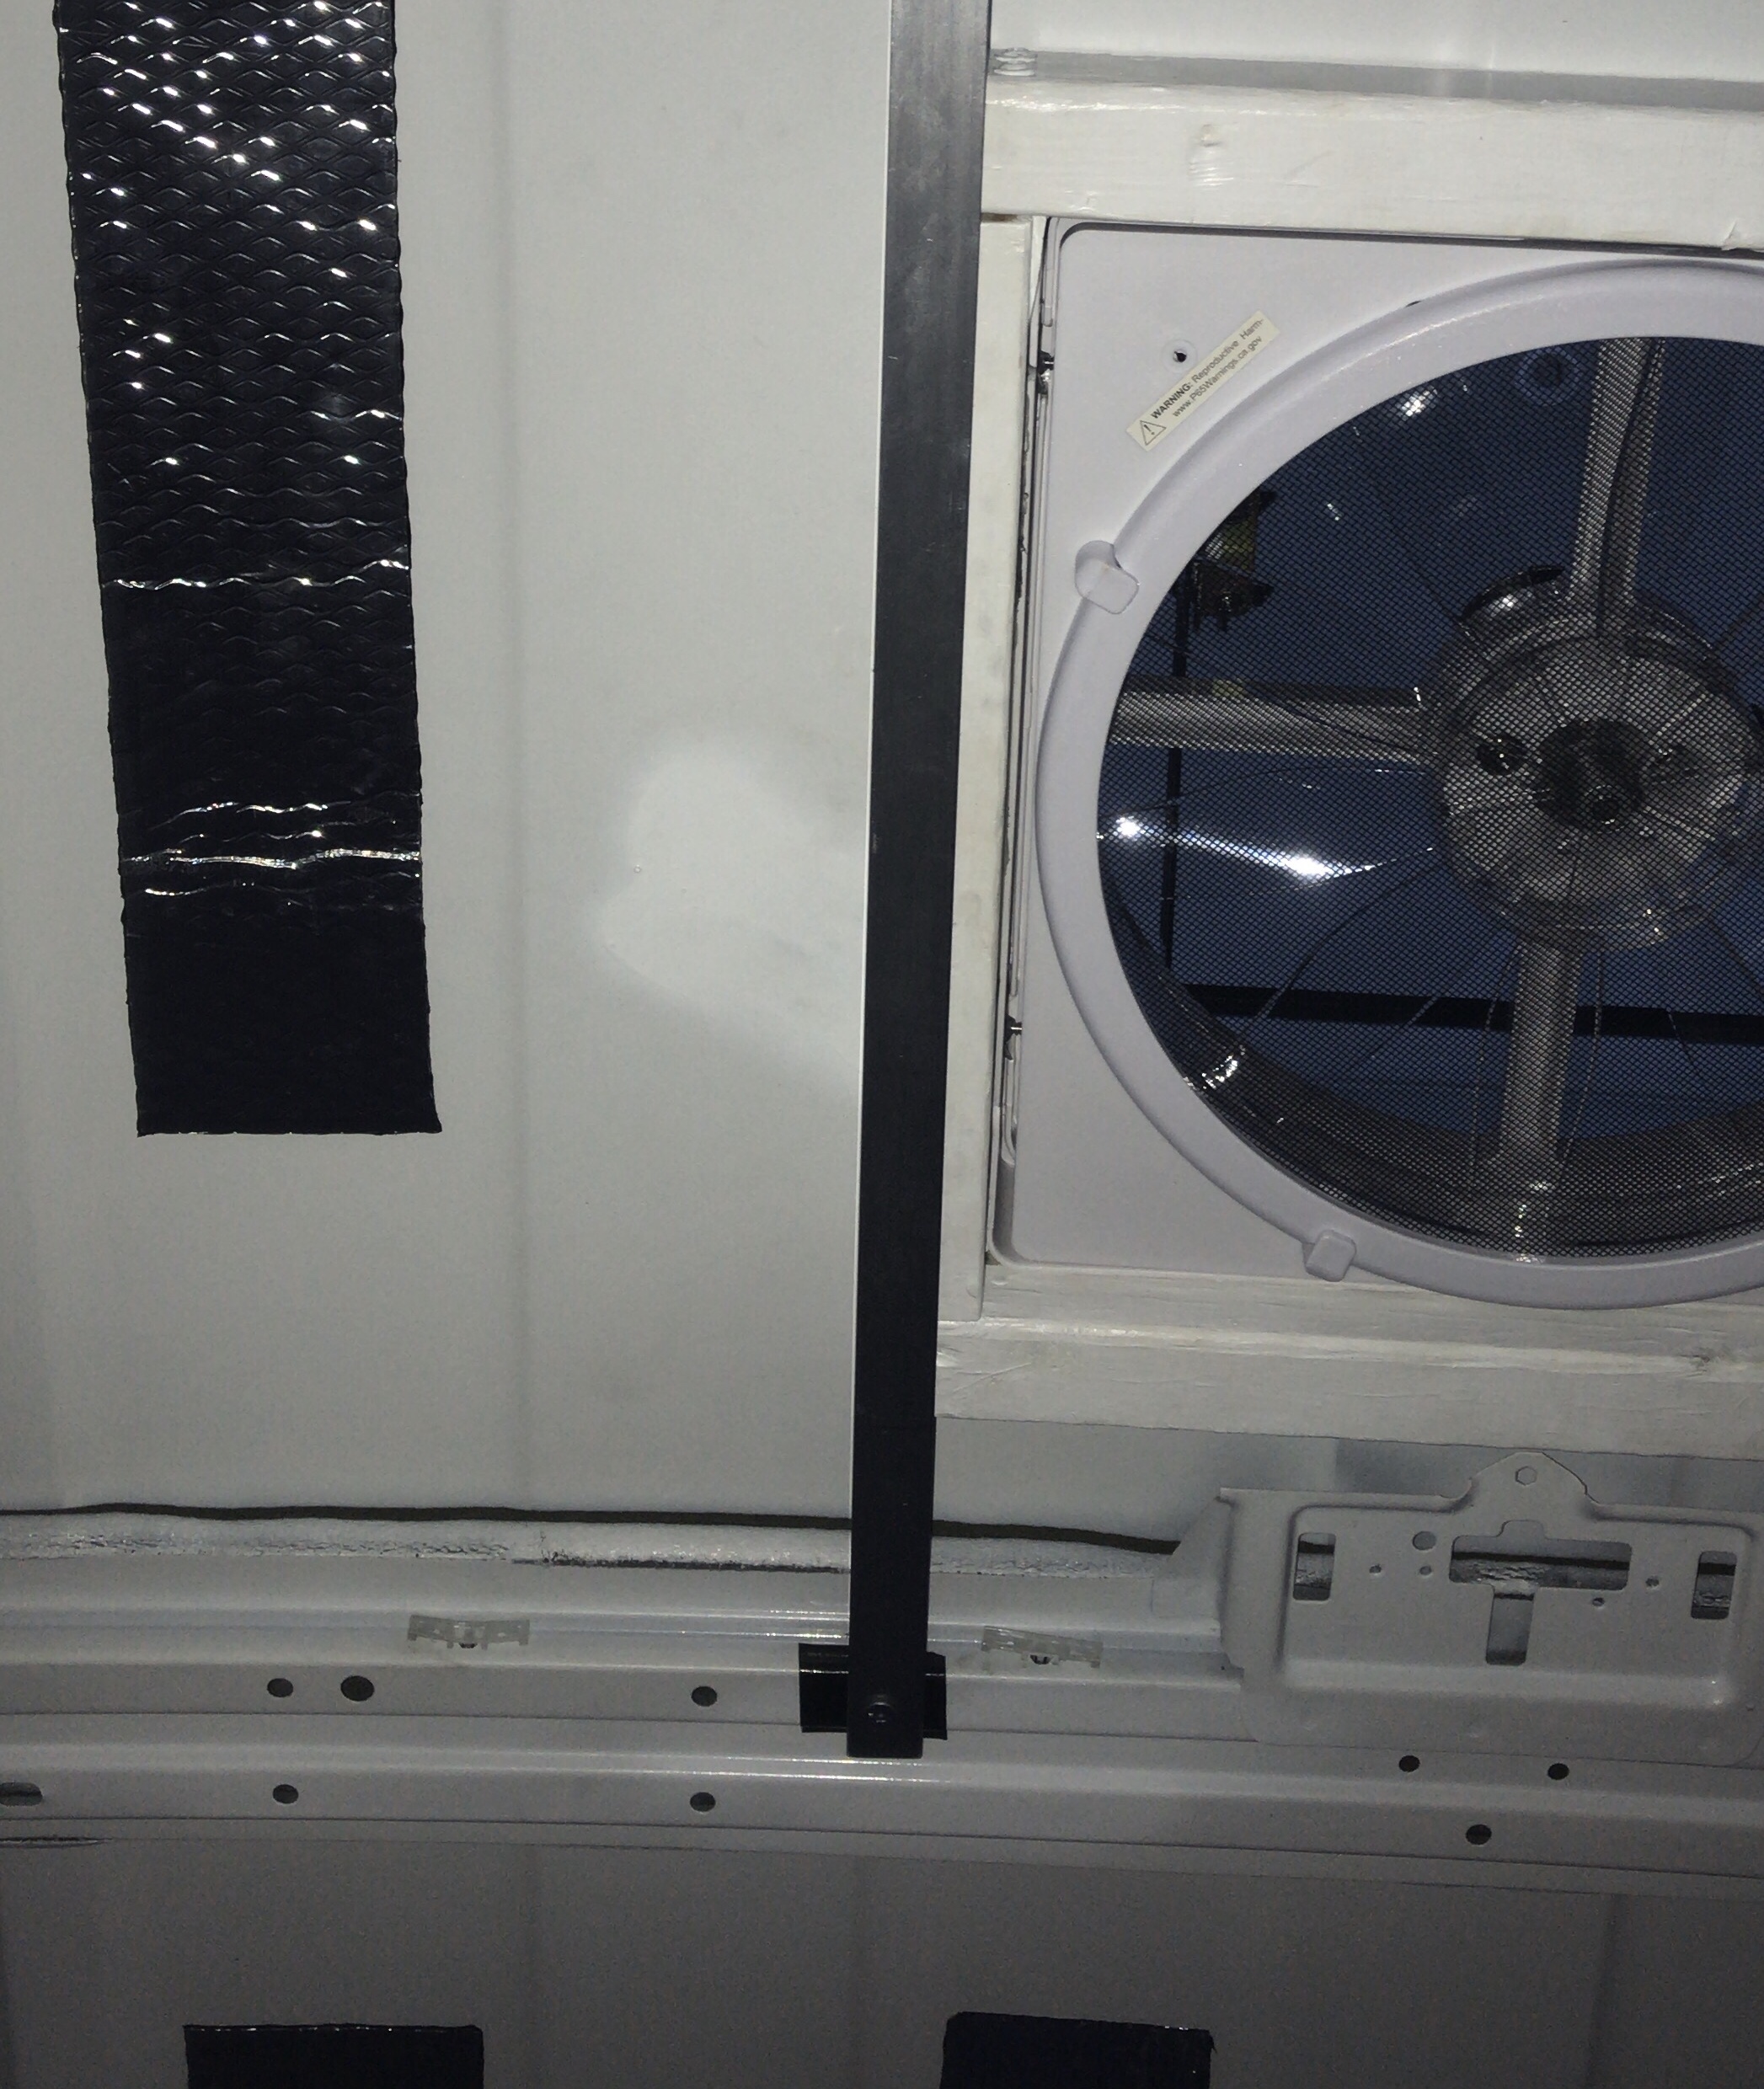
Since the two sides of the fan were not perfectly level, it meant that the supports did not line up perfectly. On one corner I needed to use a small piece of plywood to fill the gap between the support and the rib (it didn’t make sense to push the roof up here as it seemed like it might strain the roof and the support). I made clearance holes in the angle bars and pilot holes in the van ribs and used self-tapping teks metal to metal screws (I know I could have skipped the pilot hole step with these screws but chose to do it anyway as my mind liked the idea of it giving the threads a more controlled bite in the metal – this could be completely wrong but I went with it).
Now I have more support for my fan, a more stable roof, and the fan is more level than it was before, with the major dip lifted so that rain water does not pool as much!
The only thing left to do is install the interior garnish trim ring of the fan once my ceiling is up. I haven’t decided if I want to go the extra mile and put Eternabond tape over the dicor once it is 100% cured (30 days) for even more peace of mind regarding leaks (Eternabond is considered permanent, which is why I am hesitant to use it. Though you can remove it by applying heat, but it would likely be a pain. Bob of Cheap RV Living used it in his fan installation).
Phew! Having completed what I expect to be the most stressful part of the build I feel like a weight has been lifted. I learned a lot and feel more confident going into the rest of the build.
I’ll leave you with what feels like is becoming my theme song surrounding the build and my foray into vanlife. I can just hear some people addressing my project with a, “young lady, you’re scaring me” …
Until next time,
Kat
Copyright © Chronic X-Roads 2020

One thought on “Van Build #3: Fan Installation”