*This post was originally written October 1, 2018
_______________________________
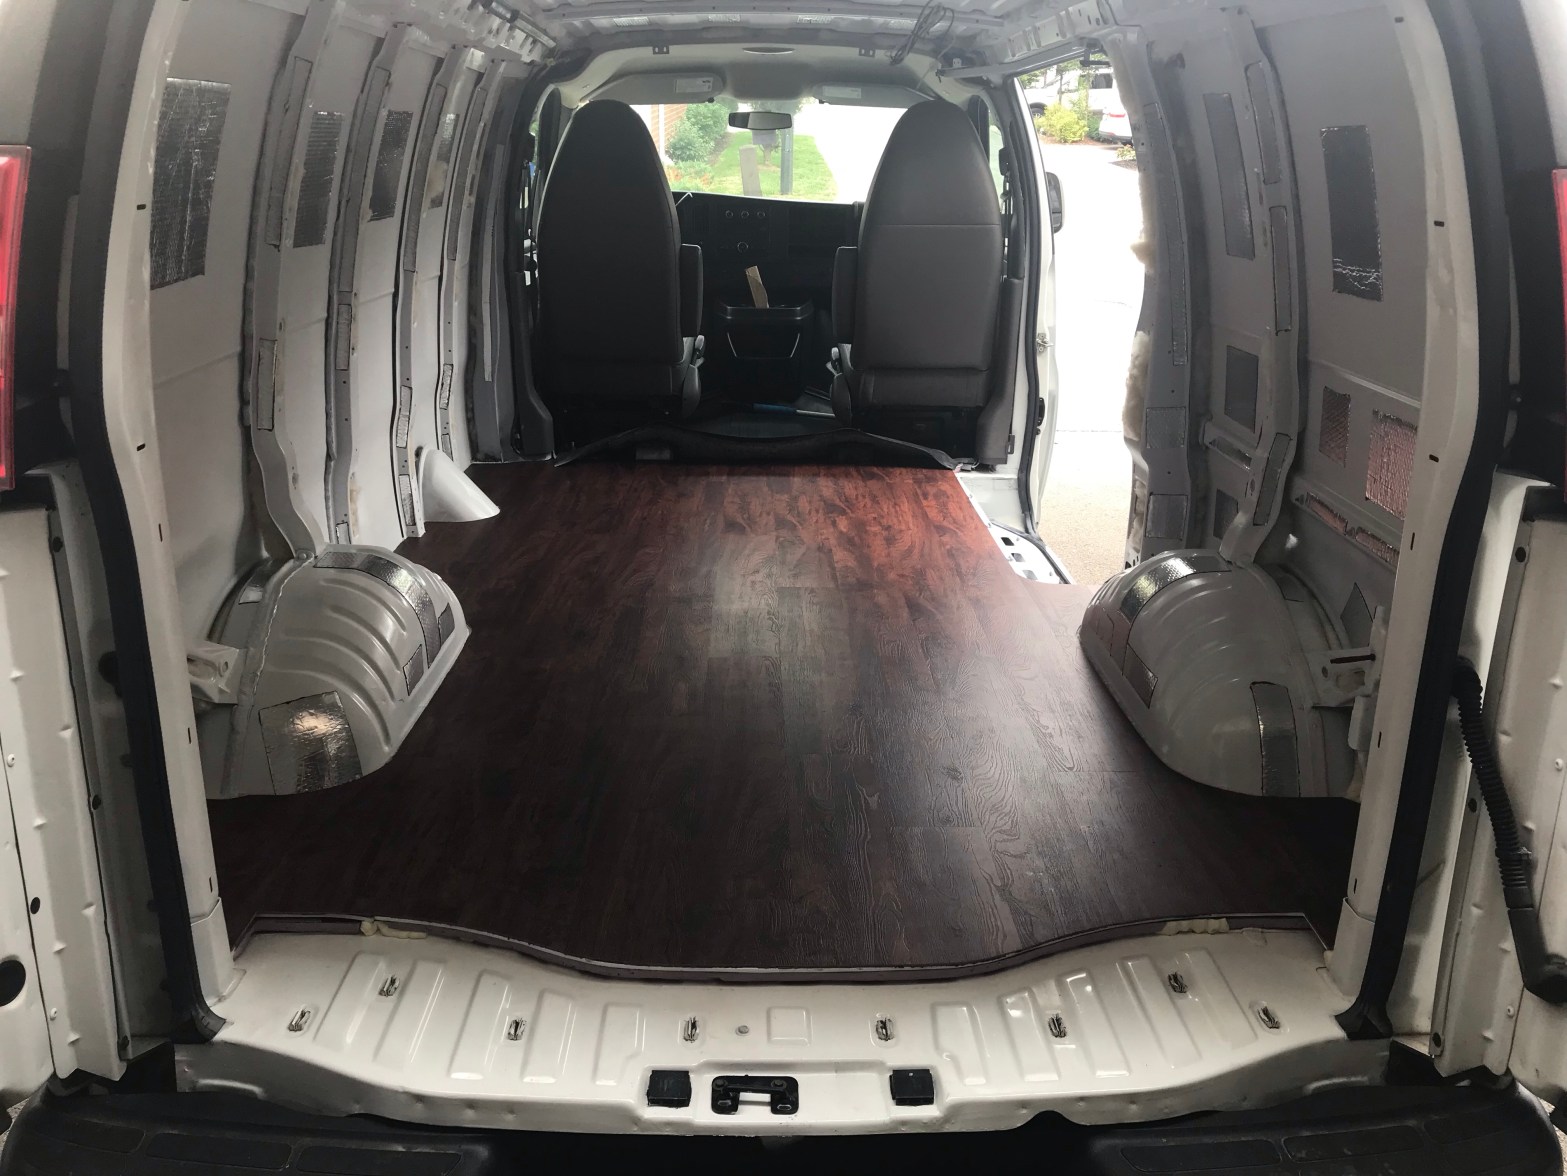
Putting in the floor was a long but rewarding step in the van build. It is quite literally the foundation. There were several considerations that I put a lot of thought and research into. I’ll talk about these as I describe each part of the process.
Templates
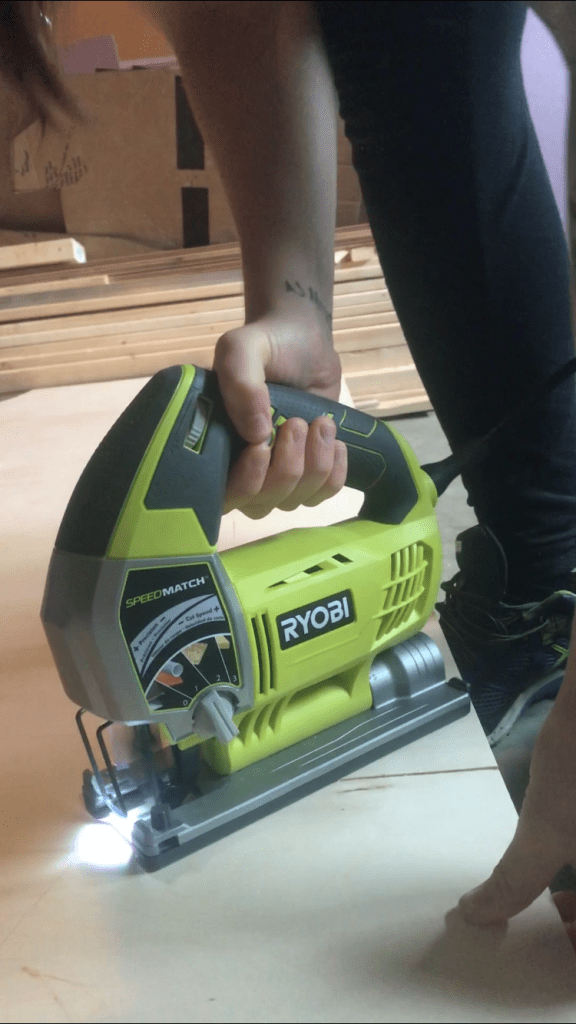
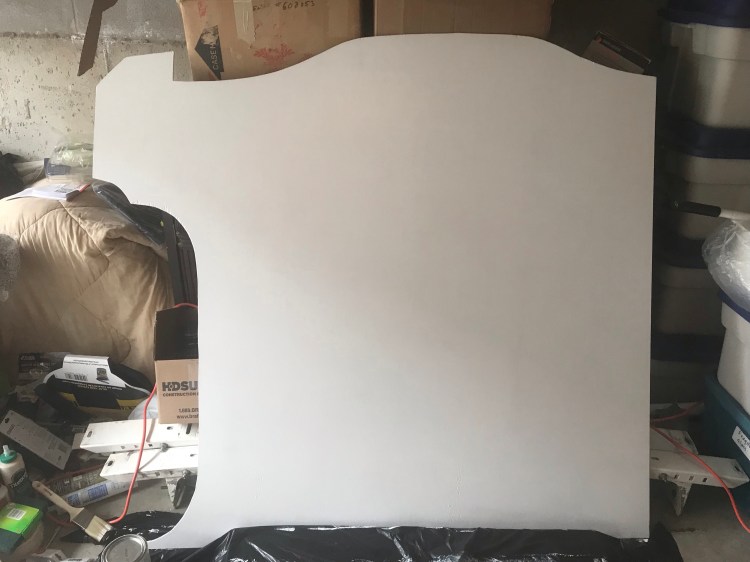
The very first thing to do was create templates to go around the wheel wells, fuel pipe, ribs, and curved walls of a Chevy Express.
The template phase is not a difficult one, but it is fairly time consuming. I understand why many van lifers aren’t a fan! My patience was tried, but I turned on some good music or a good podcast (currently listening to And That’s Why We Drink) and got to work.

I probably used the slowest method for making templates, though I felt it would be most accurate (I’m a perfectionist and this project is teaching me the pros and cons to that). I had some left over moving boxes and cut them into quarters. I placed the straight edges against the wall anomalies (e.g., wheel well), took a tape measure, and measured at various points the “mirrored” distance from edge of cardboard to wall, etc. then applied those to the cardboard and connected the dots to create my cut lines. In retrospect it’s definitely the more complicated way! Oh well.
I’ve seen others eyeball their floor components and gradually perfect them as they go. I’ve also seen people who use a sort of compass or scribing tool to trace where they want to cut (or if you’re really DIY make your own scribing tool). Whatever method you choose, there will be fine tuning along the way.
I planned to use my cardboard templates for each layer of my floor: insulation, subfloor, and vinyl.
Floor Insulation
This was one of those things I was talking about that I put a lot of thought into. But I am learning more and more that there is often no one right way of doing things (though there can be not so good ways) and you can spend hours debating – you just have to make a choice and stick with it and trust that you did the research – or learn from your decisions.
Ultimately, I went with Extruded Polystyrene (XPS) Rigid Foamboard Insulation (R-5.0 per inch). XPS has a high compression value, which is beneficial in a floor as it contributes to a sturdy surface – especially with a corrugated surface. It does not absorb moisture and is not affected adversely by it. The downside to XPS being that it will off gas and the hydrofluorocarbons (HFCs) used have a higher global warming potential (GWP) than other rigid foam insulations.
I was temporarily considering expanded polystyrene (EPS; R-4.0 per inch) when I saw someone using it because it compressed more easily. Their thought process was that it would compress on top of the raised ridges in the van’s corrugated floor and fill in the lower ridges. This meant less height taken away in the van, and for me filling in those lower ridges would be a big plus since I still wonder if those pockets of air could create space for condensation and water to become trapped, creating a potential for rust or mold (If anyone has experience with this or info re: moisture and air gaps in a sealed van floor please comment below!). I ended up deciding against EPS due to its moisture permeability and degradation under constant vibration – which would not be good in a van.
The other rigid foam option is polyisocyanurate (polyiso), which has a higher R-value (R-6.0 per inch) and is better for the environment. The kicker is that polyiso actually performs worse in cold weather! It does not have as much compressive strength either.
You can find more info on insulation choices from Gnomad Home and Cheap RV Living.
I’ll also note that I chose to do the full floor first for a reason. I could have insulated the whole van before putting in the subfloor and vinyl, arguably decreasing the material used on the floor. But I’ve been factoring in the possibility of moisture and condensation. I chose not to use a vapour barrier as the climate I am in will change with my travels and based on my research prefer to rely on ventilation. Especially when I think about the possibility of messing up a barrier and then trapping the moisture behind the walls…

So my theory is that in the event of any moisture condensing behind the walls, if my floor extends to meet the van’s walls (as opposed to just meeting wall insulation or panels) then any moisture on the van’s walls will drip down onto the waterproof vinyl floor where it can evaporate or I’ll notice it and wipe it up. If the wall insulation or panelling had access to the van’s metal floor then water could get trapped under there and cause rust or mold. Hopefully that won’t be an issue with a fan installed, but I like to hope for the best and prepare for the worst.

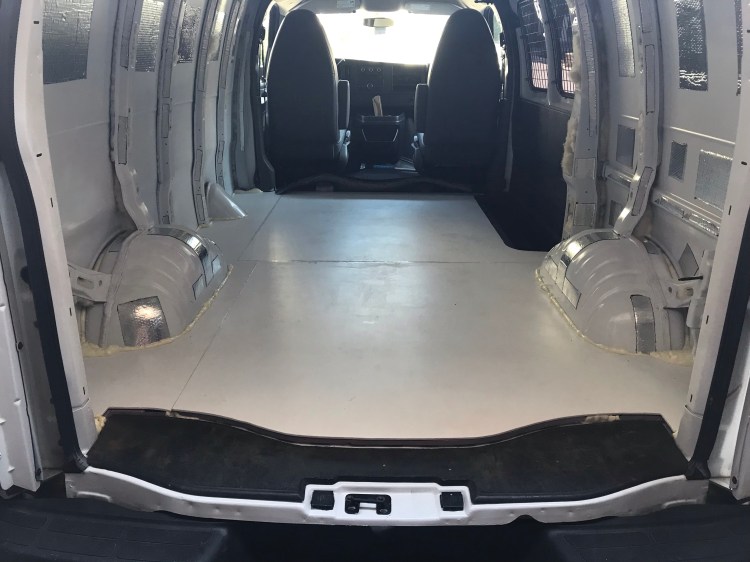
Once I settled on XPS and had my templates ready to go, I got to tracing and cutting! Two 2′ x 8′ 1/2″ XPS foam boards fit into the van themselves and once I had them placed I used their positions plus the templates to cut the remaining pieces. Since I had some screw heads sticking up on some of the raised van floor ridges, I also cut holes in the foam boards to fit around those.
Cutting XPS can be tricky without good technique – using a utility knife and sawing it will produce rough edges. Steady single strokes at a 45 degree angle is the best bet for a clean cut. I also came across the suggestion of using a hot wire foam cutter after I’d already completed this step – something worth a google search (it’s pretty neat to watch it cut)!
I aimed to have all of the foam to foam pieces fit tightly at their seams and was happy with a 1/8″ – 1/4″ space at the outside edges of foam to metal.

In terms of adhering the XPS insulation to the van floor I was initially going to use 3M Hi-Strength 90 Spray Adhesive. But here’s the issue: it eats rigid foam! I had seen many other van lifers use 3M 90 and felt that it was a good quality product (which I have no doubt that it is if you use it correctly). The label went on and on with its list of materials you can use it with, so I didn’t think twice about it not being compatible with foam insulation. And it didn’t take long for me to notice the reaction once I started to spray – the adhesive sizzled and my foam insulation disappeared before my eyes! I learned that the high acetone content in this (and most) spray adhesive(s) is the culprit. I did have to pull up some XPS from the van floor, but it wasn’t too hard considering the foam’s deterioration, meaning it hadn’t adhered well. My beautiful clean floor now had adhesive and pink foam residue – but since I would be gluing again I didn’t bother to clean that off.
With some research (and this awesome video) I narrowed my options down to Gorilla Construction Adhesive or 3M 78 – a spray adhesive specially formulated for use with polystyrene. Fun fact – around 2002 3M changed their spray adhesive formulas to have a much higher acetone content, after which people could no longer use most of these on foam board.
Armed with experience and knowledge I moved forward with the Gorilla construction adhesive, using it relatively sparingly. This time I did a test between pieces of foam using the construction adhesive (and Great Stuff Gaps And Cracks for comparison). Gorilla was a much stronger hold (I couldn’t get the pieces apart!) and less messy. The Great Stuff pushed the foam pieces apart despite a light weight on them while drying and expanded beyond the edges.

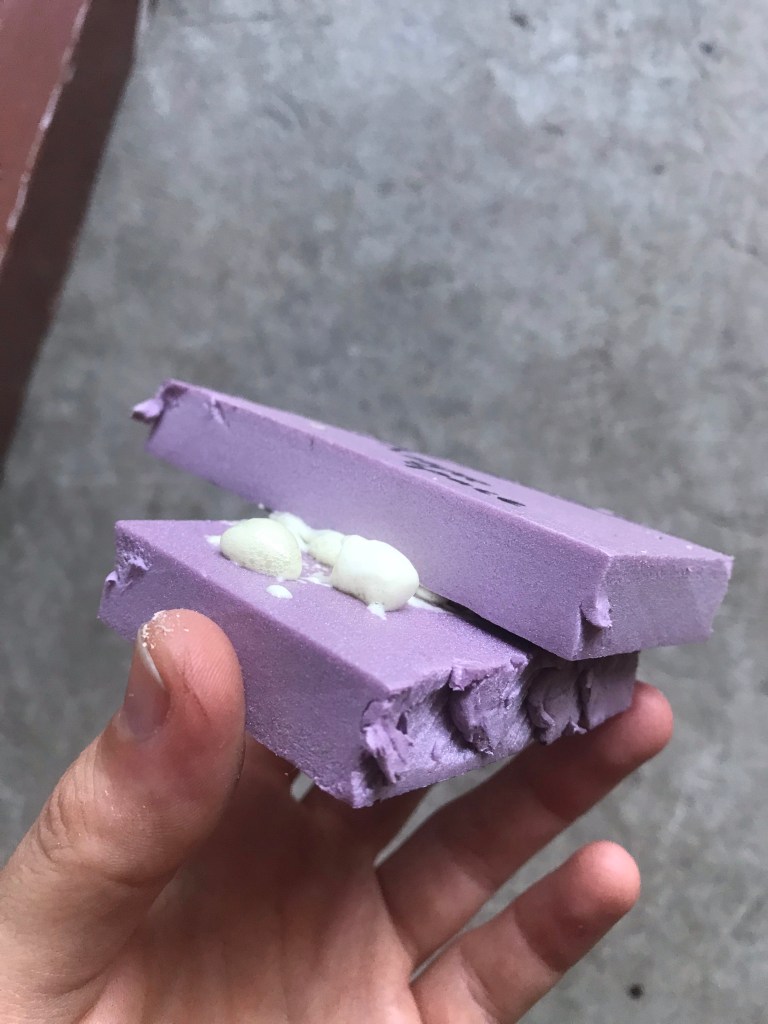
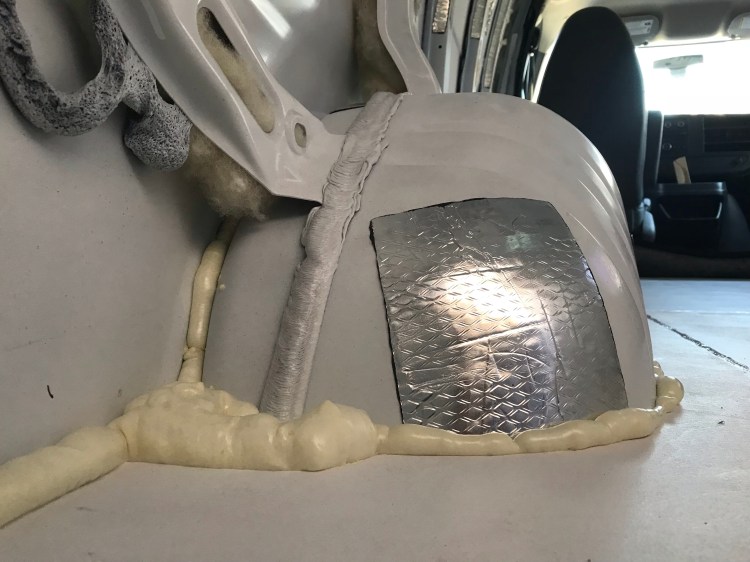
Before adhering anything, I also made some special foam pieces to put where there were no ridges in the van floor. I had noticed during the dry fit that wherever there were no raised ridges the rigid foamboard bent down under weight. To fix this and keep everything strong and level, I altered some 1/2″ XPS into 1/4″ pieces. I did another dry fit and everything felt much more sturdy.
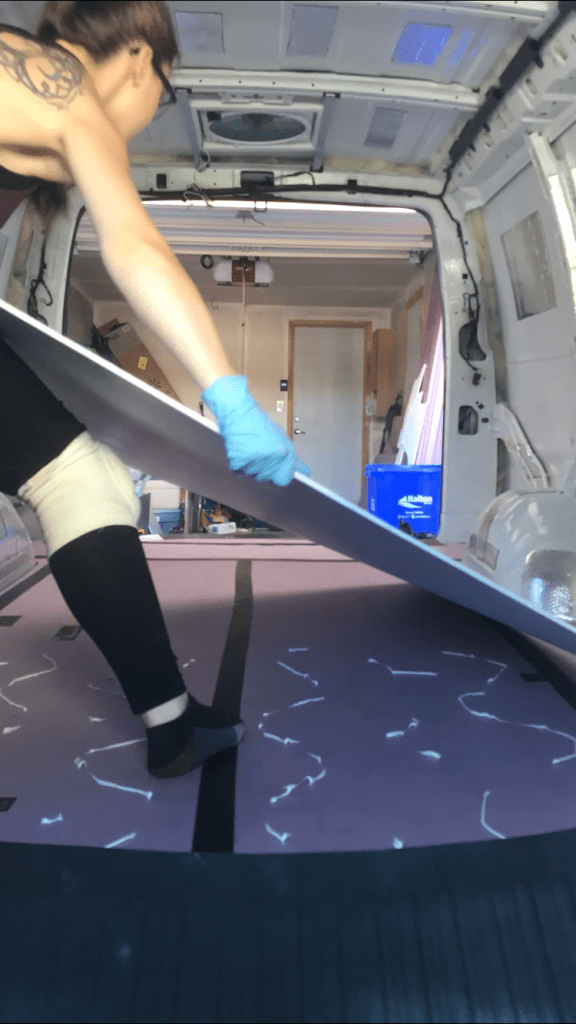
These pieces were glued down first and then I lay down the adhesive on the raised floor ridges, placed my XPS puzzle pieces down, and lay weights on top during the curing process. Once cured, I taped the inner seams between XPS pieces with Gorilla tape. I also used Gaps and Cracks to fill the holes in the foam board for the screw heads. It’s always a good idea to weigh down the flooring when applying Gaps and Cracks spray foam insulation as when it expands it can actually lift areas of the floor. I then trimmed the excess spray foam once it cured to make the whole floor level and Gorilla taped over the screw head hole areas.

Dry fit 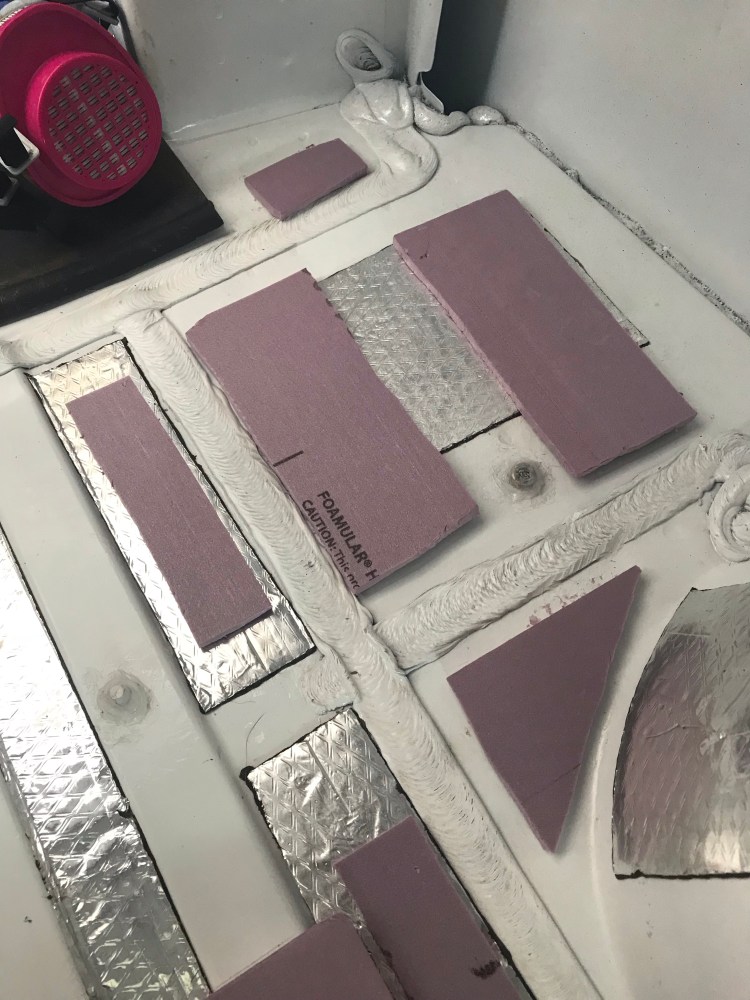
Fillers 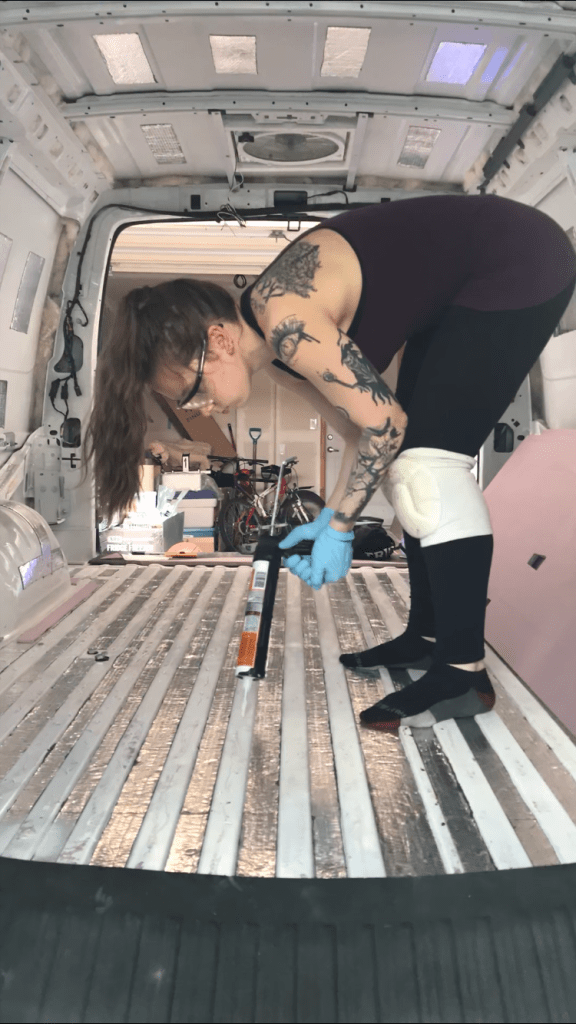
Applying adhesive 
Carefully laying down the insulation 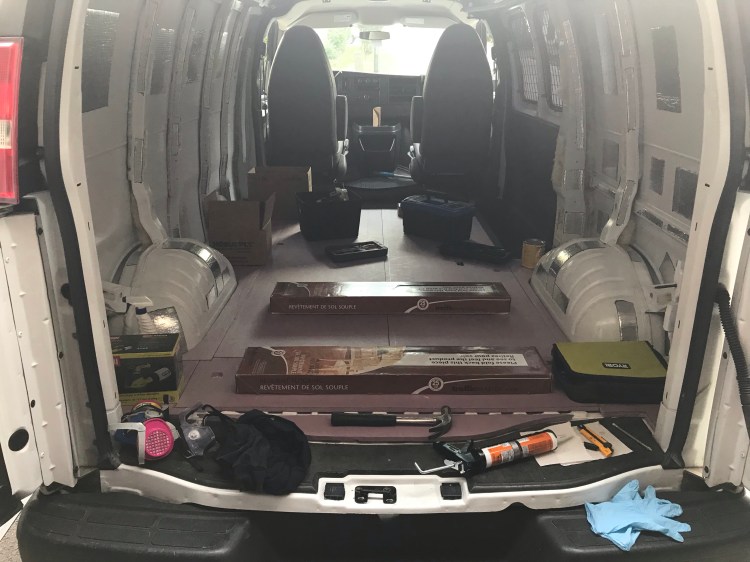
Weighing down while the adhesive cures 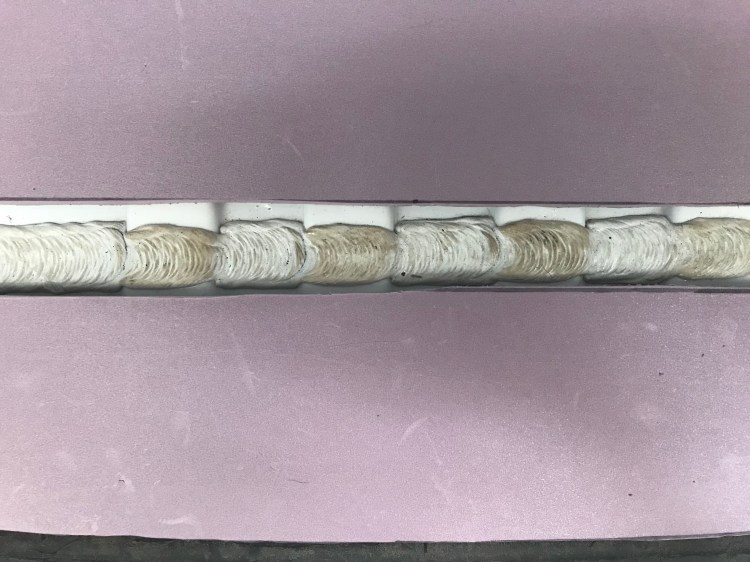
In order to keep the floor level I left space over odd parts of the van floor and later filled with spray foam 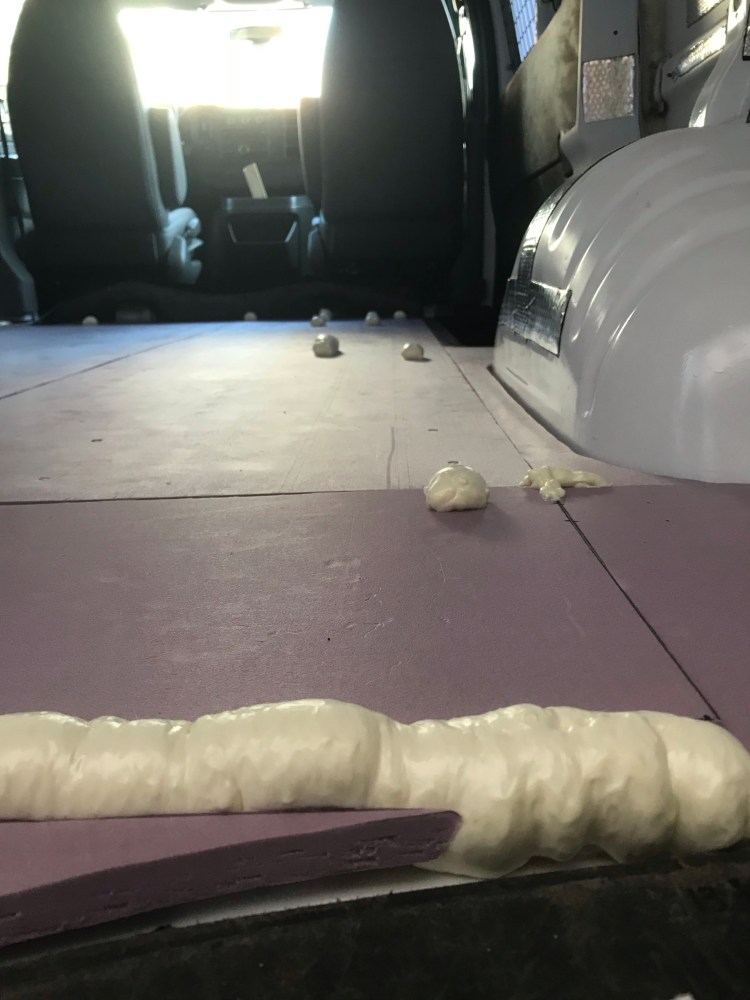
Gaps & Cracks at work 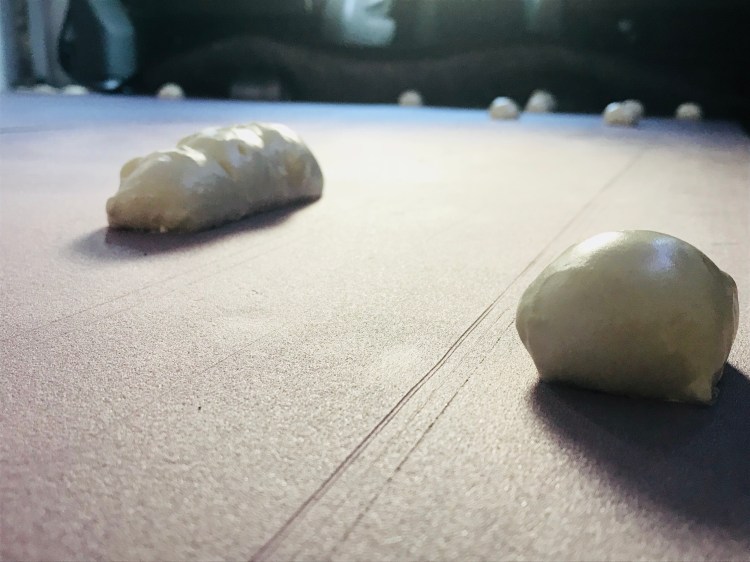
I trimmed the expanded Great Stuff and covered with Gorilla Tape 
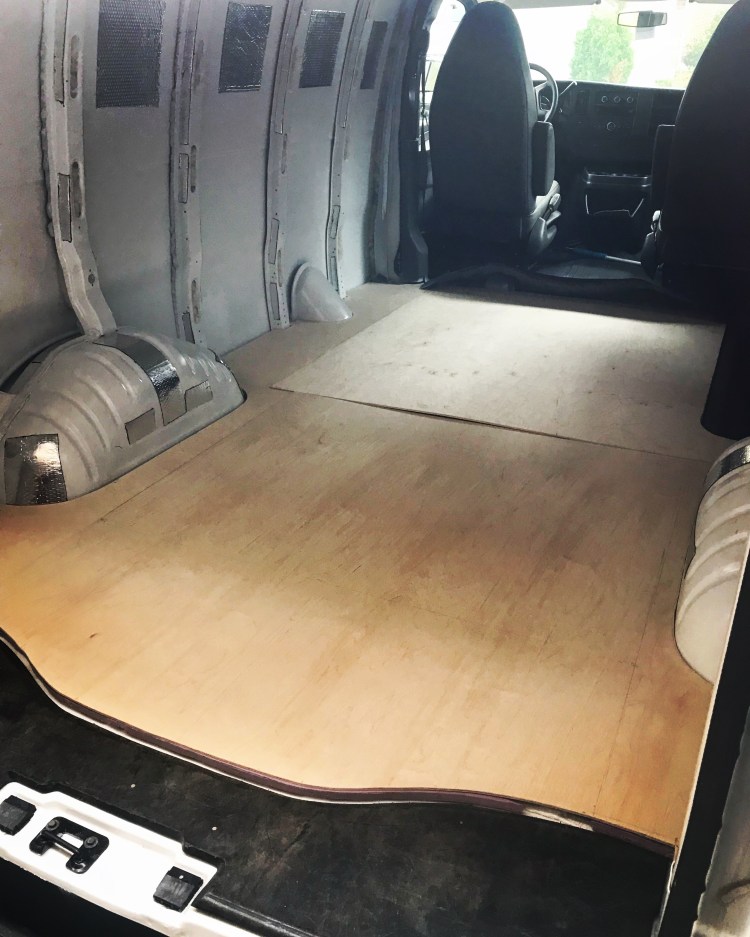
Finished floor insulation
Et voila! Floor insulation complete.
Subfloor
I chose to use 1/4″ birch plywood for my subfloor. Birch because it is a hard wood and 1/4″ because it would still provide a strong, flat surface, but would not take away too much from the height of the van. The usual suspects (hardware stores) didn’t carry birch so I went to a specialty wood distributor.
Just as with the insulation, I used my templates to trace my pieces of subfloor. I kept in mind to vary the seams of the insulation and plywood. I also planned out my pieces so that the subfloor seams would lie where there would be the least foot traffic. Factory edges formed the inner seams so that I would retain perfectly straight edges where each piece met. I then carefully used my jigsaw, with scrolling blade, to cut. I found it best to cut with the grain of the wood as much as possible in order to minimize split edges. I then sanded all cut edges of plywood and dry fit the pieces of subfloor in the van, making adjustments where necessary and ensuring I had at least a 1/8″ space at the edges for expansion.

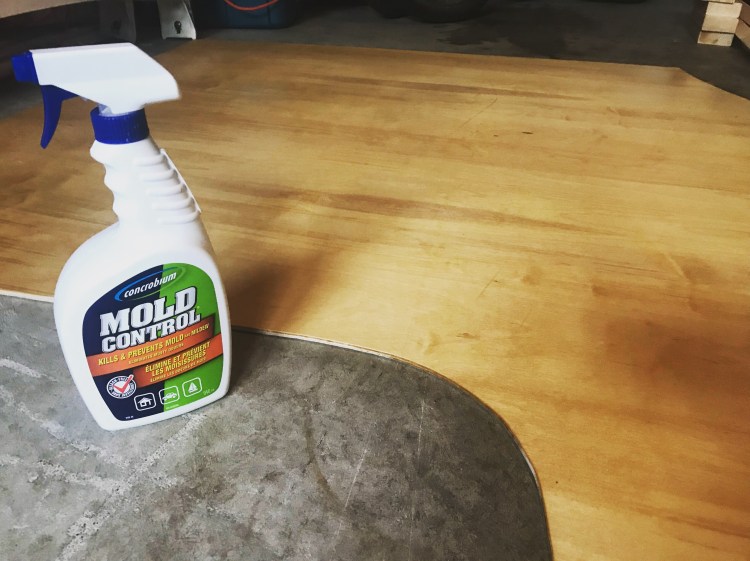
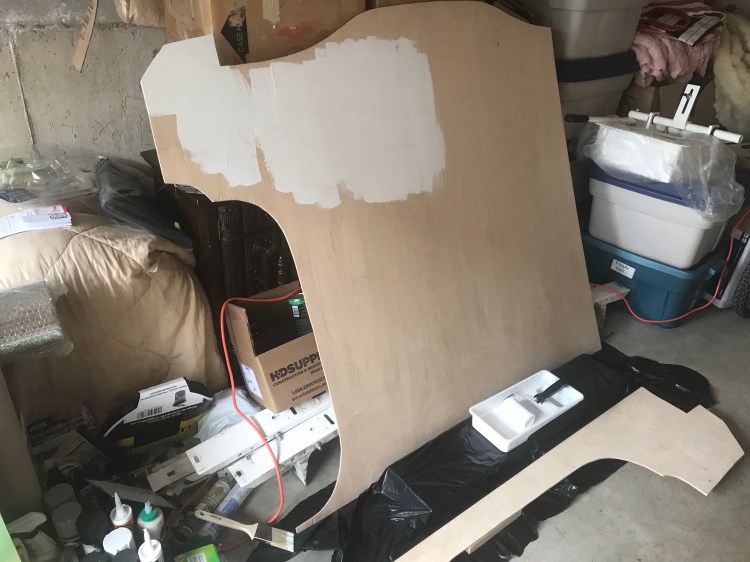
With mold being a concern for organic materials, especially those in dark confined spaces, I treated my subfloor to prevent any future mold. I got the idea to spray my subfloor with Concrobium Mold Control and then paint with a mold-proof paint from Gnomad Home. The process was pretty straightforward: I sprayed all subfloor puzzle pieces with the Concrobium, allowed it to dry for 24 hours, then painted all wood surfaces with the Zinsser Bulls Eye primer. I used two 946mL cans to paint all sides of wood meant for about 50sq/ft of floor space in the van (I did two coats, one right after the other).
After some drying time, I adhered the subfloor to the XPS insulation in the van, once again using Gorilla’s construction adhesive. A couple of the birch pieces were a little warped so I weighed them down heavily during the curing phase. I used flexible, waterproof silicone sealant between all of the wood seams. Then filled the XPS/ subfloor to van wall gaps with Gaps and Cracks spray foam insulation and trimmed the excess the next day.
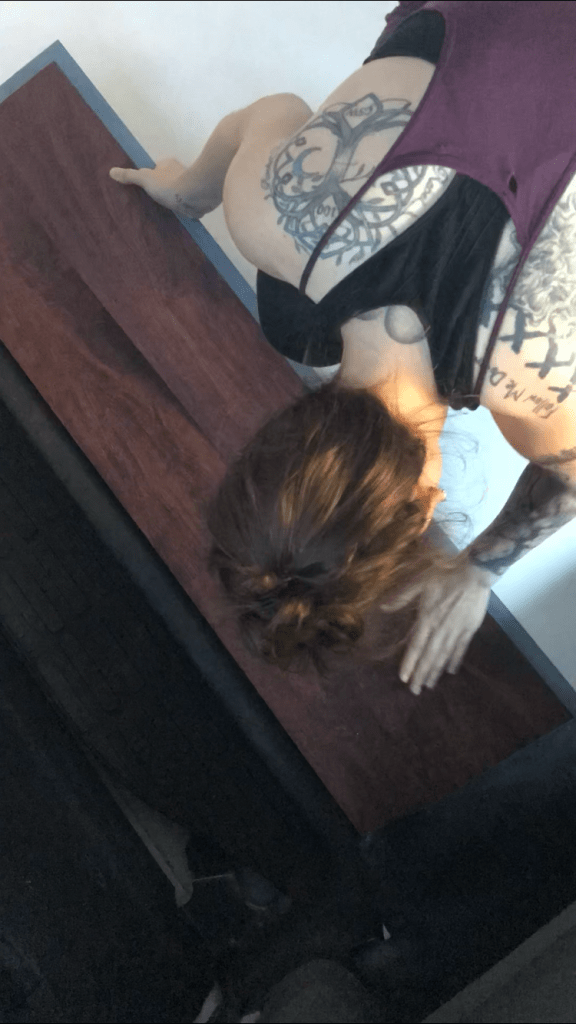
Finally – the FUN part – I could now start on my vinyl flooring! But first, I left a little piece of me…

Vinyl Floor
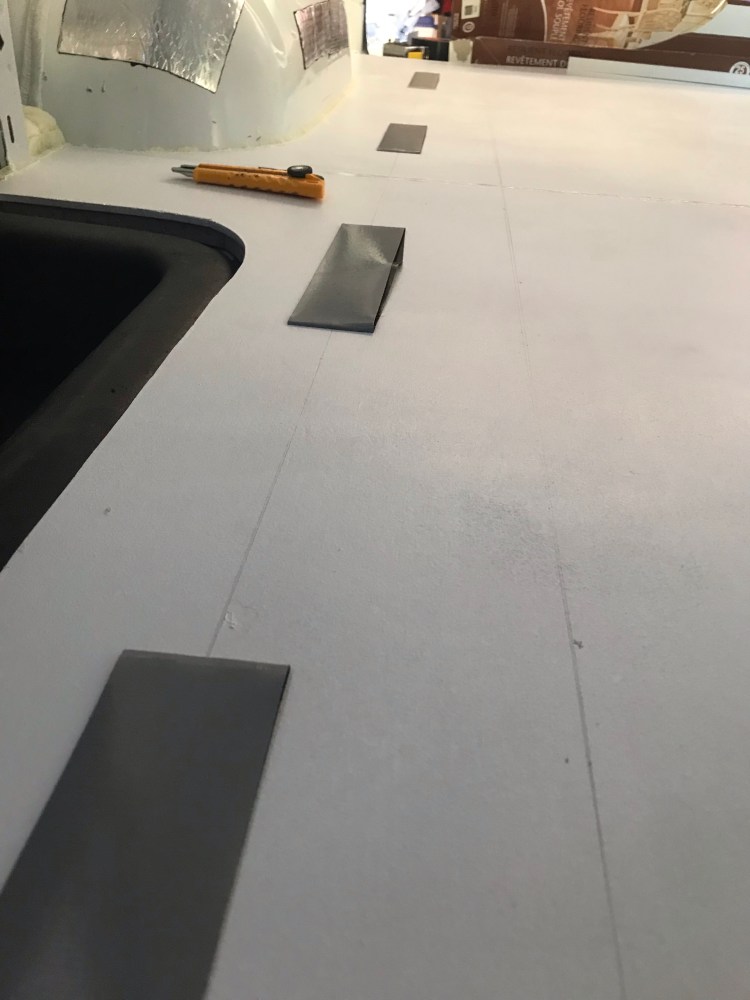
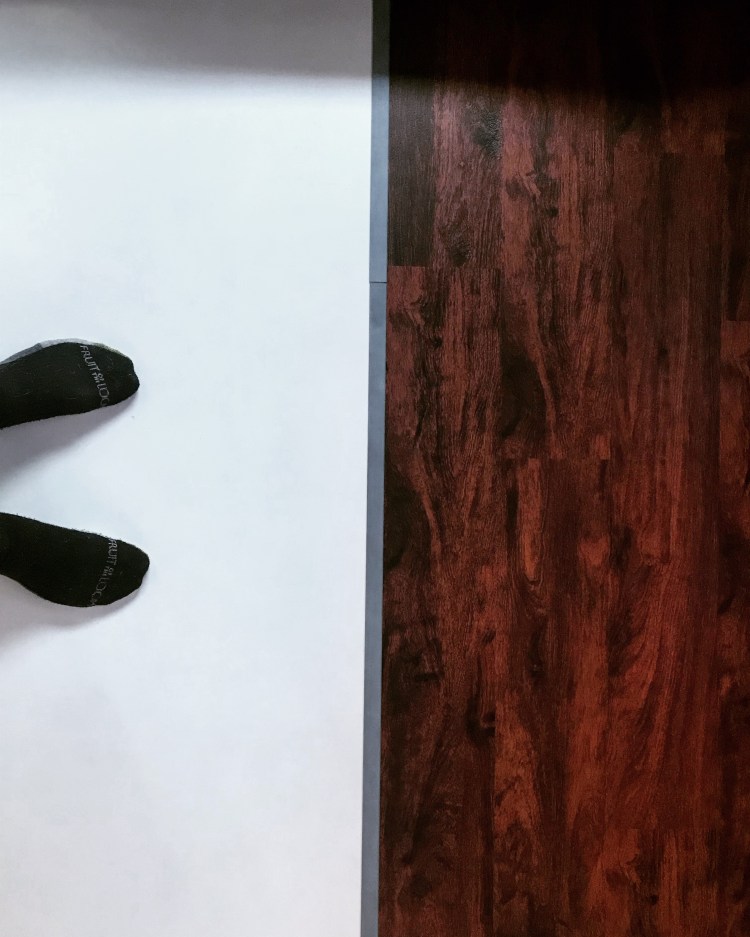
I chose vinyl floor because it is thin (4mm) and waterproof. I managed to only need two boxes (24sq/ft per box) and a couple of sample planks to get the job done (thanks to the amazing home depot lady who generously gave me two “samples”!). They say to plan for about 10% scrap but I kept my scraps to a bare minimum with strategic cuts. I would have liked to use the click-lock style planks, but those were all much more expensive and I didn’t like the colours. Instead I used the grip-strip style planks, which were easy enough to install.
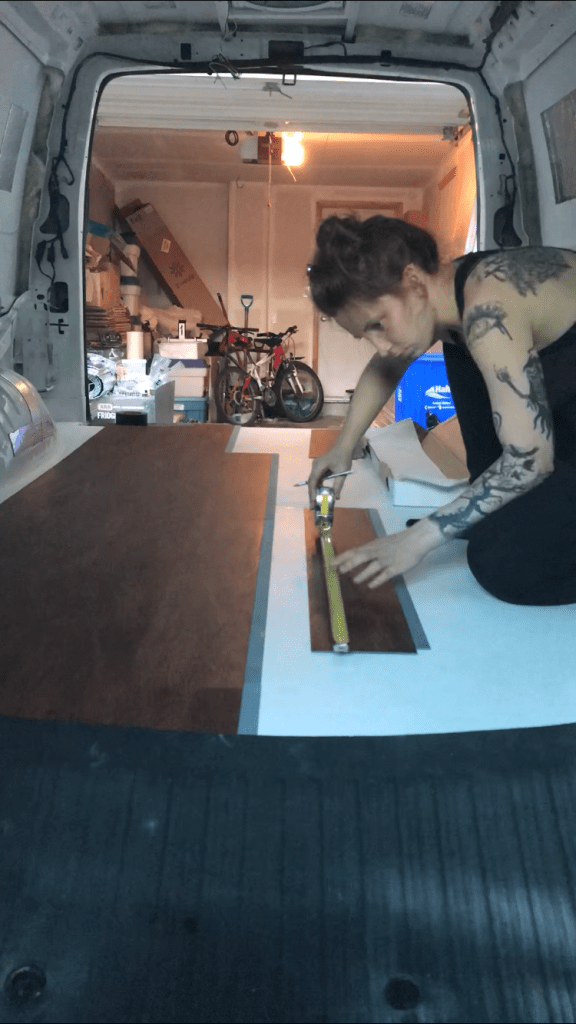
I started by putting double-sided tape along the edges of the floor. Technically this is a “floating floor” but I liked the added security. I then began the floor along the straight edge of the side door step, working my way across until I would have to start cutting the planks to fit around the wheel wells and odd edges. This went pretty quickly. The most important thing here is precision- making sure the seams fit tightly together.
I actually didn’t use my templates at all for the vinyl – the cardboard was a little worn and bendy and hadn’t been perfectly accurate throughout the other layers of the floor so I took my chances (and time) with my measuring tape, crafting each piece individually around the edges. For the curved edge of floor at the rear doors I left each plank a little longer than needed when first laying the planks and at the end of the install scored the edges on the curve. I used a pencil to mark my cut lines and a utility knife to score the lines a few times before breaking off the excess off.

There were a few seams that did not fit together properly where I had cut make shift pieces so I used the clear silicone sealant to carefully and discreetly seal these spots. They were all at the sides and where I will have shelves or my bed so they shouldn’t be noticeable.
The final touch was to seal the edges of the vinyl floor (again with clear silicone, and where a 1/8″ gap to the wall was left) to the steel van walls. This would create a waterproof barrier so that any moisture that may drain down the walls will not go underneath my floor.
I also sealed the gaps under/ between layers at the rear and side door edges with silicone for small spaces and spray foam for the larger spaces between the corrugated floor ridges. Just to cover my bases in terms of any liquids getting under there. The only thing left to do is to add trim. It’s proven a little tough to find something that will curve, but I’m sure I’ll find something, even if it has to be repurposed.
I have a floor!

And on that note, I’ll leave you with a song from a band I’ve been listening to a lot lately while working on the van. They’re fun to listen to and possibly even more fun to watch!
Later,
Kat
WARNING: This video has been identified by Epilepsy Action to potentially trigger seizures for people with photosensitive epilepsy. Viewer discretion is advised.
Copyright © Chronic X-Roads 2020

One thought on “Van Build #4: Flooring”