
*This post was originally written October 2, 2019
_______________________________
There are many ways to do a van build. I’ve seen some miraculously finished in a week. Even a one month timeframe baffles me. Because I am at the other end of that timeframe spectrum.
In saying that, there may be pros and cons to both sides – the grass is not always greener. But I believe how long a build takes is reflective of a complexity of factors. And one thing I’ve learned a lot about is my process. I am attentive to detail. I take my time because I want to make sure I do things right. And as this is my first foray into “construction”, there has been a learning curve. Finally, this phrase has become a sort of mantra:
Do not let perfect become the enemy of really good
Because life waits for no one.
Because my build timeframe is a longer one, it’s been important to learn how to “tend the flame”. A van build is a project born out of passion. It lit a fire beneath me. But fire burns bright and it burns fast, and if not tended to carefully it will burn out. I’ve been learning how to have patience while keeping motivation levels up – not an easy task, especially when working solo.
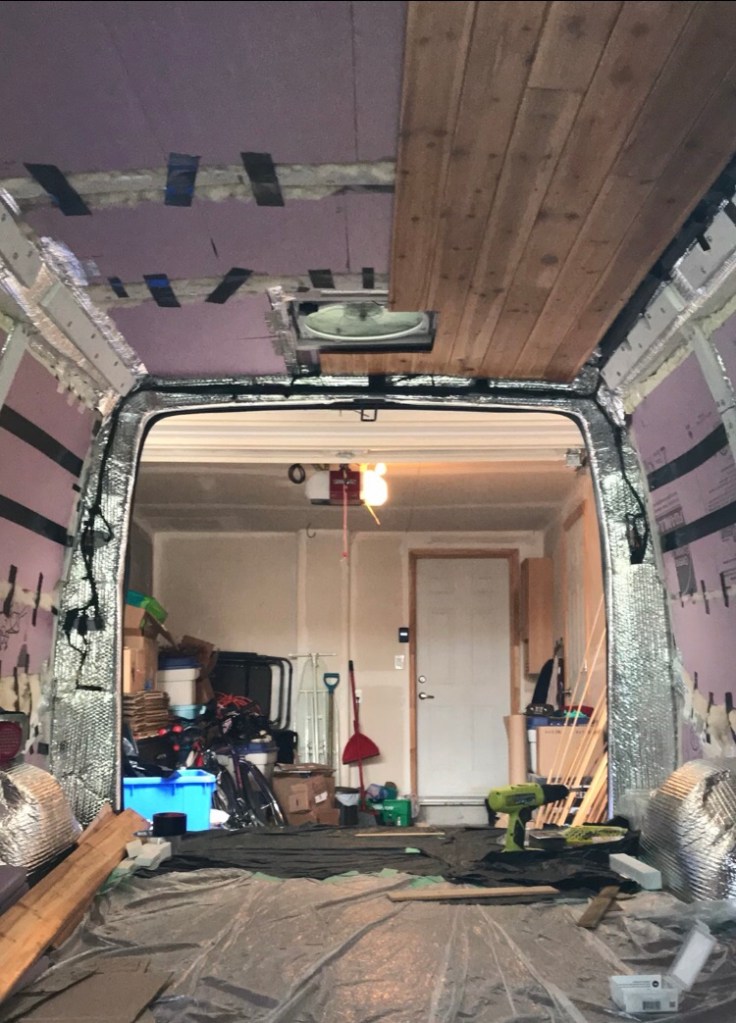
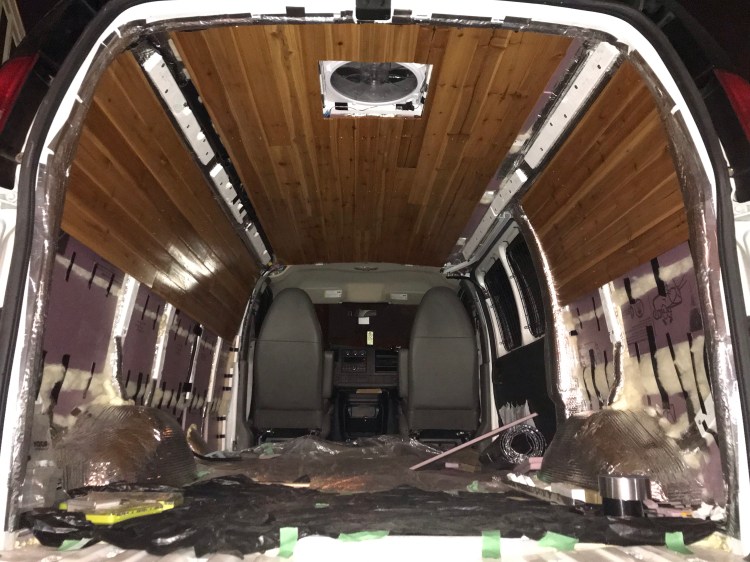
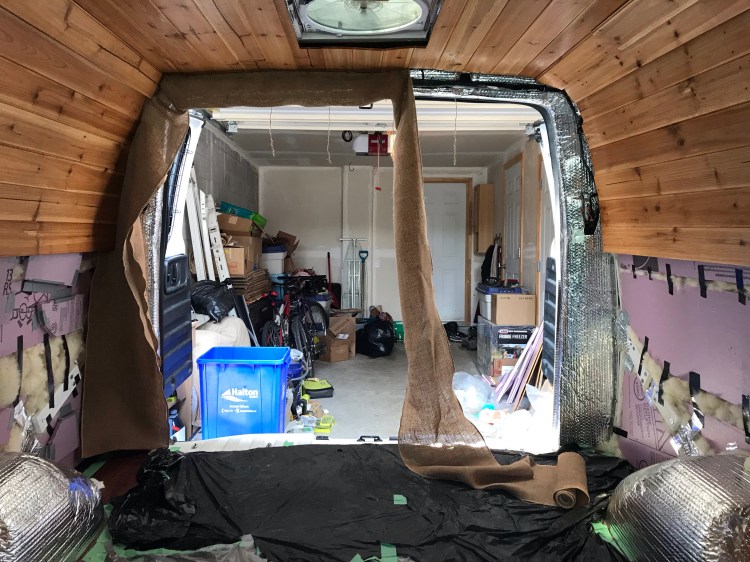
That being said, it’s important to stop along the way and recognize progress. This is harder to do when the progress is in an “invisible” form – like research, decision making, purchasing materials, or prep work – when the van doesn’t look much different. But the ceiling and walls is one of those phases of the build where things transform before your eyes. The whole van interior looks different! So you can bet I took a moment to soak in how far I’ve come since the inception of this van build idea.

On to the documenting…
Materials
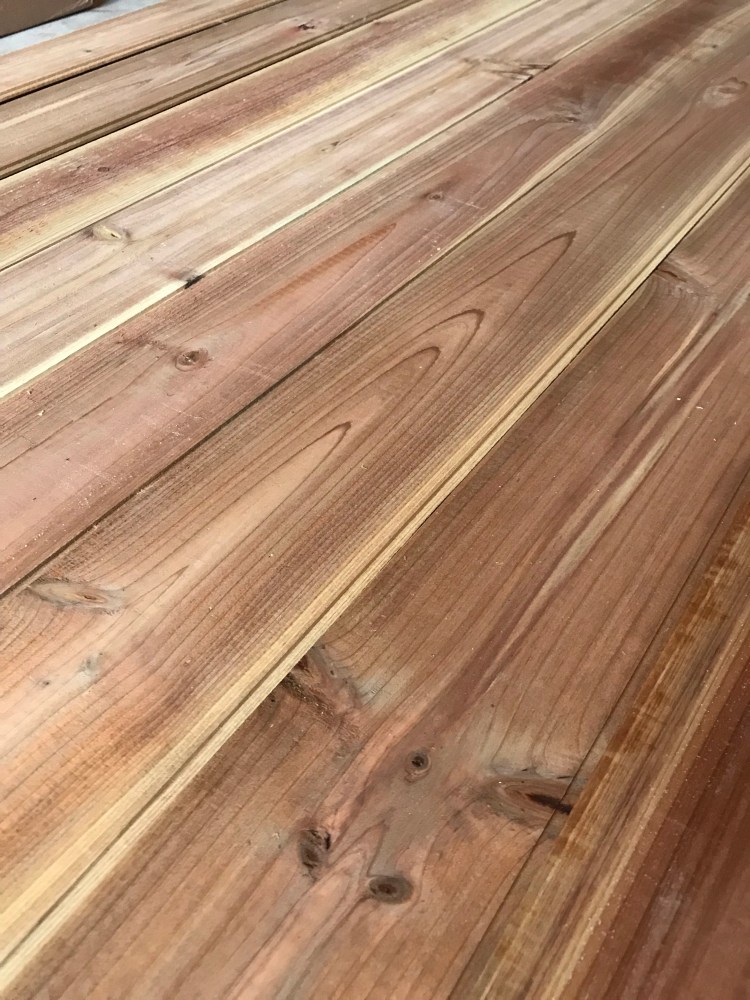
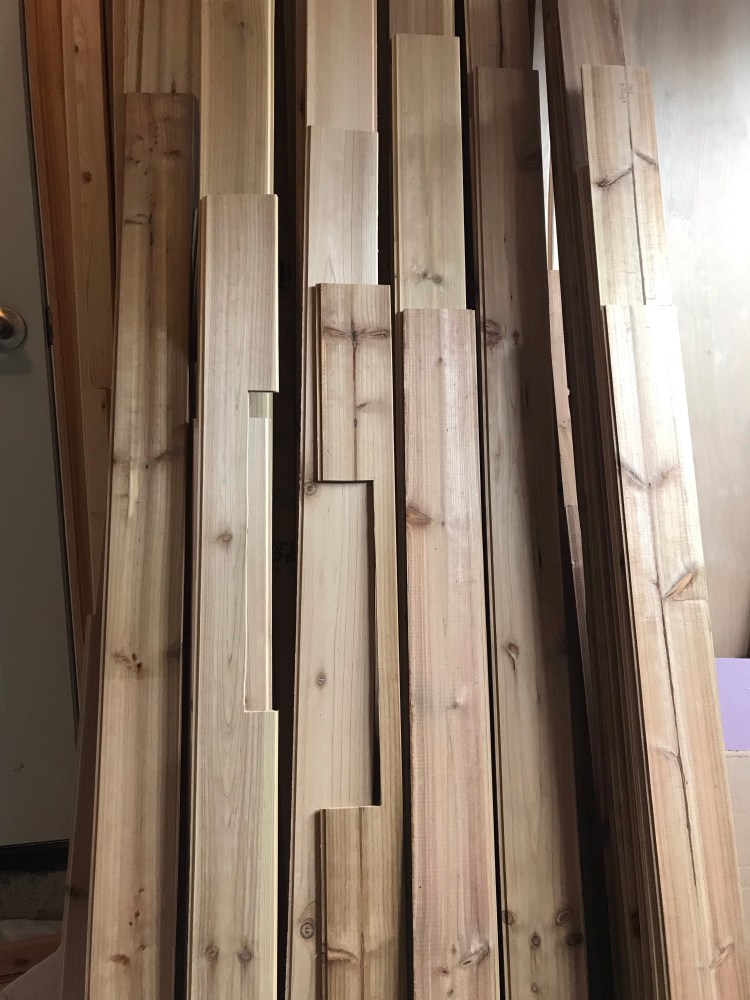
I used cedar tongue and groove (T&G), birch plywood, and burlap as my ceiling, wall, and odd rib/ joint coverings.
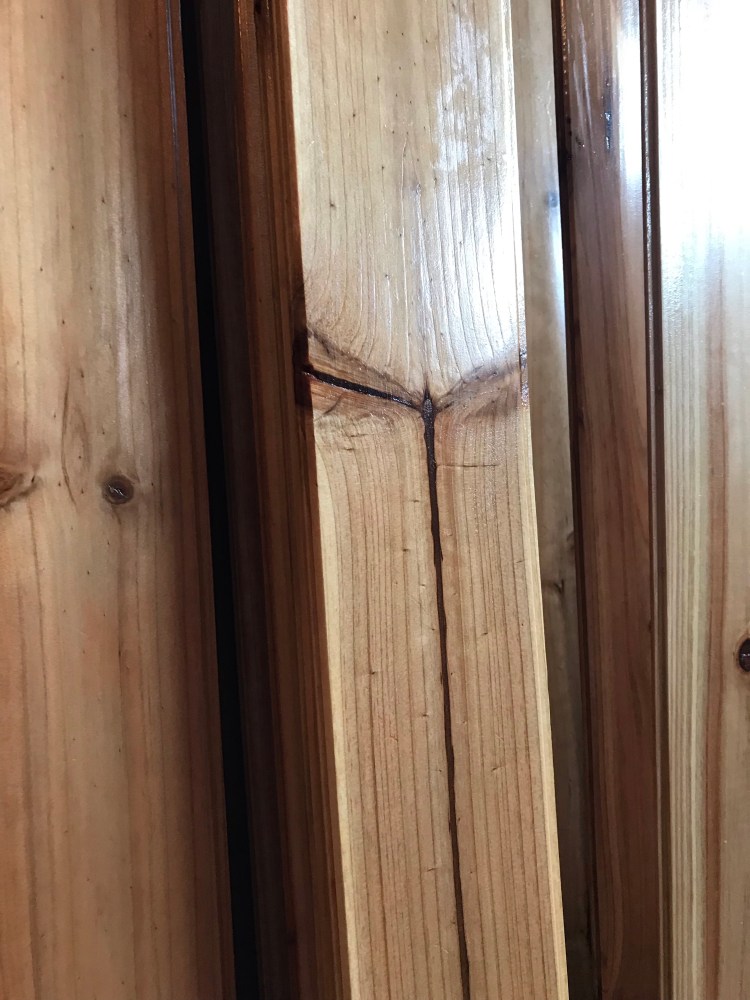
Why tongue and groove? First, I like the look. I also found it in 5/16″ thickness, which means it will keep the weight of my cargo to a minimum. That being said, with it being so thin it is more prone to splitting (and cedar is said to be prone to splitting) and the tongues and grooves are extra thin. So I had to be careful while handling the planks, but for how thin the pieces were, I only had a few tongues/grooves crack off on me – and nothing that hindered my installation or had me scrap any pieces.
I’ve seen the 1″ thick T&G used in van builds and like most choices for a build there’s usually a trade off. The way I see it, it’s a choice between sturdy or lightweight. I can’t speak for the 1″ as I haven’t worked with it, but the 5/16″ does have some flexibility to it, which is useful in the event of slight curves (like my Chevy Express has). Time will tell how it holds up long term with the vibration of the van on the road (UPDATE: after 2.5 months on the road the T&G held up with no issues!). I also have the Chevy Express 1500 – if I was working with the 2500 or 3500 (more load/ towing capability/ V8 engine), I might not consider weight as a key factor in material choice.
Why cedar? I initially chose cedar because its aromatic oils are rot-resistant and act as an insect repellant. It smells divine and has a really nice grain pattern. Unfortunately, since I sealed my cedar I won’t get much of the insect repellant property, which acts through scent. But cedar wood chips can be used for this effect, and apparently they also dehumidify by absorbing moisture, in case I decide to place some around the van later (maybe near doors to discourage ants or other insects from entering the van – yes, I am brainstorming as I write this).
Why plywood? I got enough cedar T&G to cover my ceiling and the top half of my walls. Since the lower half of the walls have the wheel wells, fuel pump, and uneven metal ribs, it isn’t a level surface, which makes it more difficult to install T&G. That’s why I went with plywood for the lower half of the walls.
Why birch? It’s a durable hardwood and good quality.

Why burlap? This might seem like an odd choice. Basically, I was sitting in my van, T&G all installed and prepping the plywood. I’d previously planned on making plywood covers for the metal ribs lining the back and side doors. These were to also bridge the gaps at the ends of the walls to create a seamless appearance. But these makeshift pieces would need to fit neatly over curves, bends, and brake light wires. No matter how I visualized it – it seemed messy and like a big hassle.
A case for the path of least resistance.
So – I decided on burlap. It would be much easier to work with and I could use adhesive/ screws to keep it in place and pin it behind the wall and ceiling edges to create my seamless blending of materials. I tried to find used burlap bags to repurpose – but had no luck with the local coffee shops or grocery stores.
The Tongue & Groove
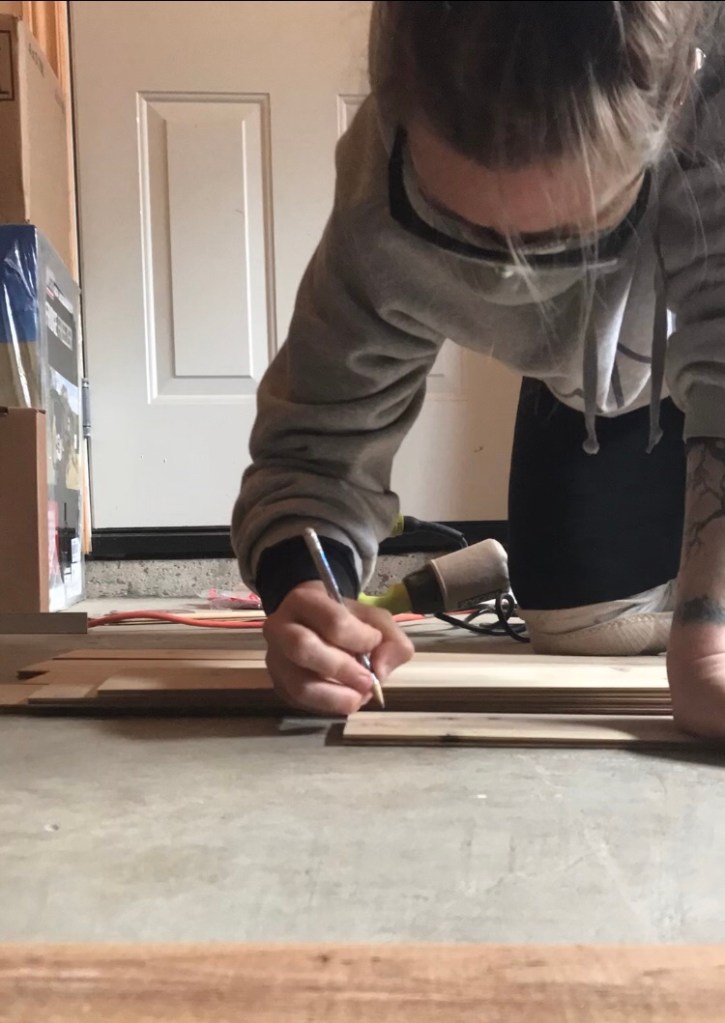
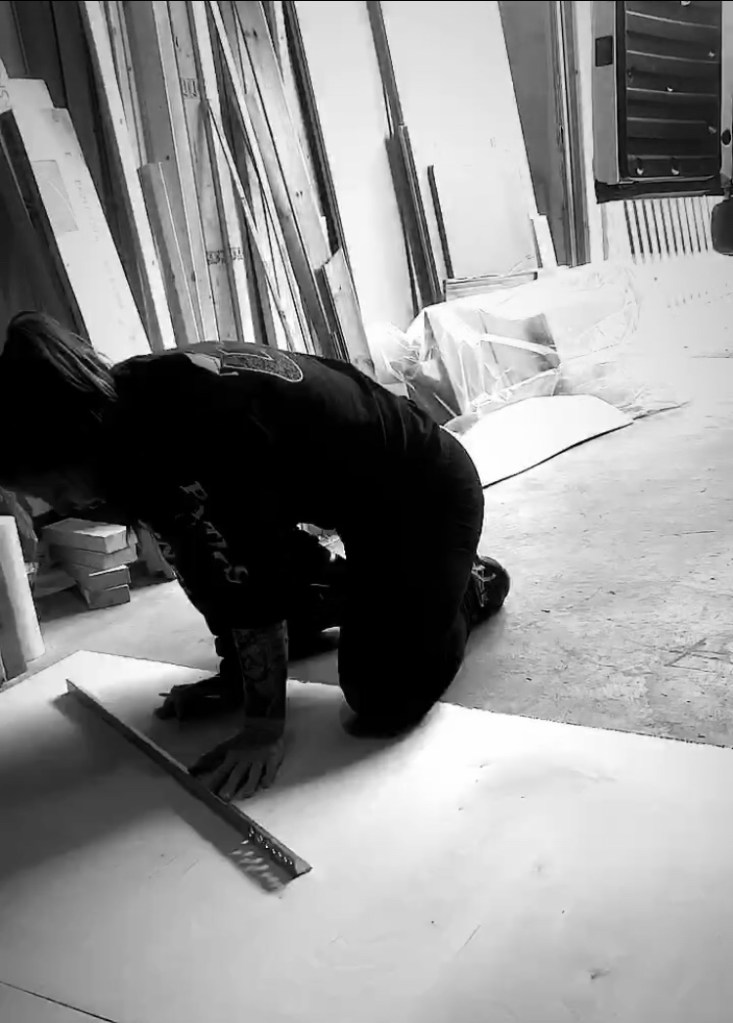
Measure & Cut
The first step was to take measurements of the van and strategically plan my cuts. Now – I realize there is an easier way. But let me explain why I chose this route.
I’ve seen many a build cut their wood as they install. This would be so much easier as you are less likely to make mistakes with length and you can do custom cuts (like around the fan) as you go, undoubtedly delivering more accuracy. After installation the wood is stained and sealed (visible side only – which also preserves a wood/ log cabin smell). You don’t need to seal (or “finish”) both sides of wood because water vapour will still pass through – a finish cannot completely stop moisture exchange, but may slow it down. But since preventing mold and mildew is another priority for me in this build – I wanted to take every precaution – and the back side of the wood is where it will have the least ventilation. It is also advised to finish wood before installation in terms of T&G due to seasonal expansion and contraction in order to avoid visibility of streaks of unfinished wood when it shrinks and separates in cold and dry winter weather.
My plan was to make my cuts (based on ceiling and wall measurements, going around the fan, and staggering butt joints), label them for future reference, sand, pre-treat with concrobium, stain, and seal (on both sides). I also chose a finish that was rated for outdoor use – which means protecting from fading by UV rays, minimizing expansion and contraction from temperature changes, and protecting from water (check the can for specifications as you can get some finishes that contain mildewcides).
So – did I choose the labour intensive route? Yes. Was it 100% necessary? Maybe, maybe not. But I like to plan for the worst and hope for the best. Play it safe.
Back to the process.
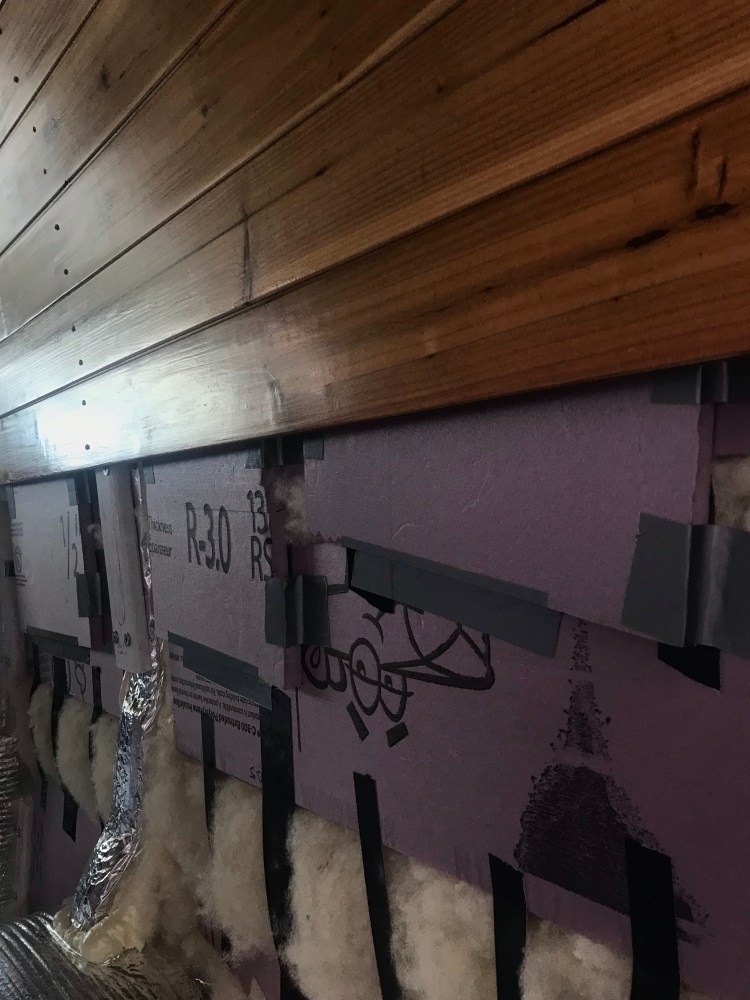
I took measurements at various points length- and width-wise on the ceiling, making sure my T&G planks would lie over the wood studs I had previously put in (see my insulation post). I was aiming to have as much T&G over the studs as possible at the edges in order to avoid putting screws too close to the ends – which can increase the probability of splitting. Since my walls curved at the back edge I would have gradually lengthening planks that would need to be cut at an angle (which I waited to do during installation for accuracy). I also measured the distances around the fan to the ceiling edges in all directions in order to plan where I would need to make custom cuts. I took into account that I wanted each plank to be secured to at least two studs. I did not plan for butt edges to meet over studs, as I wanted to minimize screws being driven near T&G edges in order to lessen the chance of splitting. I also did not need to have butt edges over studs since consecutive rows would keep all butt joints level. One place in which having butt joints over studs would be handy is the first or last rows of each T&G section where there is not a row on both sides to keep things level.
In all honesty, planning the staggered butt joints in advance as opposed to during installation was a pain in the ass. Especially as I was trying to waste as little wood as possible (thus strategically planning everything).
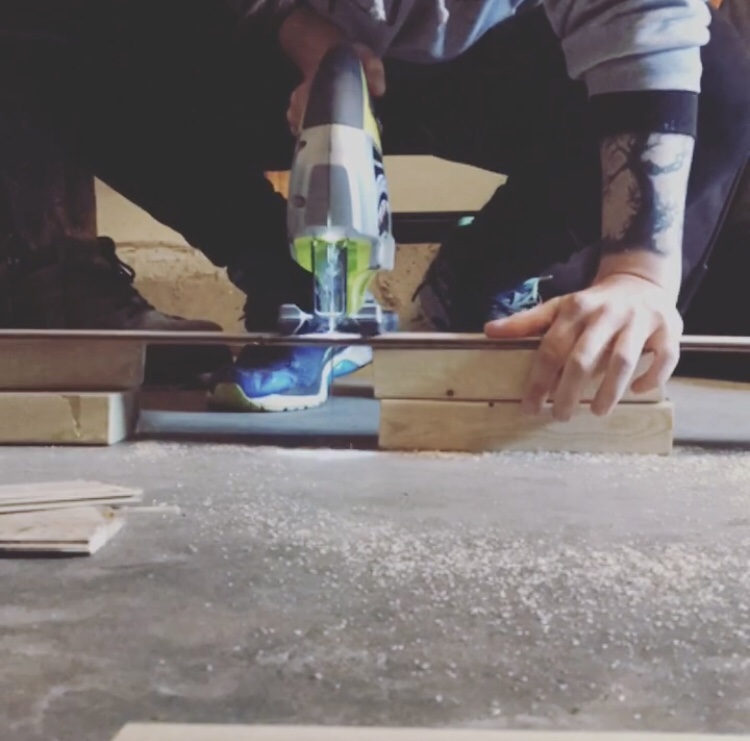
Once I had all my cuts planned, I got going with the jigsaw (wearing a dust mask and safety glasses). I made sure to cut the planks face down to ensure a smooth cut on the visible side (it’s more likely to have splitting/ a rough edge on top because the teeth on my jig saw blades cut on the up-stroke). Where I could I also tried to use the factory edges as my butt edges to keep them as straight as possible. I used pencil to label each plank (back side) with its length and a number for later reference.
Mold Prevention
I then lay all the pieces out and treated them with Concrobium. I stood them up and gave them 24 hours to dry. Note: treating the wood with Concrobium does change/ darken the wood’s colour.
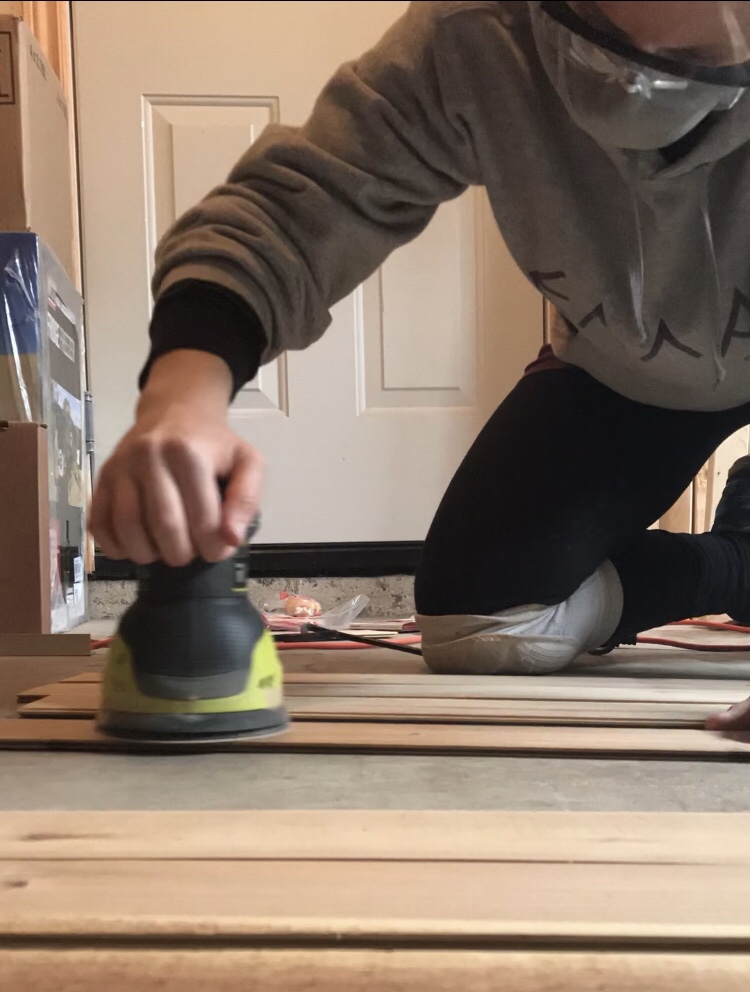
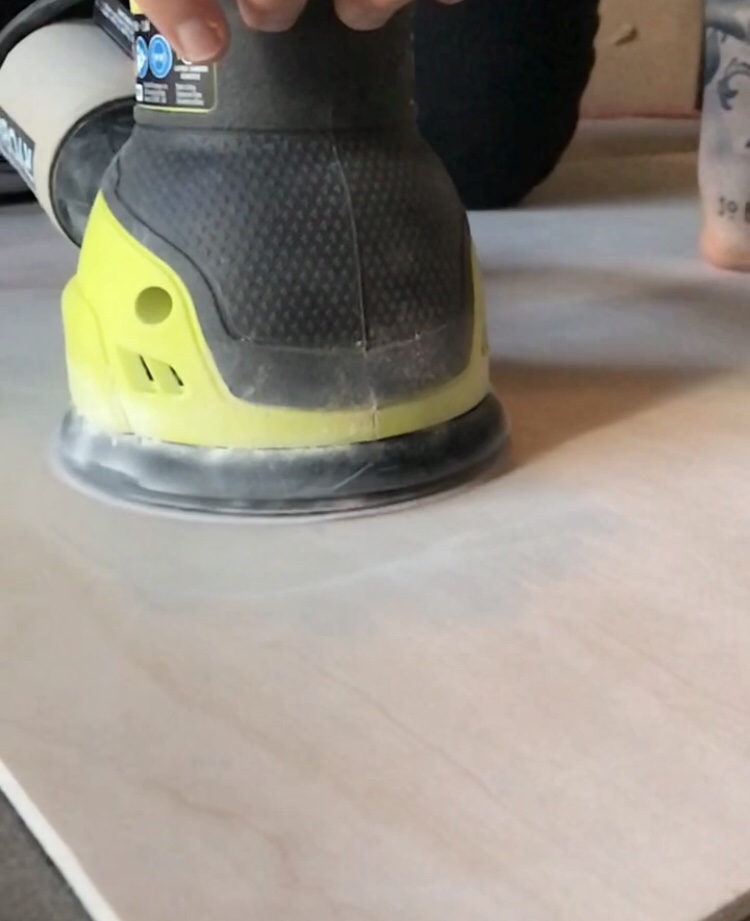
Sanding
I sanded the edges by hand. Then I did both sides with a random orbit power sander and fine grit (220) sanding disc. If the wood had old finish or scratches I would have started the sanding with medium grit sand paper, but it was new wood. I used a tack cloth to wipe the wood dust off (folded, folding to new side once full of wood dust, storing any cloths with some use left in them in a sealed bag to prevent drying out).
Staining
Now the exciting part!
A few notes on stain. Why stain? It helps to bring out the grain pattern of the wood, and you can choose preferred colours. Stains consist of pigments, dyes, and carriers – the carrier may be water or oil based. It is important to stir stain as you use it as heavier pigments can settle to the bottom (not as critical with gel stain, though I did stir mine at the outset of use to even out consistency and eliminate globs). Stain permanently changes the appearance of wood, so test pieces are a good idea, especially as the same stain can appear different on different types of wood. This is due to the natural colour of the wood and the size of wood pores that accept the stain. I found it helpful to go to the manufacturer’s website where they often give advise on types of wood and stain compatibility. If a test area looks blotchy it is advised to use a wood conditioner 15 minutes prior to staining (with same water/oil base as the stain to be used; wipe on with wood grain, let soak in 15 minutes, wipe off excess). Apparently pine is known for being blotchy. If you want a darker stain you can leave on longer or apply additional coats. Water based stains have more colour options, no dangerous fumes (vs. oil or gel based stains which take 24-48 hours to evaporate, longer if cool or damp environment), clean up with soap and water, and will evaporate more quickly than oil based while applying. But, while I’ve never used water based stain before, my impression is that it would be more likely to drip and I’ve heard that it dries so fast that it is prone to leaving streaks and not blending well. Stains add colour, but they don’t protect the wood – this is why we use a sealant/ finish.
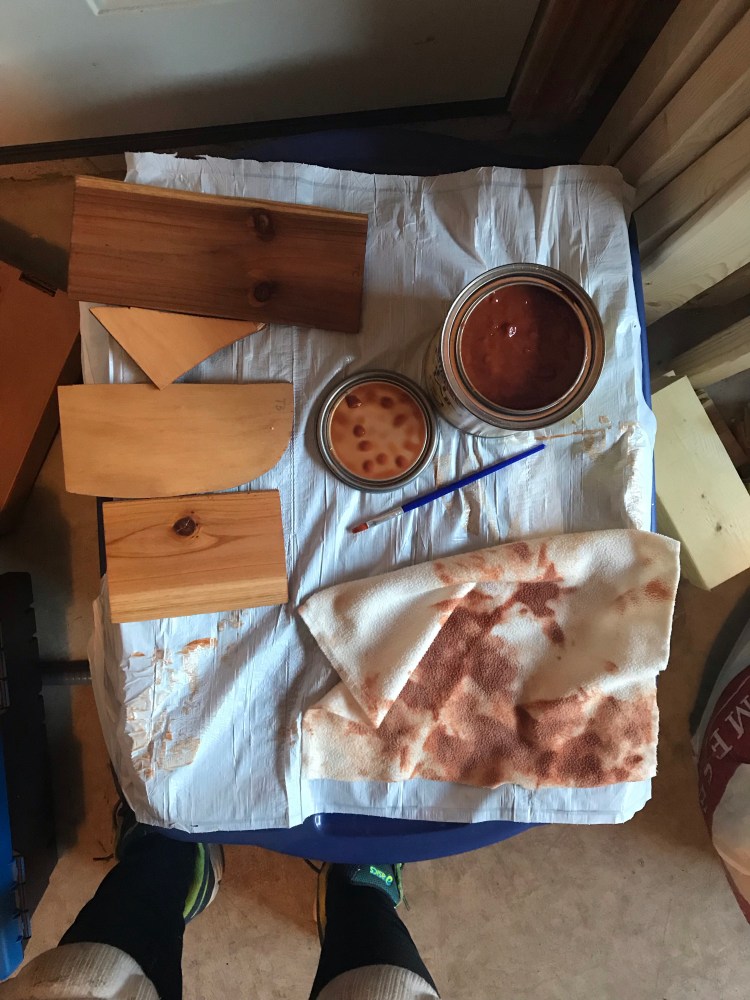
I chose to work with gel stain. This is an easy type of stain to work with especially if you are staining ceiling/walls after installation as it is thick and will not drip. Gel stain is also useful for woods that tend to come out blotchy – often eliminating the need for wood conditioner. I did some test pieces to make sure I liked the colour I’d gotten (Honey Maple) and to see if the wood looked blotchy when stained (pointing to the need for wood conditioner). I saw no blotches, but as it turned out – I wasn’t super thrilled with the colour. I had expected a very light beige, but the colour I had turned out pretty orange. When I’d opened the lid on the container I was surprised to find that the gel stain was a reddish colour, too.
I went back to the local hardware stores and looked for other options. When it comes to gel stains there are a lot less colour options than there are with water based stains. Regardless, I had the lightest colour available across a variety of brands (keeping it light to contrast my dark red floor was the goal), and I did not want to use a water based stain.
At the end of the day, I stuck with what I had. I could get my panties in a bunch about colour, or I could move forward. I chose the latter. (Not to minimize the importance of colour choice – which can set the whole tone to your environment and decor – but for me personally I was on the clock).
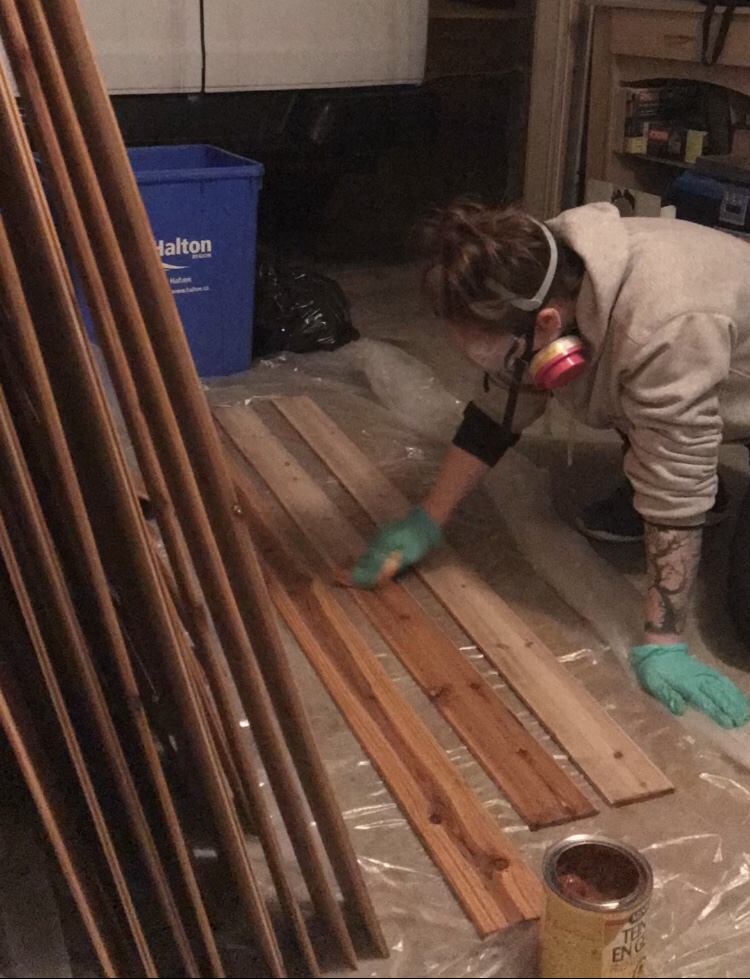
For the staining process I made sure I was in a well ventilated work space (garage door open) and I wore gloves, goggles, and a respirator. I put a drop sheet down under my work space. I stirred the stain before use. I cut up an old band tee to use as rags (RIP) – as opposed to applying with a brush. And I proceeded to apply a liberal amount of stain – wiping in a circular motion cross-grain to fill the wood pores first, then with the grain to even things out, making sure to cover the whole face side of the planks as well as the top portions of the tongues and grooves to ensure that if the wood were to contract in cold temperatures there would be no noticeable streaks showing that were not stained. I also made sure to stain the butt edges. After a few minutes of letting the stain sink in (see manufacturer instructions – I wanted to keep the colour light) I used a separate rag to wipe off excess stain with the grain of the wood. I then propped the planks up to dry at least 24 hours before sealing with a finish.
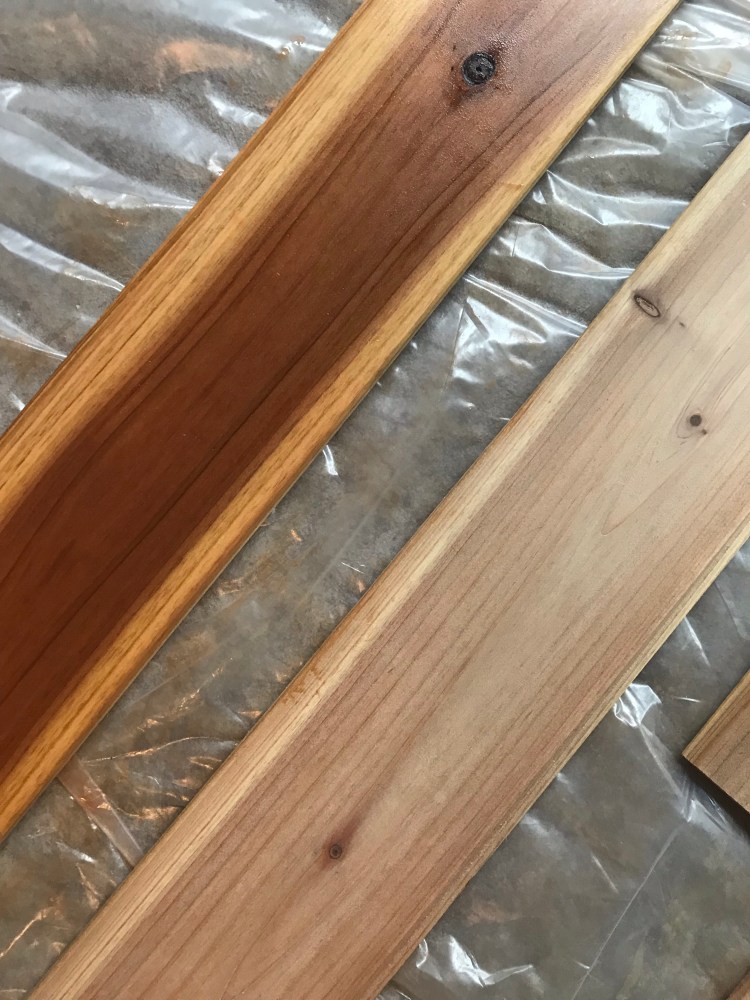

Sealing/ Finishing
The finishing process was similar, but without the need to wipe off excess, and I applied the finish to both sides of the T&G planks, on the butt ends, as well as in the grooves. I used spar urethane, formulated for outdoor use. It was important to stir occasionally during use to make sure the mineral spirits were evenly mixed throughout as they tend to sink to the bottom. I used a small paint brush to seal inside the T&G grooves – making sure to keep this coat light and prevent drips here as I did not want to inhibit the space needed for the tongues and grooves to fit together. I then used the rag to apply the finish to both sides, circular then with the grain, and in and around the tongues. I tried not to use too much finish as I found that after standing the planks up to dry there could be some pooling at the bottom edges or drips – which I had to later carefully scrape off (which took a while, and was sticky).
This step was time consuming (because I had so many individual planks and was going in and around the tongues and grooves) – so much so that I vowed this would be the only coat of finish I applied. But… I’m stubborn… and I always say “quality over quantity”. So I did a second coat (it is recommended to do 2-3 coats). This time I didn’t worry about the Ts and Gs – I just did the front, back, and ends of the planks – which cut the work time in half. And I have to say, the second coat did make a big difference in the appearance of the wood. There was a definite sheen.
While it is suggested to lightly sand between coats of finish, I was not pleased with this step. I understand that sanding helps additional coats to adhere. But my experience was that wood dust found its way into knots and crevices, leaving a white dust that was hard to remove even with tack cloth, and any uneven spots (edges, knots) were prone to being over-sanded – even removing some of the stain! Obviously a power sander is not gentle, so I sanded gently by hand (fine grit wrapped around a block of wood for even pressure), with the grain of the wood to avoid unsightly scratches, and no matter how light my touch, I still had some scratches and stain being removed. While I read that a finish can bring out such blemishes on the wood, I was lucky in that the urethane seemed to lessen the appearance of the spots where stain was lifted, and the scratches seemed to disappear (perhaps it was just light scratches in the first layer of finish).
Note: some tack cloths contain chemicals that can prevent good adhesion with polyurethane. A microfibre towel or wet cloth is an alternative – in which case you would need to wait for the wood to dry before finishing.
Oh and I wore a dust mask and glasses while sanding – I certainly did not want to breathe in any wood/ stain/ finish dust.
I will say that I did not test the finish prior to application. It’s important to note that polyurethanes tend to add an amber colour to the wood. They come in satin, semi-gloss, and gloss. I didn’t particularly want things to be too shiny, so gloss was out for me. I figured semi-gloss would be a nice middle ground, so that’s what I went with. But after using it, I would say it’s still pretty damn glossy. If I were to do it again I might give the satin a go.
A note on Concrobium: Concrobium recommends pre-treating wood, but if another substance is then applied to the wood (e.g., paint) they advise applying an additional layer of Concrobium. I tried this out with a test piece, and as you might guess, during application the liquid simply sat on top of the wood finish – because finish resists moisture. The point here is not absorption, I already covered that, but to have a top layer of this substance that resists mold or mildew (the particular finish I had on hand did not specifically state that it contained mildewcides). I also noticed that once dry the Concrobium left white residue where drops had been – I assume these are the food grade inorganic salts. I’m not sure how effective it will be, but I decided to apply a small amount of concrobium to the backs of my T&G planks only with a cloth. The front sides of these planks will have better ventilation and I wouldn’t want to ruin the finish.
Installation
Now that the wood prep was done, it was time for installation!
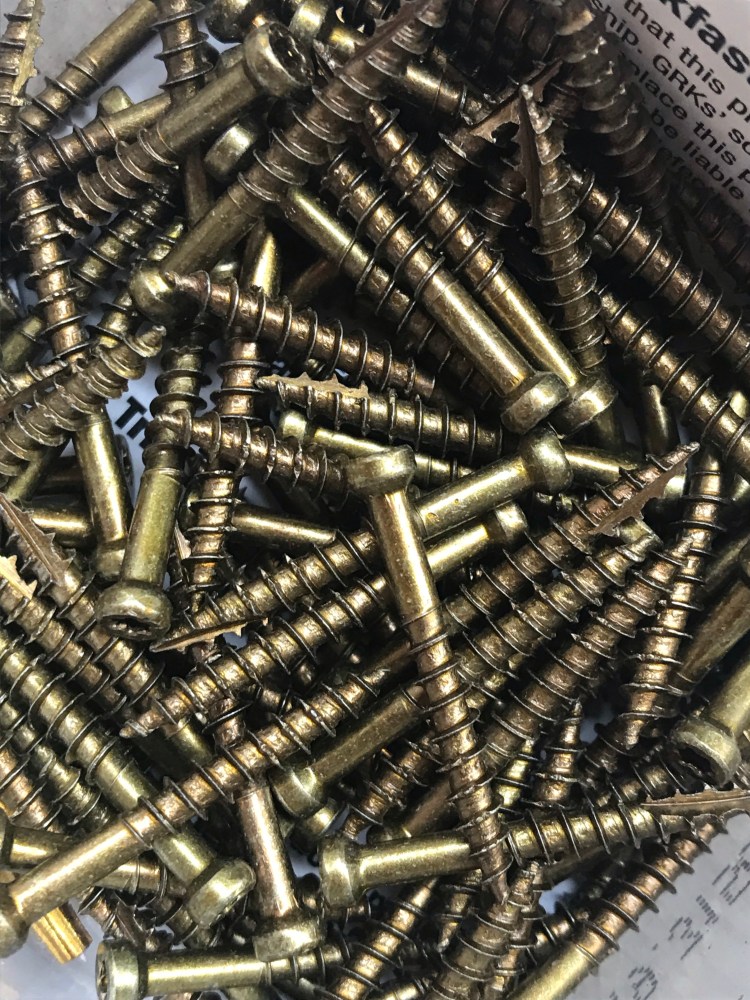
I decided to use screws instead of nails for a few reasons. First, screws are stronger in terms of withdrawal force (for the ceiling). Second, because I was using such thin T&G planks with such tiny Ts and Gs, I figured blind nailing would be more difficult in terms of accuracy and risk of breaking the Ts and Gs. I also do not own a brad nailer.
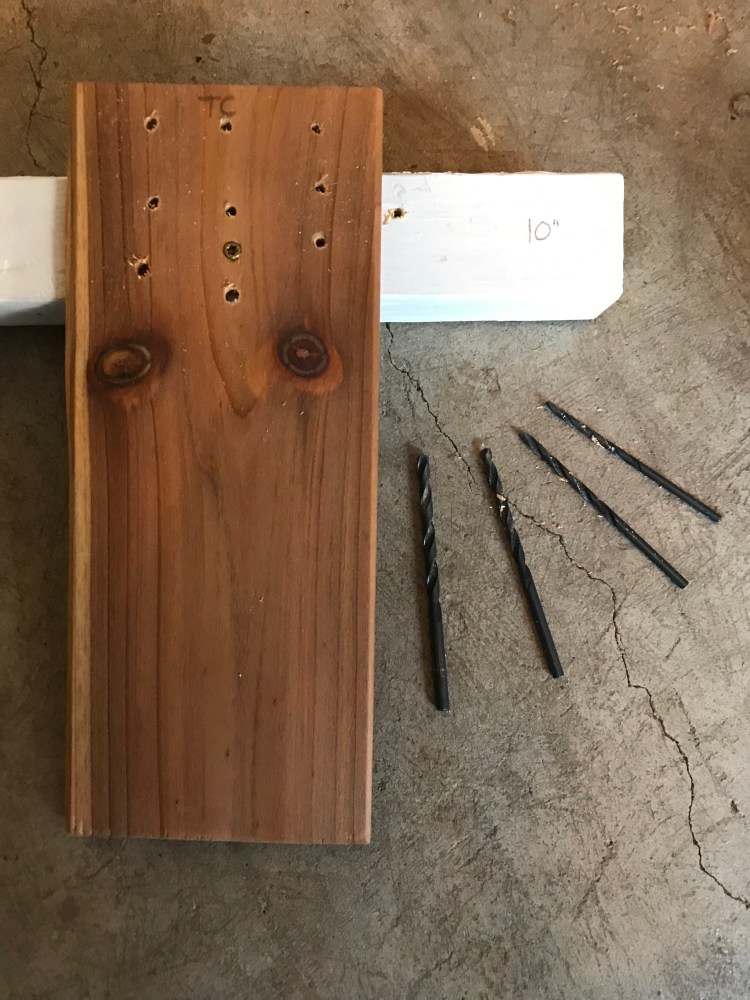
Since I knew that cedar could be prone to splitting, I used a test piece to decide on pilot holes. I used various sized drill bits and drilled at various distances from the T&G test piece’s edges. There was no splitting as long as the T&G plank had a sturdy backing support – even if no pilot hole was used and I simply drove the screws (self-drilling/tapping). I still chose to do pilot holes just to be on the safe side. I didn’t use clearance holes (to prevent the screw threads from grabbing the T&G) because the top portion of these screw shanks do not have threads, which allowed for the T&G and backing material (studs) to be pulled together. Also, since I was using trim head screws I worried clearance holes might allow for the screws to go right through the wood. I ended up using a 1/8″ drill bit for my #8 1-1/4″ trim head GRK screws.
Side note: I found out later during installation that in spots where the planks were not touching the studs behind them (due to uneven ribs, curve of the van, or raised insulation), or were raised by the screw heads from the studs, there was more strain placed on the T&G planks as I drove the screws – especially as I tried to drive the screw head to be level with the wood surface. I tried using a countersink, but it didn’t help much with this particular screw head shape. I also tried using shims to temporarily provide backing support as I drove the screws, but this was only slightly helpful, and a little time consuming.
Side side note: when choosing screws, I wanted to go for quality, and GRKs are great – I really enjoyed working with them! During planning, I calculated that I had about 1/4″ T&G and 1″ backing studs to drive my screws through, so 1-1/4″ screws would be perfect. But then I learned the hard way that a “2×1″ is not actually an exact one inch in thickness – more like 3/4”. So, take about 1/4″ + 3/4″ and you get 1″, if the two pieces are touching, before hitting the metal van rib. Crap! 1-1/4″ GRKs are the shortest you can get and I’d already purchased them. I would have to screw in at an angle… (and I did a bunch of research into whether this would affect the integrity of my fasteners – as screws have the most strength against withdrawal force, but can snap from sheer/ lateral force. Note: when using screws with sheer force a larger gauge screw is advisable). Turns out – things worked out perfectly since my T&Gs would not be lying flush to the studs (for the variety of reasons mentioned above).
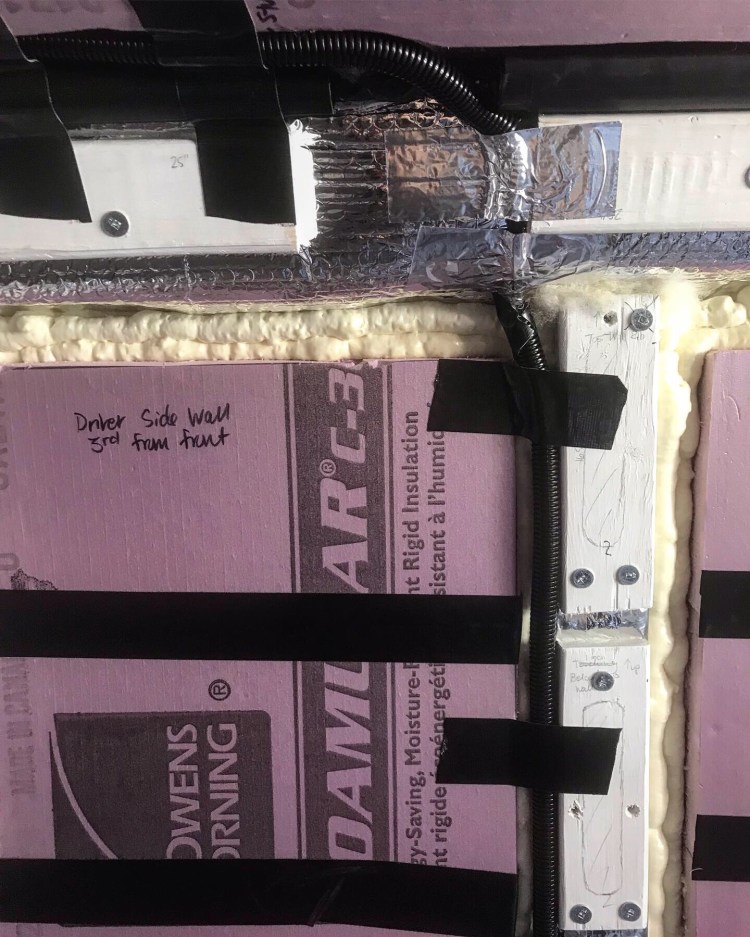
Last note here I promise: Had I truly been working with screws that threatened hitting the steel van ribs behind my 2×1 studs, there was another solution. Many of the metal ribs have holes in them. I had made “rib templates” out of cardboard prior to attaching my studs (I have Reflectix over the van ribs so I needed the templates to make sure I was screwing around the holes), so I got out these templates and drew these spaces on top of the studs. This way I knew where I could screw straight in without worry about hitting metal! I also updated the templates to show where the studs begin and end so that at a later date I know where I can screw into (furniture, wall hangings, carabiners, etc.).
Okay I lied: Another pro to working with thin T&G, and it being lightweight, is that you don’t need to worry as much about the strength of the fasteners. Of course, I still wanted to know that I was using good quality, but length of threads into the backing material and size of the screw determines strength (though larger gauge screws create a higher possibility of splitting the wood, especially if used too close to the ends of boards). If using thin, shorter screws, drive a higher number of screws to increase strength. I was going to drive a lot of screws for this purpose, but once I began installation I realized it wasn’t necessary to go overboard with such lightweight planks.
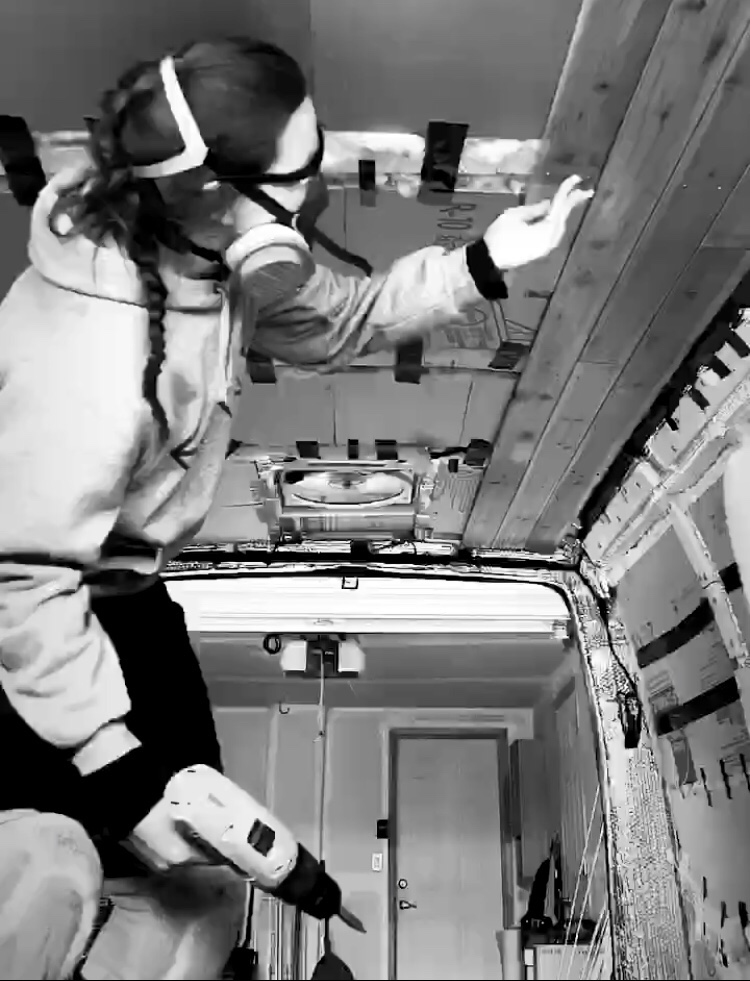
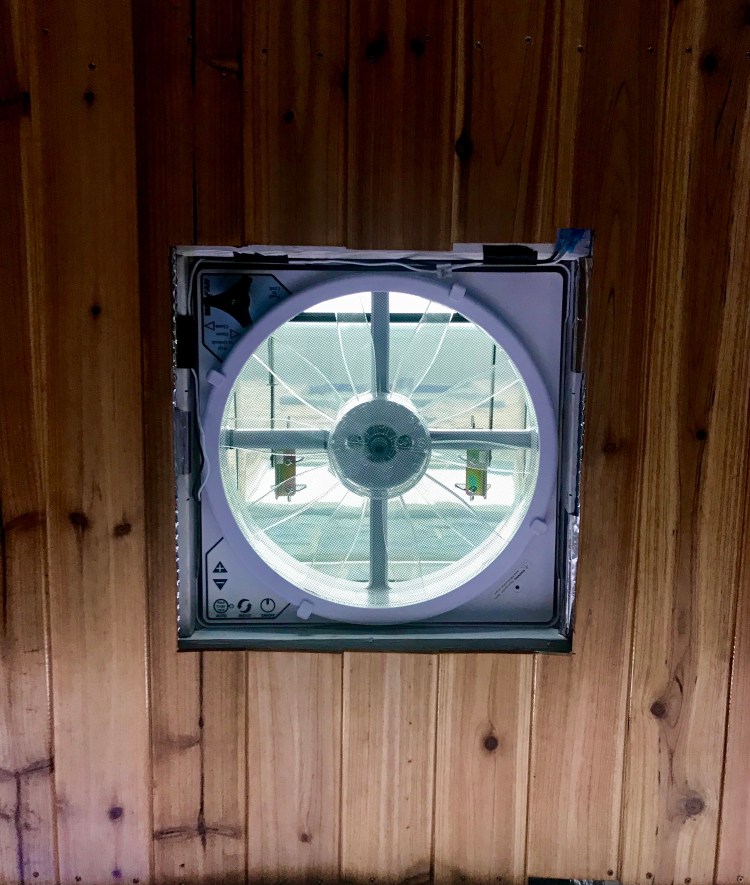
I began on the ceiling on the driver’s side, tongue to driver so I could push tongues into grooves as I went. The first row was the hardest. I had to make sure it was straight, which was a task considering the length of the ceiling is about 9ft, I was the only one holding up the planks, and there are multiple planks per row to keep straight. I also needed the first row of T&G to be placed at an exact distance from the fan to ensure that my cuts around the fan would lie accurate and symmetrical.
Note: leave 1/8″ to 1/4″ at edges of installation to allow for expansion/contraction of wood.
Once I got the first row in, things got rolling.
I had all my planks arranged in order for easy access as I worked (my labelling came in super handy). I dry fit each row as I went to make sure the edges had enough overlap with the studs they were to be screwed into and so that I could configure as straight an edge as possible with all the planks.
I then used pencil to mark where each plank rested on a stud, followed by marking where stud screws or gaps or holes were so that I could plan the placement of the screws I would be driving (so they wouldn’t hit underlying screws or air…).
Once I made the marks for my pilot holes, I got to drilling. I did do a slight countersink (all the help I can get). Then I placed the planks in their spot, ensuring the butt edges were as close as possible and tongues and grooves were married as best as possible before finally driving the screws.

When Ts and Gs don’t want to marry some people lightly tap on the plank edges (e.g., with a mallet or hammer covered in cloth), but I didn’t want to risk damaging my thin planks, so I just pushed. I used low torque and speed settings on my drill and took it slowly (don’t want screws to go all the way through the wood!). There were a few instances when I could hear a plank begin to buckle/ “split” under the pressure, but I got no visible splitting on the surface.
It worked out so that the last plank on the ceiling had to be cut length-wise in order to fit, which I had expected. Often there may be difficulty in getting the last piece to fit, in which case you can remove the back of the groove by breaking off the flange with a few hammer raps, making it easier to put the last plank in place and then screw in (can’t be blind nailed).
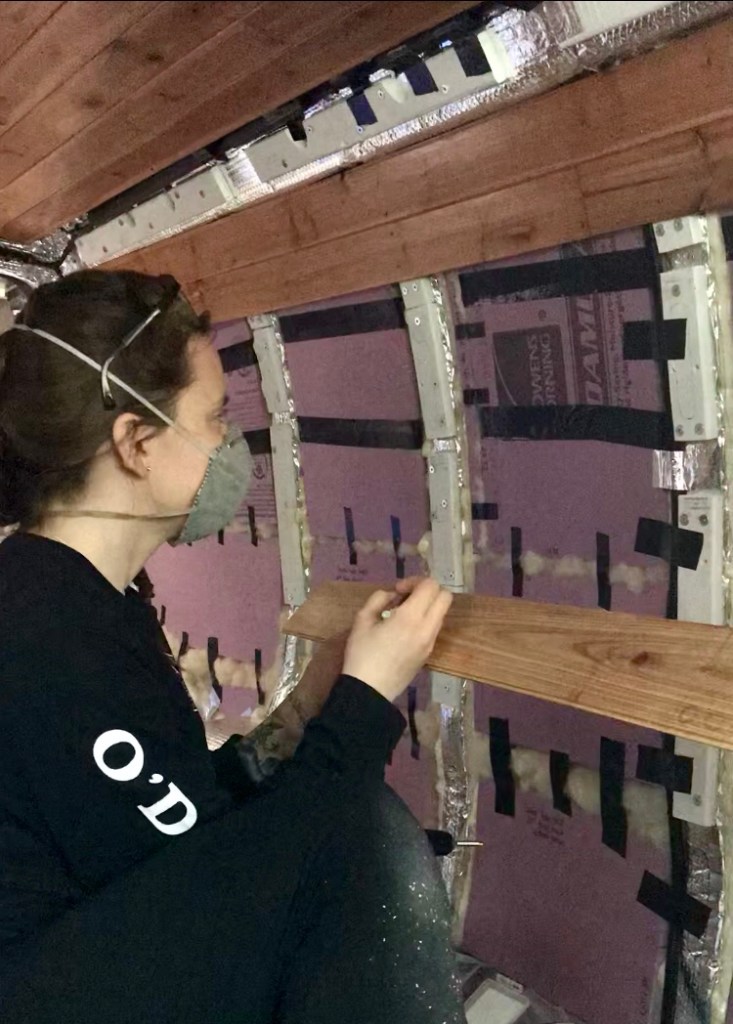
On to the walls. Again, the first pieces were the most important, especially considering the van’s curves and anomalies, in order to keep things looking level. I did tongues UP because in my head I figured any moisture could pool in the grooves if they were face up. There were some spots where I needed a makeshift shim between the ends of planks and their backing studs (spaces up to an inch or so created by the curve of the van walls/ uneven ribs). While I had cedar shims, pre-treated with Concrobium for this purpose, I decided to use some leftover XPS rigid foam insulation instead. I simply cut the appropriate size and maneuvered it between the T&G and stud, where the screw would go through it to keep it in place, and it worked like a charm – with the added benefit that XPS is inherently water proof. In these spots I used longer GRKs.
A few challenges arose during the T&G installation. One being that despite the incentive of factory cuts being straight edges, not all tongues and grooves were straight. On a few planks there were uneven tongues, which meant that while the Ts and Gs were pushed together as far as possible, there were parts of the planks that were not even touching! This tended to happen (twice) with longer planks, in which case I cut them to make them more manageable. Longer planks were also more difficult to seat as they were more prone to warping.
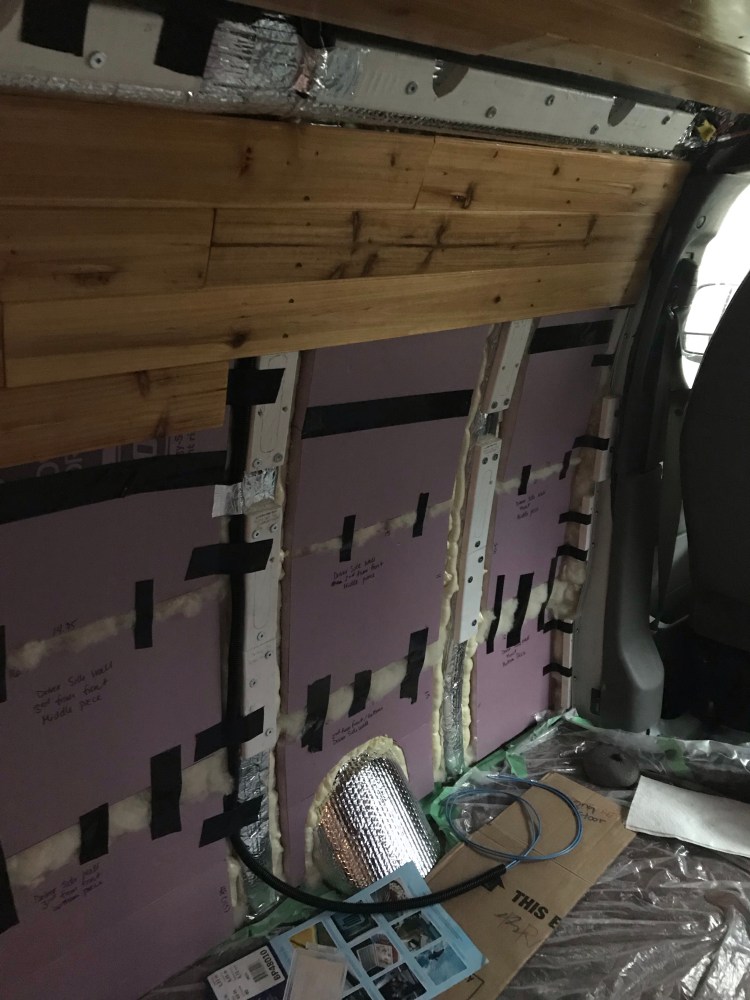
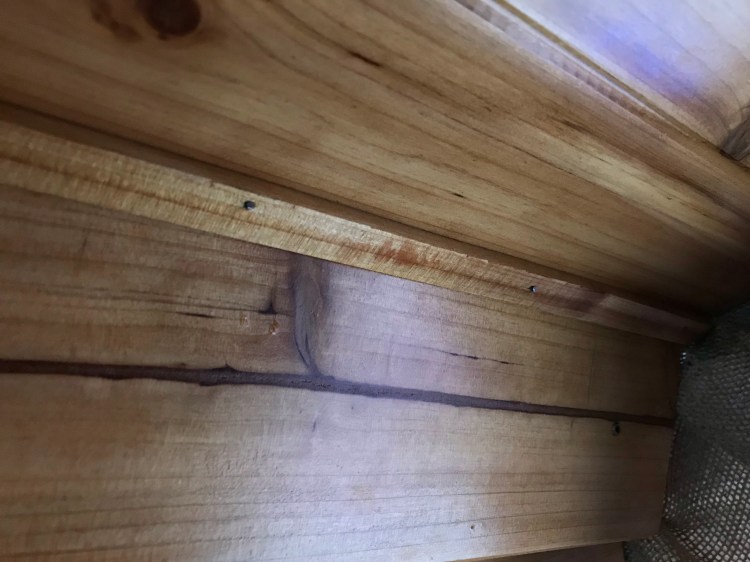
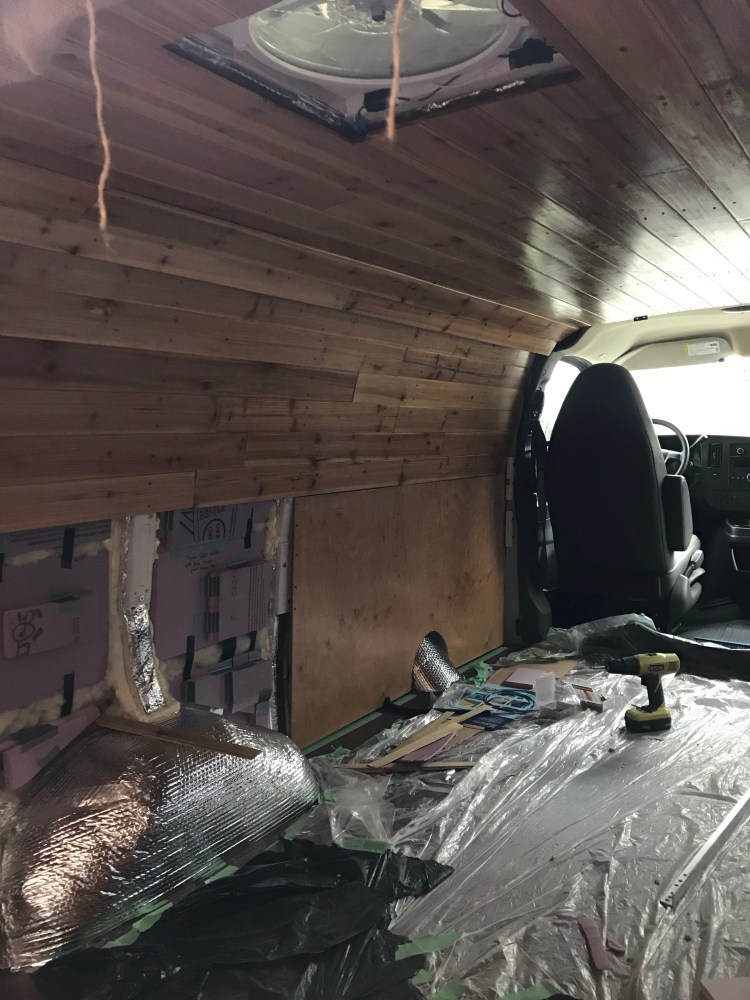
The other challenge was the point at which the ceiling and walls joined. With an odd structural rib here, I had to be creative. This turned out to entail one row of planks on each side of the van that lay on said structural rib, parallel to the wall planks, and overhanging the metal rib by an inch or so. If you stick your head under this rib and look up, you will see the Reflectix underneath. But my current plan is to hang rope lights in this little groove – so they will be hidden and have a reflective surface to shine against!
I also put in a plank on a diagonal on the driver’s side to cover the space between this overhanging row and the ceiling, which goes over the brake light wiring running from the driver’s seat to the rear doors.

Finally, a makeshift strip of T&G, less than an inch wide, was put into the corner of the “diagonal” on the passenger side with finishing nails to cover a mere sliver of space between the adjoining planks (creativity!).
Each plank that was cut during installation was later sealed on the cut edge. I also made sneaky markings along the edges of the T&G walls and ceiling to show the alignment of the ribs/studs – yes, I can estimate by the screws, but this is more accurate.
More Resources
- Pros and Cons to various woods
- Cedar Info
- Birch Info
- Sanding
- Manufacturer Staining 101
- Manufacturer Guide to Clear Finishes
- Staining and Finishing with Gnomad Home
- Finishing with Van Dog Traveller
- Applying stain with a rag vs a brush
- Why you wouldn’t need to finish both sides
- Tongue and groove
The Plywood
I prepared the plywood in much the same way as the cedar T&G.
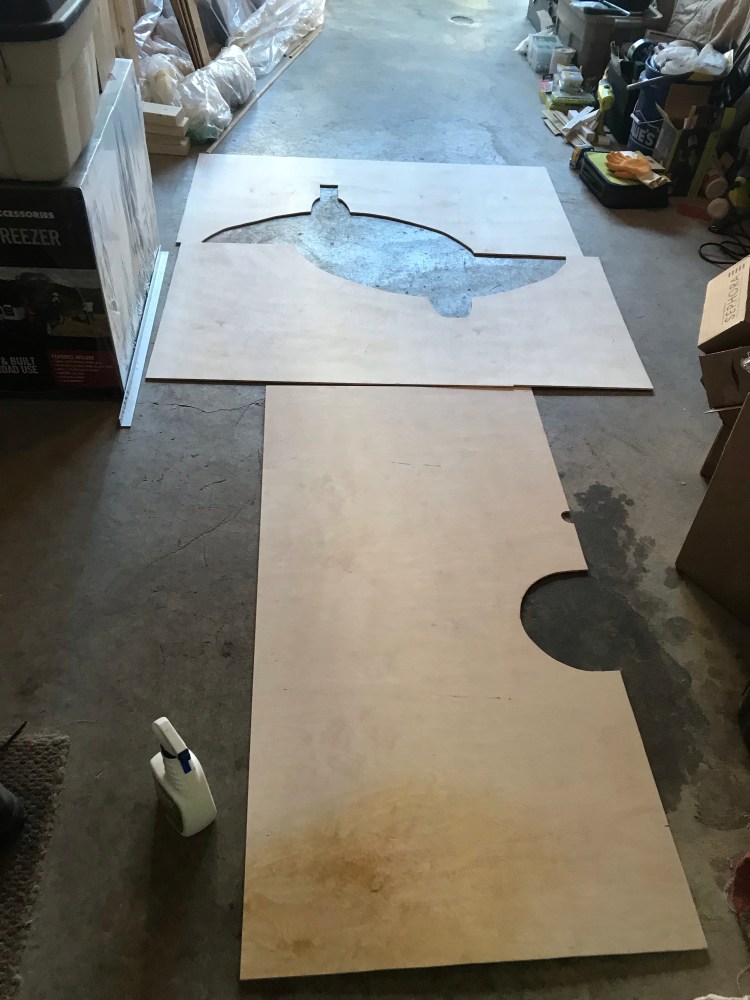
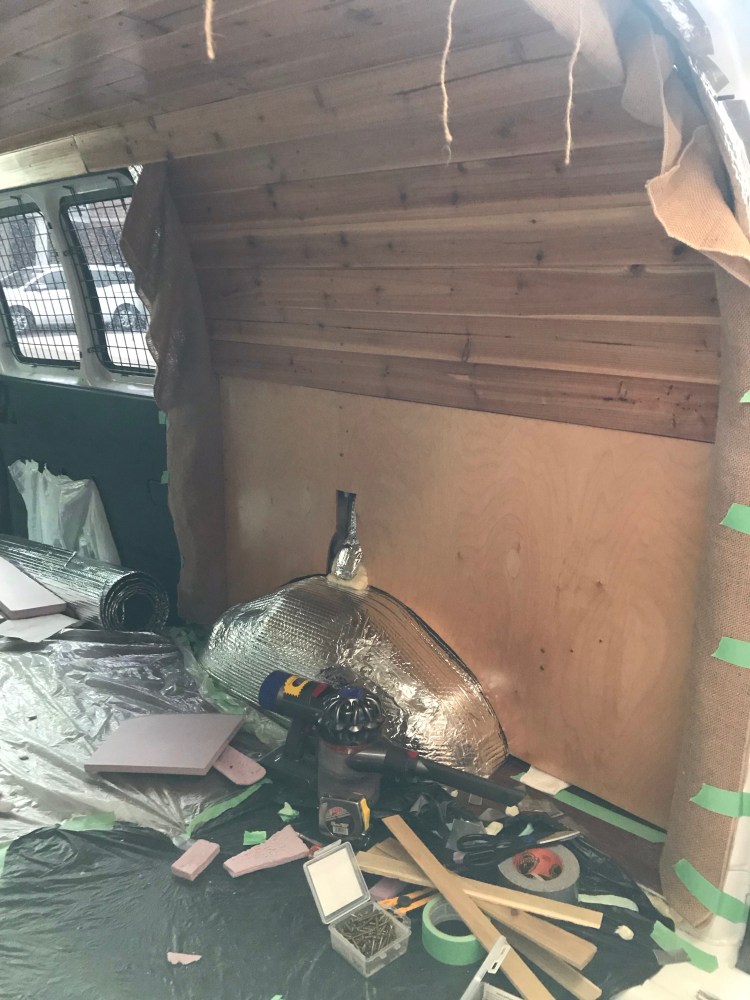
I used 1/4″ birch to maintain thickness with the 5/16″ T&G. I took measurements for the walls to ensure adequate overlap on “edge studs” (at the ends of the walls). On the long driver wall I made sure the two plywood pieces would meet in the middle of a stud since I had no tongues and grooves to keep things level. I used trial and error/ careful and conservative measurements to make cuts that would fit around the wheel wells, fuel pipe, and tubing for the fan wires.
When making my cuts I made sure to cut face down so no splitting would occur (as tends to happen when cutting cross-grain with birch plywood) on the side that would be visible in the van. I used my jigsaw and a scrolling blade.

I pre-treated the plywood with concrobium, allowing 24 hours dry time, and noting the deepening in colour of the wood.
I sanded the edges by hand and the rest of the plywood with my power sander. Plywood needs to be worked more in order to open its pores to accept stain. I noticed this on my test piece, which I had only lightly sanded with fine grit sandpaper by hand, as it seemed the stain had very much remained on the surface. So I sanded my plywood walls with medium grit sandpaper first, followed by fine grit for a smooth finish, and finally wiped with tack cloth to remove the wood dust.
I followed similar steps for staining. I will say, take a close look at the plywood you choose. If you look closely you can see that some pieces are a bit blotchy, while others have a beautiful, natural looking grain pattern. While tracing my wall pieces I had made the effort to choose the sides that looked the best to be visible – and even then I could see that some pieces looked a little blotchy – the sort of pre-existing blotchiness that I’m not sure wood conditioner would help with. While staining, one of my pieces came out absolutely beautifully, while the others did look a little blotchy (luckily these will mostly be covered by furniture). This tells me that it’s not necessarily the birch that is the problem in absorbing the stain evenly, but the individual plywood pieces that simply differ.


A note on staining plywood: because plywood is a mix of veneer, wood chips, and glue, the staining process may differ slightly. I used medium grit sandpaper to help open up pores (to better accept stain), followed by fine grit sanding and a tack cloth wipe down. My research showed that special gel stains may be your best bet with plywood, but if you use a wood conditioner any stain can be used.
I also followed the same steps for sealing the plywood – applying to both sides and edges, and a very light sanding (gentle, with the grain of the wood) prior to a second coat.
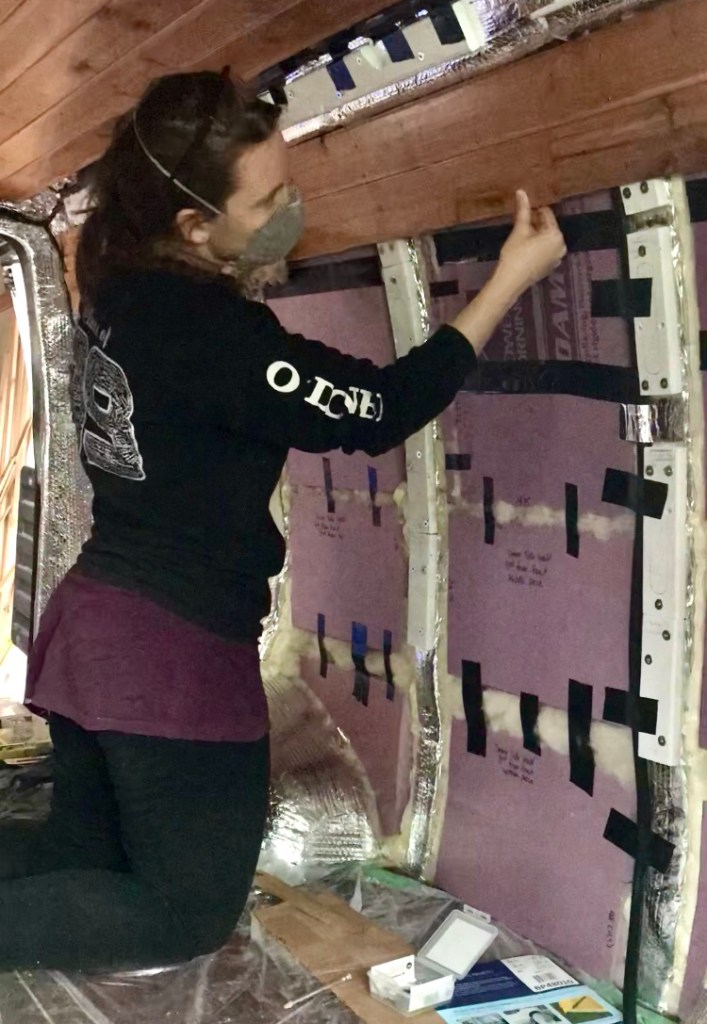
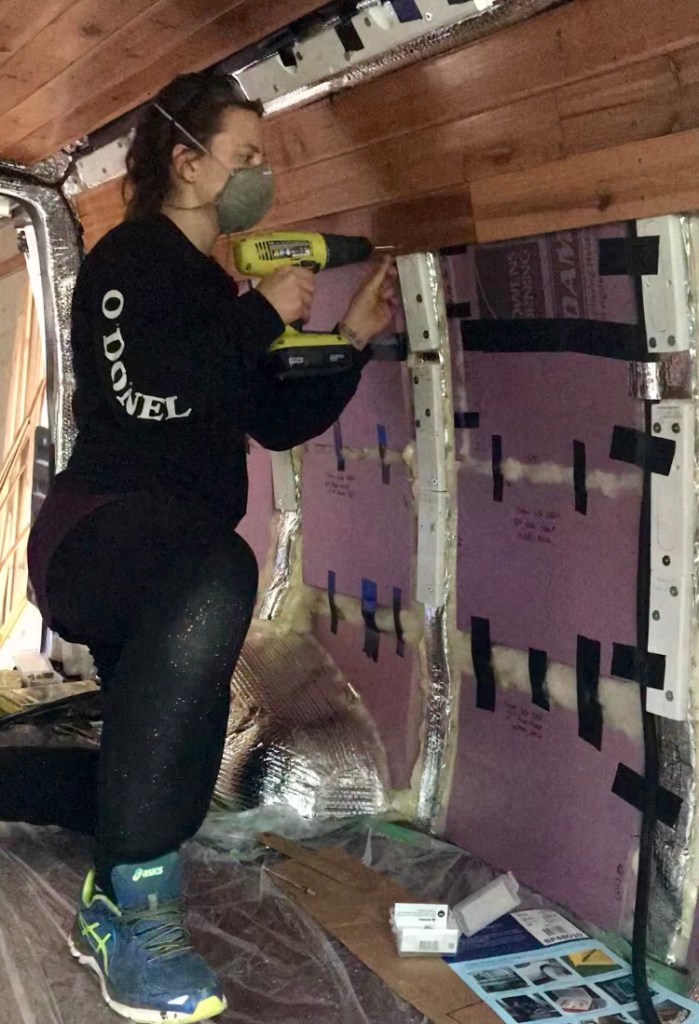
Once everything had time to dry and air out I installed the plywood pieces in the van. I used GRK screws of varying lengths, depending on the spacing between the plywood and studs (in some cases this was almost 2 inches). This difference in spacing was due to the curve of the walls and angle of the ribs relative to the straight wall I was trying to create. I dry fit the plywood and marked my pilot holes (extra important with hardwoods like birch, which are more prone to splitting than softwoods) in line with studs and avoiding backing screws or spaces.
I used extra XPS insulation to keep things level. And in terms of adding extra XPS, I added more insulation on the walls as I noticed that if I put any weight on the walls where there was space behind, the wood would bend inward. Having more insulation behind to take up that space ensured that I could lean on the walls and not have to worry about the wood splitting. Instead I had more backing to support any pressure.
More Resources
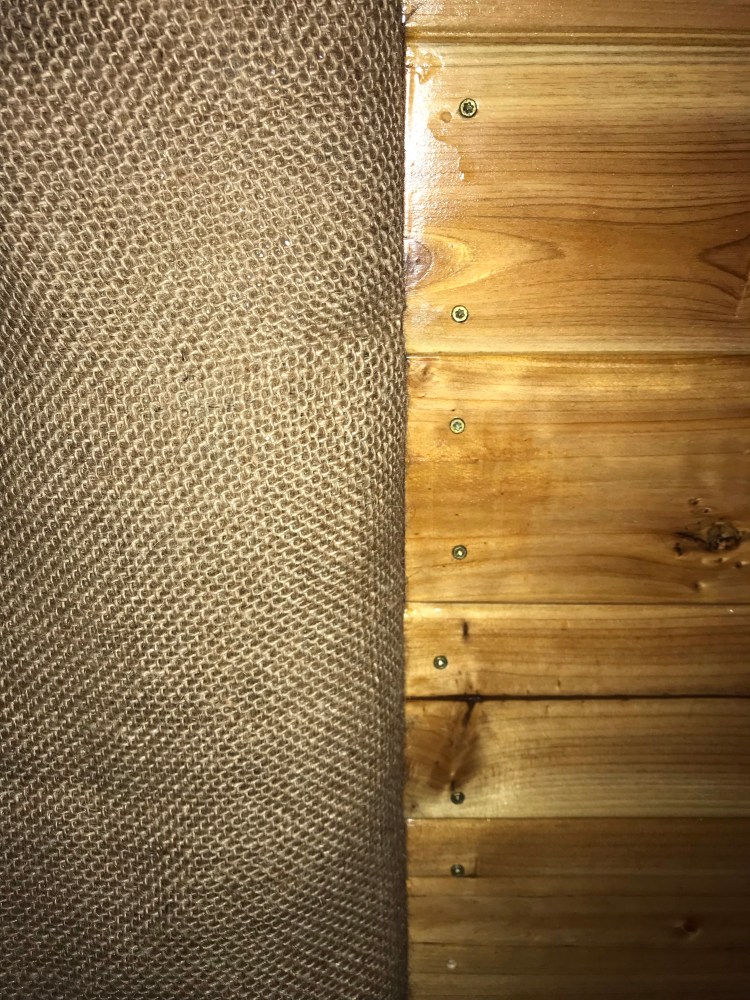
The Burlap
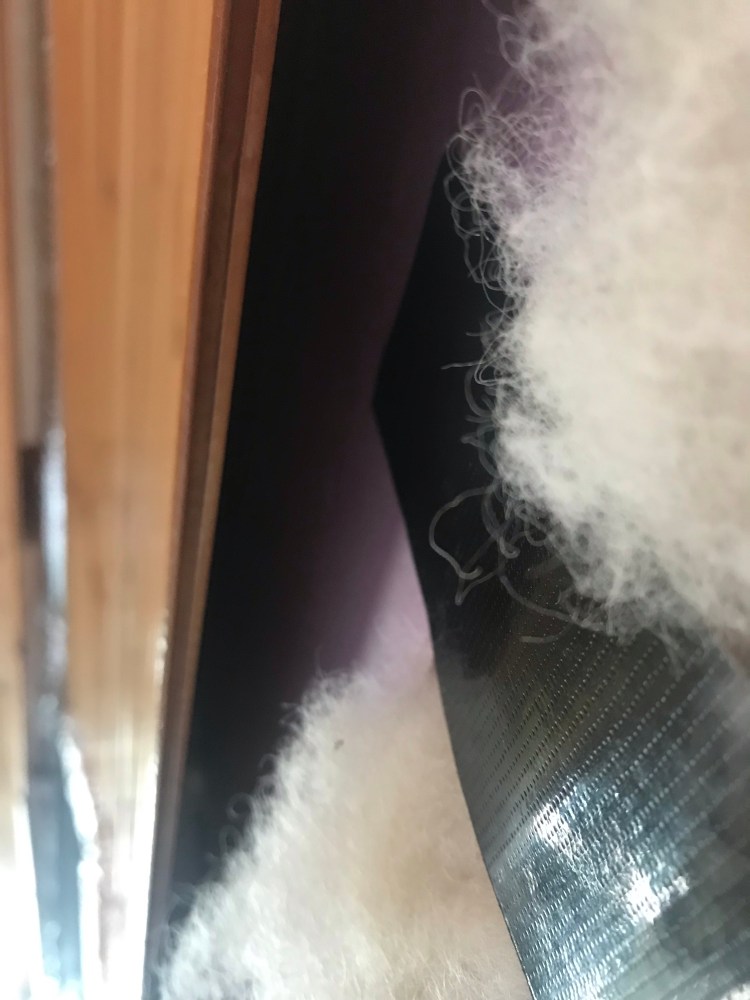
Working with burlap worked out well – I really like the look of it on the door frames and it does a wonderful job of creating a seamless transition where you otherwise would have seen the tongue and groove/ plywood meet studs and metal ribs. The burlap covers open spaces, Reflectix, and even the brake light wiring which was an eye sore. Not to mention it is flexible.
I was able to order a “table runner” form of burlap which meant that all edges had a seam and would not fray or unravel. Where I had to cut I used adhesive to preserve the edges.
First thing’s first – I of course pre-treated the burlap with Concrobium (what’s new).
Once dry, I worked one edge of the burlap behind the walls and held it in place with the screws that were holding the wall edge to studs behind. I made sure that the burlap was lined up to create a straight line on its other edge where it would lie on the door rib before screwing in.
Finally, I adhered the burlap to the outside edge with 3M 90 Spray adhesive between the burlap and the Reflectix behind.
And there you have it!

So, there it is. Strider is really coming together. As per usual, a song closes out my post. This one’s catchy, not to mention has some pretty relevant lyrics if I do say so myself…
“Blood, sweat, and tears of joy”
“We got gas in the tank to go all night”
“Relentless”
Later,
Kat
Copyright © Chronic X-Roads 2020

One thought on “Van Build #7: Ceiling & Walls”